Anyone who has spent much time photographing children will probably agree with me when I say that there is a special place in heaven for photographers that specialize in taking pictures of children. Taking pictures of youngsters can be one of the most rewarding tasks, but it can also be one of the most frustrating.
Specializing in stock photography gives me the freedom to photograph a wide range of subjects, but one subject that seems to be frequently revisited is children. While I don’t count myself as an expert child photographer, I have learned a few things along the way that I thought I’d share in today’s post.
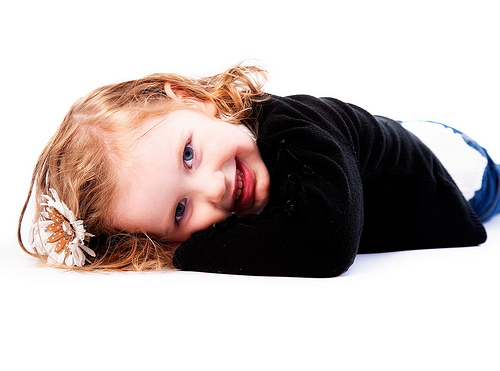
GET ON THEIR LEVEL
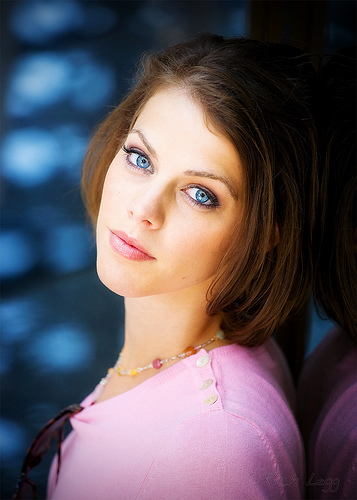
The feature image of cute little Saylor on the top of this page is a perfect example of this. While doing the studio portrait session she was acting a little bit shy and put her head down on the floor. When I saw this, I quickly got down adjacent to her to capture the scene. By putting my camera literally on the floor, I was able to create a viewpoint that few adults (grandparents etc.) in her life will ever see of her.
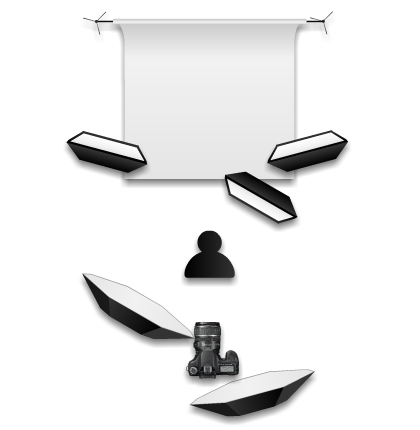
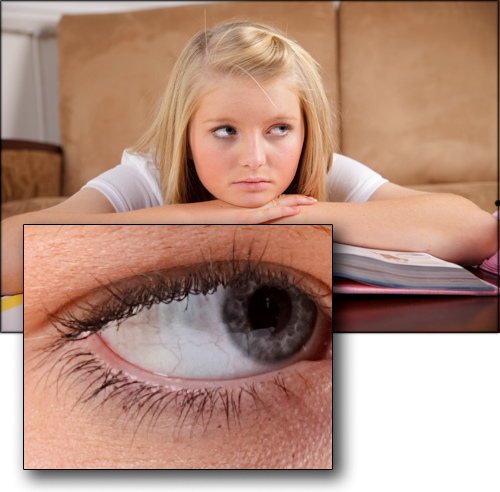
One thing I would have liked to do different on this shot was to have quickly dropped my lights to a lower position. The height of the lightstands eliminated any catchlights in her eyes. However, if I had taken the time to adjust the lights I could have missed the shot – which brings me to my next point:
BE READY
Kids, and especially babies, can change moods in what seems like a microsecond. The photographer can come into the shoot with a distinct plan on what and how they want to shoot and an upset child can quickly derail it.
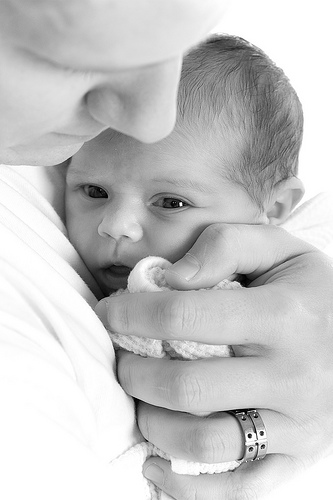
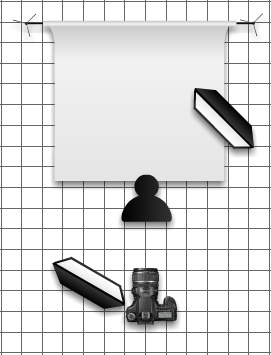
This image of baby Chloe is an example of this. The plan for the session was to create newborn images for the birth announcement. Unfortunately, Chloe didn’t get the memo. She wanted no part of being anywhere but in mom or dad’s arms. During the shoot she became extremely unhappy being in front of the lights with mom. To help soothe her, dad took her into his arms and stepped just out of the frame. Seeing this tender scene I quickly spun a softbox around and took the picture. The spontaneous un-planned image became the final shot for the announcement.
EXAGGERATE
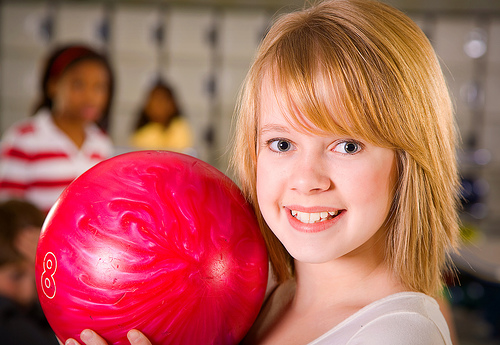
Similar to the first tip of getting on their level, I like to also exaggerate parts of a scene when photographing children. This might involve an extreme wide angle close-up shot, over-the-top laughing or like in this example shooting from a very high angle.
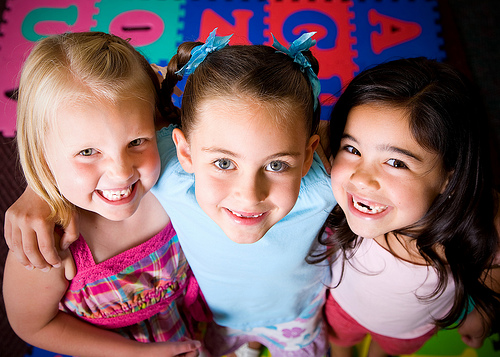
For this stock image, which is one of my top sellers, I stood on a step ladder to create the look. When looking at the image the viewer doesn’t get the impression that it was taken from nearly 9 feet up, just an exaggerated perception that these are little girls.
INVOLVE THINGS FROM EVERYDAY LIFE
In addition to the simple backgrounds that seem to typify my studio work, I like to do environmental portraits of children. For me this means shooting images of them involving things from their everyday life. Toys, pets, in their room, etc.
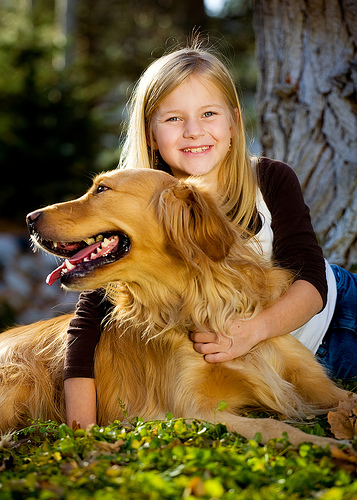
Here is an example of including a pet in the image. While having a rambunctious golden retriever in a portrait can be a challenge (note that he didn’t even look at me!), the inclusion adds another element to the image and can be especially meaningful to the family.
KEEP IT SHORT
Especially with babies, keep the session short. Don’t worry about capturing numerous shots, but try and get one or two keepers. I know that when I’ve tried to keep shooting to get “that one shot” after the child has become bored/tired/upset with the experience, it seems to do nothing more than frustrate me, the subject and the parents.

In a studio session of Chloe (a few months after her newborn pic above), this image of the happy little girl is literally one of only two shots she smiled in and it was taken right at the beginning of the shoot. Shortly after this was taken, she decided that she wanted no part of what we (her parents and I) had planned for her. We could have stopped after 5 exposures and already had our best for the day.
ELIMINATE DISTRACTIONS (PARENTS)
When photographing children it is a parent’s instinct to want to help the photographer make the child smile. This can be a frustrating thing for the photographer. Inevitably, the parent can help get a great expression but in it the child is looking off to the side and not at the camera. My recommendation is to graciously talk with mom and dad before shooting and explain that you can get better results if they are off to the side and out of the child’s sight.
These are just a few of the things that come to mind when I think about photographing children. I would love to learn what other photographers do to create great kid photos. If you’ve got something you’d like to add, please chime in with a comment or two.
LeggNet’s Digital Capture
© Rich Legg, Inc. All rights reserved.