
November 8th, 2007
Photoshop Tip: An Alternative to Unsharp Mask
]]> 
Earlier this week, I mentioned my recipe for having a high percentage of my photographs accepted into my portfolio on istockphoto.com. One of the key ingredients to my system is NOT using the popular UNSHARP MASK filter in Photoshop for sharpening. While this filter does a nice job for sharpening images to be printed, I find that it can be detrimental to the quality of stock photos which get inspected with a fine-tooth-comb before begin accepted.
The alternative method I use for sharpening is the HIGH PASS FILTER method. This method provides good sharpening while minimizing image degradation. Here are the steps:
1. Create a COPY of the layer you wish to sharpen
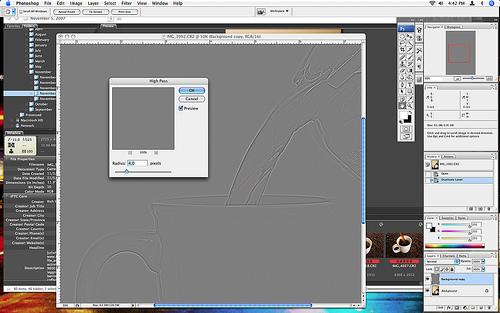
2. Select FILTER, OTHER, HIGH PASS
3. Set the radius to 4 PIXELS (then click okay)
4. Change the blending options of the new layer (by double-clicking on the layer) to SOFT LIGHT for mild sharpening or OVERLAY for stronger sharpening
It’s a very simple method for clean sharpening of photos. To make it even easier, I have recorded the steps as an action that I can run with the press of one function key.
If you haven’t tried sharpening this way, give it a shot and see how well it works for you.
Additional Note (Added on 15 November)
In response to a comment about this method causing an undesired “HALO” effect, let me add a clarification (that I should have included originally). This method is intended to be used on FULL RESOLUTION images of 8+ megapixels. Using it without tweaking the ‘RADIUS’ on smaller images will give an undesired result.


