March 13, 2008
There’s still time to “Create Your Own Creativity”
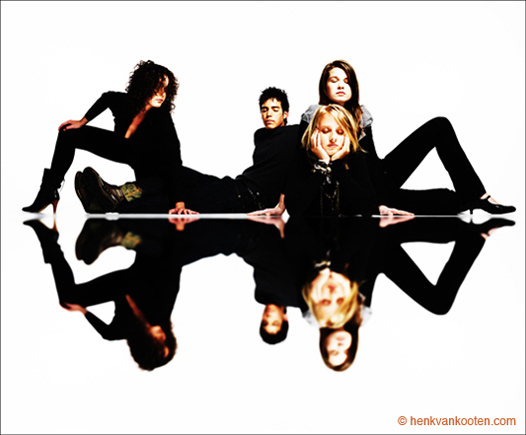
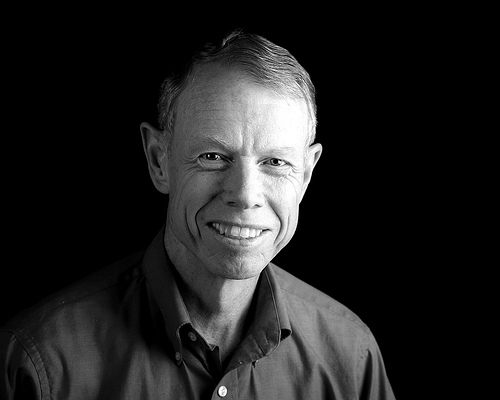
As I wrote about a couple of weeks ago, internationally recognized portrait photographer Henk van Kooten will be hosting a one-night seminar in Salt Lake City on March 25th. The main subject will be “How to Create your Own Creativity”. It only takes a few moments on Henk’s website to see how creative and unconventional he is with his photography. He is able to take somewhat radical ideas and introduce it into his portrait work to create stunning results.
This seminar is not only for portrait photographers, but really any photographer that wants to improve the creativity in their work. It doesn’t matter if your main subject is landscapes or weddings, Henk will inspire you creatively.
Doors open at 6:30pm and the seminar starts 7pm precisely. It lasts until 9:30 with 2 breaks. The price of the seminar is $85 with a maximum of 40 students. To sign up, email Kenneth Linge’s International School of Photography at: intsop@gmail.com. In the mean time, be sure to check Henk’s work out at www.henkvankooten.com.
The International School of Photography is a sponsor of LeggNet’s Digital Capture. I have attended several of their training seminars over the past year and value their mission of sharing information and training photographers. I will be featuring their programs from time to time on this site.
Labels: education, photography
March 12, 2008
Rockin’ the Studio
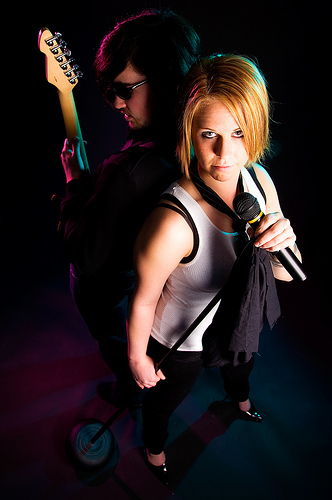
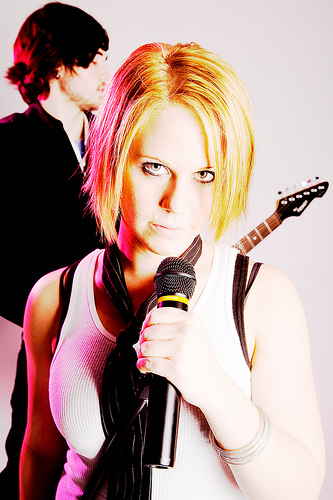
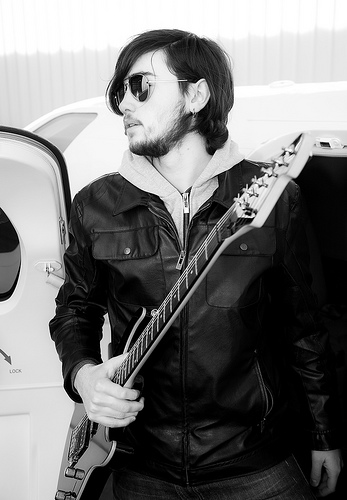
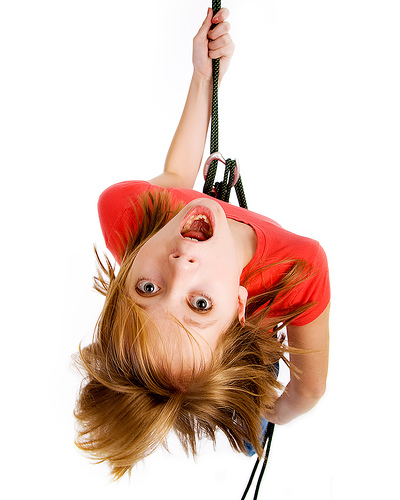
Jessica and Andrew were in the studio last night for a Rocker Chick photo shoot. With the models playing their parts very well to the accompanying 80’s rock on the stereo, we had fun shooting it.
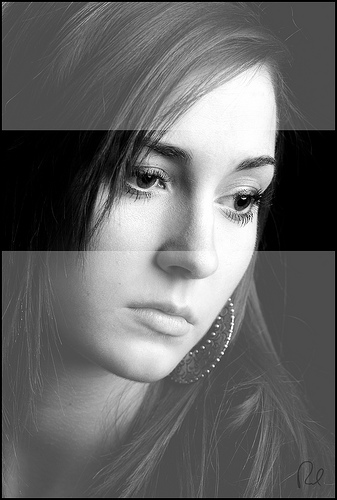
This shot was lit with a single key light to the right of camera and a red-gelled hair light in the back left. The shadows created by the angled main light worked well to create the mood to the image I sought. To further enhance this feel with some extra punch, a cross-processed effect was added.
Now, I’m off to process the rest of the images from the shoot to add to my portfolio.
Canon 5D, Canon 24-105 f/4L lens – 1/125 second, f/9, ISO 100
March 10, 2008
Photowalking Utah – February Event Video
Here is a video of last month’s Photowalking Utah event at the University of Utah’s Moran Eye Center. As always, big time thanks go to Jeremy Hall for shooting and editing video for the events.
LeggNet’s Digital Capture
© Rich Legg, Inc. All rights reserved.
March 8, 2008
Setting the Background in Stock Photography
One of the most enjoyable times for me to photograph is when I am doing a stock shoot on location. I like the challenge provided by setting up a realistic looking scene in a new place. An important item to remember when setting up a scene is not only to focus on the main subject, but plan the background as well.
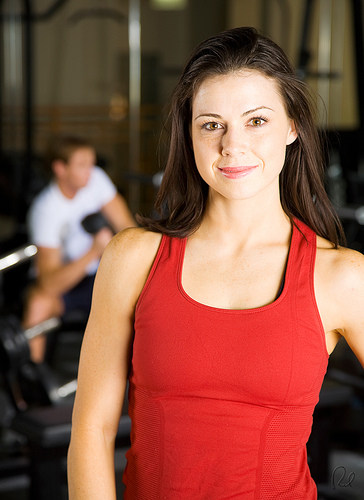
In today’s shot of Holly at the health club, I placed Tyler in the background doing curls with a dumbbell to better communicate the theme. Combining this model placement and a shallow depth-of-field not only adds depth to the image but increases the ‘realism’ of the shot.
Another example of this technique is demonstrated in last month’s laboratory photo shoot. By placing models Ron and Julie working on the bench behind Michelle, the scene becomes more interesting.
One drawback to adding background people is a bit of complication to the lighting. In the health club shoot I set a low-power monolight aimed specifically at the background model(s). I set the exposure for this light at approximately half f/stop below the subject exposure. I wanted them to pop, but not overpower the main subject.
This technique can be utilized in recreational photography as well. By paying attention to the background and either adding or removing people, the impact of a shot can be greatly increased.
View these images in my stock portfolio: Health Club – Laboratory
March 5, 2008
Muted Color
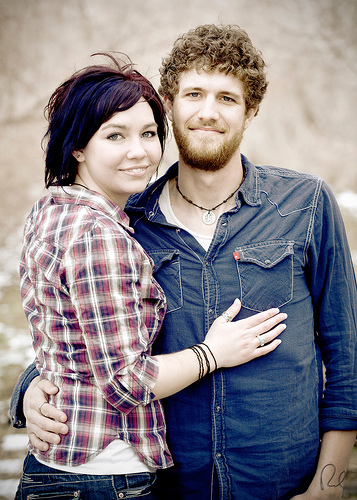
One effect that I use occasionally on portraits is Muted Color. This treatment can help to give an antique feel to the image similar to sepia-tone while still retaining color.
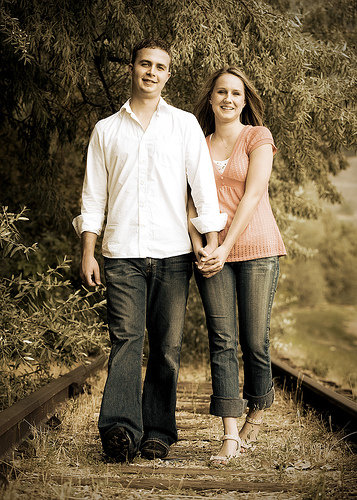
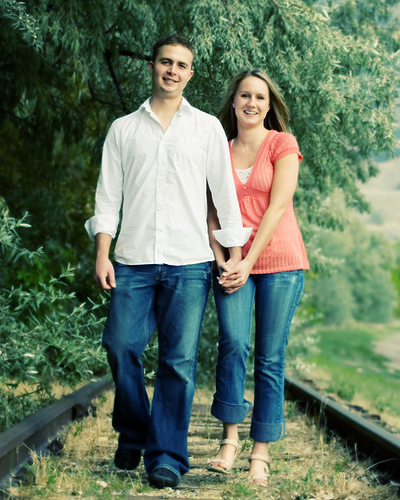
The young couple in today’s image wanted an old-fashioned look to their engagement photos. Their initial thought was to go with black & white or sepia-tone. However, upon seeing the muted color version it immediately became their favorite.
There are several methods available to create this look. The method I use is simple and straightforward. I process the original RAW image in three ways: color, sepia-tone and cross-processed (I use Linge’s Photoshop Actions for the sepia and cross-processed effect). I then create a Photoshop layer of each version of the file. Once I have the three layers, I use the color layer as my base and blend the other two layers over it, adjusting the transparency until I get my desired result.
If you have a process you use to create a similar effect, please share it.
Canon 5D, Canon 70-200 f/4L lens – 1/200 second, f/4, ISO 100
LeggNet’s Digital Capture
© Rich Legg, Inc. All rights reserved.
March 3, 2008
“Create Your Own Creativity” with Henk van Kooten
Do you sometimes find yourself in an inspirational rut with your photography? Then come along with me as we spend an evening with Henk van Kooten and free your imagination.
Epson and The International School of Photography are hosting a seminar with Henk van Kooten from The Netherlands in Salt Lake City on Tuesday, March 25th at 7pm.
Henk’s main subject will be “How to Create your own Creativity”. Henk is unquestionably one of the most creative photographers you will ever meet. There is no end to his imagination and creativity, it is simply AMAZING!
It will be held at the new SpringHill Suites by Marriott, Salt Lake City Downtown located at 625 South 300 West. It is very close to Pictureline and if you need a room for the night ask for the Pictureline rate.
Doors open at 6:30pm and the seminar starts 7pm precisely. It lasts until 9:30 with 2 breaks. The price of the seminar is $85 with a maximum of 40 students.
To sign up, email Kenneth Linge’s International School of Photography at: intsop@gmail.com. In the mean time, be sure to check Henk’s work out at www.henkvankooten.com.
NOTE FROM RICH: The International School of Photography is a sponsor of LeggNet’s Digital Capture. I have attended several of their training seminars over the past year and value their mission of sharing information and training photographers. I will be featuring their programs from time to time on this site.
February 29, 2008
Rule of Thirds – Revisited
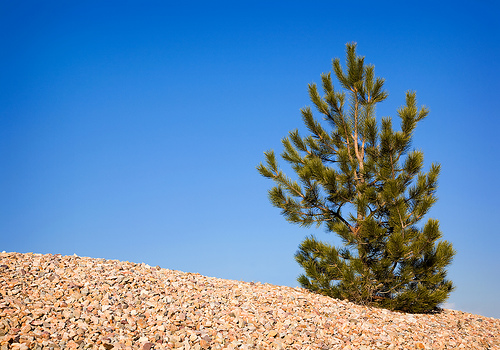
Today’s simple scenery image of a lone pine tree against a blue sky is a perfect chance to revisit a previous post from last year concerning the Rule of Thirds. Have a great weekend!
Canon 5D, Canon 24-105 f/4L lens – 1/200 second, f/8, ISO 100
from April 1, 2007:
One of the first things to get emphasized to novice photographers by those who claim to be more knowledgeable is to “Follow the rule of thirds”. While this is sound advice, the phrase can be confusing. Let’s take a few moments and simplify this “Rule” so that we all can use it when making captures regardless of our experience.
Simply put, the Rule of Thirds is a tool to use when composing a photograph. The way I like to instruct it is this: Place four evenly spaced imaginary lines on your image, 2 horizontal and 2 vertical. I have even further simplified it to some (mainly children) by suggesting that they imagine a “tic-tac-toe” board over the photo. Once you can picture the lines, place your subject very near a line and, if possible, arrange the main focal point of the subject where two of the lines intersect. In doing so, you increase the odds that you will create a photo that is visually appealing to how the human mind interprets the image.
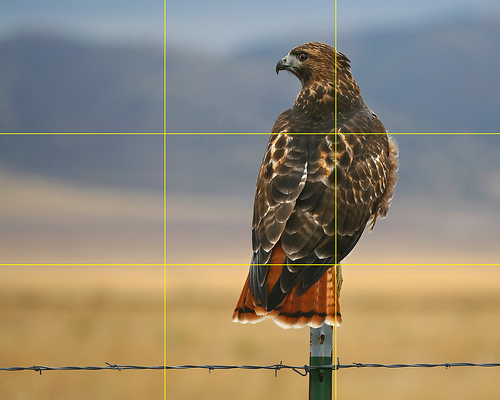
For today’s image (above) I took one of my favorite hawk photos and added yellow lines to help illustrate the process. When composing the photo I placed the bird on the right most vertical line. The main focal point of the bird is the eyes and beak, but I found that if I placed them on an intersection the photo was a bit bottom heavy. Instead, I placed the bird’s body where the two nearest lines meet. Doing so creates a pleasing composition since the birds head is close enough to an intersection to take advantage of the rule. Had I taken the same photo and composed it differently by placing the bird in the center of the image, the result would not be as pleasing.
Since I’m on the subject of image composition, the image above demonstrates another “Rule” that can be followed to make a shot more pleasing. In most situations it is desired to have the subject looking toward the center of the image. If the bird were looking to the right rather than the left, the photo would not be as pleasing to the viewer’s eye. In fact, to many people it would just “feel uncomfortable”. The same can be said for motion. If the photo is of a subject in motion, compose it so it is moving toward the image’s center.
Lastly, remember the old phrase “Rules are made to be broken”. There are plenty of times when a more pleasing image can be created by breaking the Rule of Thirds rather than following it. Try using this rule as a guideline and see if your work improves.
LeggNet’s Digital Capture
© Rich Legg, Inc. All rights reserved.
February 27, 2008
A Father’s Touch
February 26, 2008
Laboratory Photo Shoot
]]> 
Ron mixing a scientific concoction.
One of the photo shoots I did last weekend was in a real honest-to-goodness laboratory. A friend offered access to the lab he works in and that was all the motivation I needed to put together a shoot.
With a team of three models and assistance from my friend Harley, we set out to create a series of images for my stock portfolio. My goal was to capture realistic looking images of lab technicians at work. The biggest challenge was setting up lights to create a natural looking scene in the limited space we had to work in. We ended up with a modified cross-lighting arrangement and with the camera position shooting through a narrow opening.

Michelle putting her newly acquired pipetting skills to work.
I must really offer my heartfelt thanks to my friend Bryan for opening up the lab, Harley for helping with the lighting and models Michelle (my wife), Ron and Julie. Without these great folks, we could never have pulled this shoot off.

Julie, Bryan (our host), Ron and Michelle
Labels: stock
February 25, 2008
Published: Two Magazine Covers
They’re not Time or Newsweek, but they are magazine covers nonetheless. Two of my images are gracing the covers of current magazines.
I took the above image of my good friend (and fellow photographer) Dale for a feature on him in GlobalHRNews, a magazine aimed at human resource professionals. In addition to the cover, they also used an image of mine inside the magazine to accompany the article.
The next image (below) is a stock shot which turned up on the cover of Techniques, a magazine aimed at soon-to-be graduates. While not my favorite from the series of images of this young man, it does work well with the cover layout.
February 22, 2008
Photoshop Tip: An Alternative to Brightness/Contrast
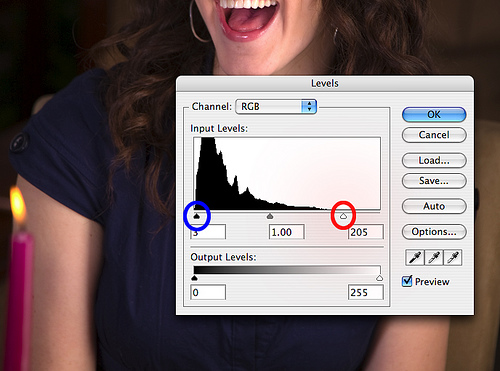
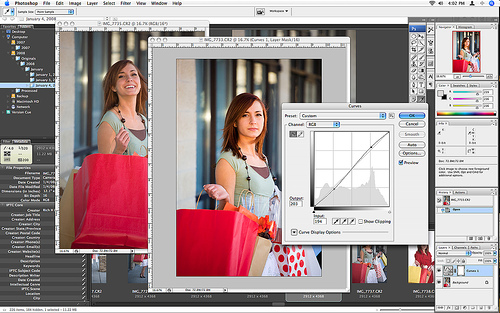
When editing my images in Photoshop, I always begin with a couple simple adjustment steps before venturing into the more advanced edits. Since I shoot most of my shots around 1/3 f/stop underexposed (to preserve highlights), the first simple editing step I do is an adjustment to the brightness/contrast of the image. But guess what? I don’t use the brightness/contrast adjustment to do this. I use LEVELS.
By using the LEVELS adjustment, I am able to fine tune the brightness of the image while causing very little damage. This is extremely important in my stock images since they have to go through a rigorous inspection process to be included in my portfolio. Here are the simple steps I use:
1. Create a new LEVELS adjust layer.
2. Slide the upper clipping adjustment (red circle below) down until it is just above the upper end of the histogram.
3. Slide the lower clipping adjustment (blue circle below) up until it is just below the lower end of the histogram.
4. Inspect image and fine tune the adjustments as needed
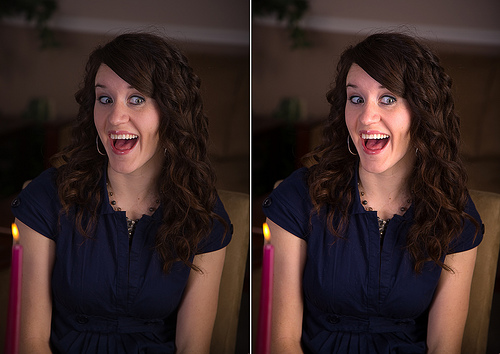
As you can see in today’s featured image, the sample on the right ‘pops’ quite a bit more than the original on the left. This was done strictly using the levels adjustment. Once I complete this step, I then go on and finish my editing of the image.
If you haven’t tried adjusting brightness/contrast this way, give it a shot and see how well it works for you.
Canon 5D, Canon 24-105 f/4L lens – 1/160 second, f/4.5, ISO 50
February 20, 2008
Real People
One of the challenges of doing the Liftestyle type of stock images I do is coming up with models to use. I prefer to use everyday people, since they provide the authentic look I want in my images. I have been extremely blessed to have several people to work with on a regular basis (thank you Jenna, Alyssa, Andrew, etc.), but I am always on the lookout for more.
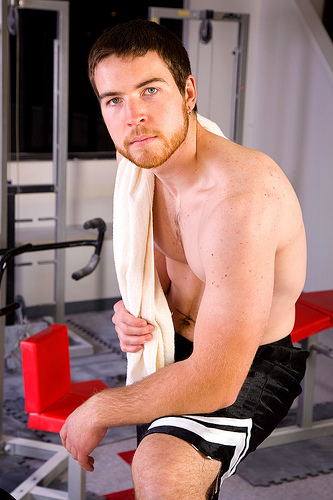
Today’s image of Jonathan is from last weekend’s Fitness series I shot at a local gym. This was Jonathan’s first time modeling. Since he is someone who is committed to keeping fit by regularly working out, this was a natural shoot for him.
Most of my models work TFCD or TFP in exchange for signing a model release. TFCD is an acronym for Time for CD and TCP is an acronym for Time for Print. This means that the model will receive digital copies of the images in exchange for their time. They are then free to use the images for personal use and portfolio purposes. If I see the results are favorable and begin to use a model on a regular basis, I may then also pay an hourly rate.
I have recently set up an account on ModelMayhem.com to expand my pool of models. I have been in contact with a few models from there, but haven’t put a shoot together yet. Many of the models on the site are more focussed on fashion modeling rather than lifestyle.
And of course, when a model isn’t available there are always family members 🙂
Canon 5D, Canon 24-105 f/4L lens – 1/50 second, f/7.1, ISO 100
Note: If you or someone you know is interested in modeling in one of my stock photo shoots (and is in the Northern Utah area), please contact me via email at rich [at] leggnet.com.
Labels: stock
February 19, 2008
Put Your Hand In The Air
February 18, 2008
[Insert Witty Title Here]
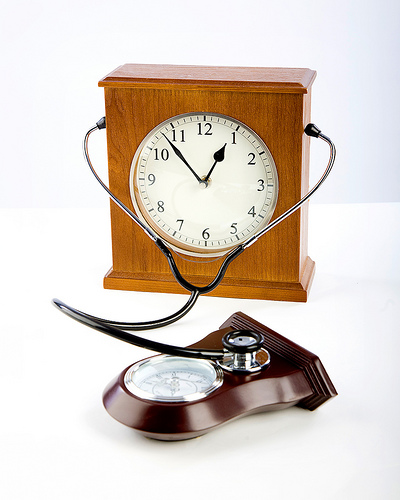
Today’s shot is an overlap between two different stock photo shoots last week. After photographing various clocks, I planned to move into capturing some medical instrument images. Since I had the props together, I thought I’d put together an image combining the two themes.
The problem is that this shot deserves a witty caption, which I haven’t been able to come up with. So, how about a little help? If you can think of a title and/or caption for this image, please share it in the comments.
Canon 5D, Canon 24-105 f/4L lens – 1/160 second, f/9, ISO 100
UPDATE
Thanks to everyone who contributed in the comments. Here are the suggestions so far:
- Time After Time
- Bum Ticker
- It was just his time
- Time’s Expired
- Dr.’s are a waste of time
- Hearing Time Repeat Itself
- Need A Little Down Time?
- His ticker’s not tocking.
- Listen to your ticker
February 15, 2008
Beyond First Class
February 14, 2008
50mm f/1.8 lens – Put One In Your Bag
I frequently receive email questions from photographers that have upgraded to a digital SLR camera. One of the most often asked questions is about additional lenses they should add to their kit. The lens I recommend more than any other is the 50mm f/1.8. This lens can be had for under $100 (Canon) and is a great addition to any photographer’s gear bag. The inexpensive little lens offers numerous advantages including:
– One to two f/stops faster than a standard ‘kit’ lens
– Very narrow depth-of-field for a great blurred background
– Extremely compact and lightweight
The Canon version of the lens feels very cheap light due to its plastic build. Don’t let this deter you. The optics are very good, especially considering the low price.
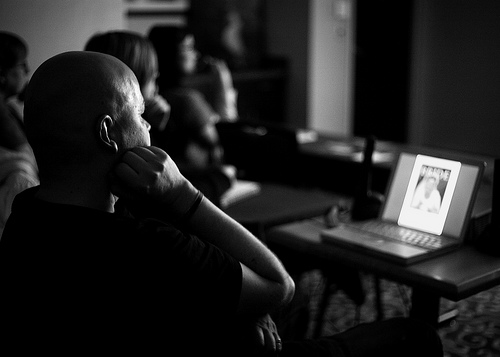
Today’s image of Kenneth during a video presentation at one of his classes was taken with this lens. The combination of the fast lens speed and a high ISO made the shot possible.
Here are links to the lens for Canon & Nikon:
Of course, if price is no object you can do what my scientist friend did (you know who you are) and cough up some real cash for a Canon 50mm f/1.2 🙂
Canon 5D, Canon 50mm f/1.8 lens – 1/20 second, f/1.8, ISO 800
Labels: tutorial
February 13, 2008
Save the Date: Photowalk #6, February 23, 2008
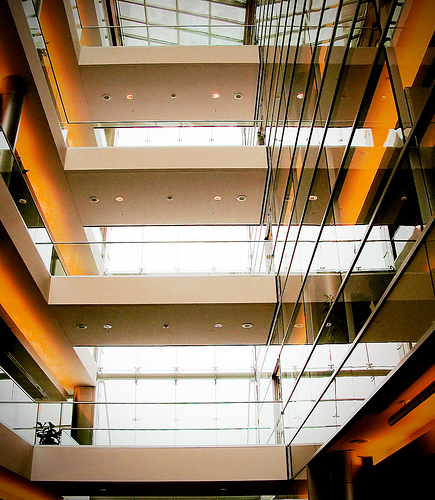
The next Photowalking Utah event is fast approaching. The event will be held at the University of Utah’s Moran Eye Center located at 65 Medical Drive in Salt Lake City. Here are the details:
Our sixth Photowalk will be February 23rd at the Moran Eye Center from 9:00 am until 1:00 pm. We’ve got a two-part indoor event: a Photoshop tutorial by Ann Torrence and photographing the new Moran Eye Center (architecture, scientific labs, microscopes small and large, glassware, computers, etc.). We will start capturing photos at 9 am, Photoshopping at 11. You can attend either, part or both.
These event are open to anyone who wishes to attend, regardless of skill level. We typically have participants who vary in ability from beginners with point-and-shoot cameras to seasoned professionals with their high-end gear. The main emphasis is a sharing of knowledge and building of friendships.
For more information visit the entry on Jones Blog and/or drop by the Photowalking Utah discussion group at www.photowalkingutah.com.
Canon PowerShot G7 – 1/500 second, f/4, ISO 400
Labels: photowalking
February 12, 2008
iStock Portfolio Image # 2,000
Cheers!
With the acceptance of this photo into my portfolio, I now have 2,000 images available on iStockphoto.com. Now I just have to begin building my new Getty Images portfolio.
Canon 5D, Canon 24-105 f/4L lens – 1/160 second, f/6.3, ISO 50
Labels: stock
February 11, 2008
Snowy Samantha
It just wouldn’t seem like a Monday without a blog post highlighting one of my photo shoots from the previous weekend.
Today’s image is of a young Australian girl who is living in Utah for a couple of years. Since winter play is a new experience for her, the plan for the shoot was to capture some outdoor sledding images. Before heading out to the sledding hill we spent some time in studio. With her mom and little brother throwing synthetic snowflakes, our impromptu blizzard created a nice winter scene for the portrait.
And as an added bonus – the studio was MUCH warmer!
Canon 5D, Canon 70-200 f/4L lens – 1/160 second, f/9, ISO 100
Labels: stock
February 9, 2008
Blue & Gold
February 7, 2008
More Studio Space!
To quote Col. John “Hannibal” Smith, “I love it when a plan comes together”.
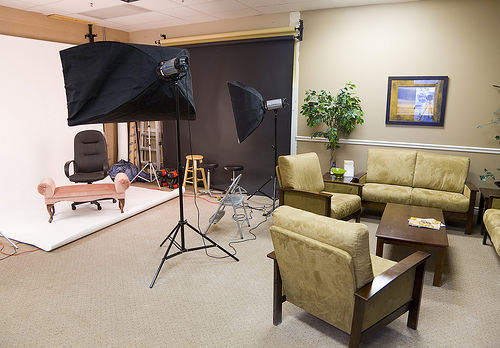
Last Saturday we (myself and two photographer friends Dale and Benjamin) removed two walls in my studio and doubled the shooting space. In addition to two seamless backdrops, I now have a sitting area that can double as a set. In total, the studio is just under 600 square feet.
As Michelle and I now make the majority of our income from photography, we continue to look forward to where this journey will take us.
Canon 5D, Canon 24-105 f/4L lens – 2/5 second, f/4, ISO 100
Labels: studio
February 6, 2008
Portrait of an Artist
February 5, 2008
Election Day
Today is the Super Tuesday primary election day in the states. In honor of this, I thought I’d put together a mock-up of my good friend Dale looking, shall we say, presidential.
Enough blogging, I’m off to vote!
LeggNet’s Digital Capture
© Rich Legg, Inc. All rights reserved.
February 4, 2008
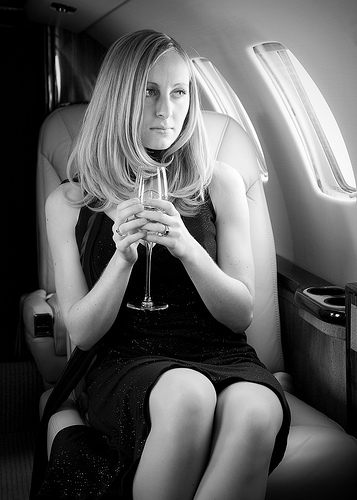
Private Jet Photo Shoot
]]> 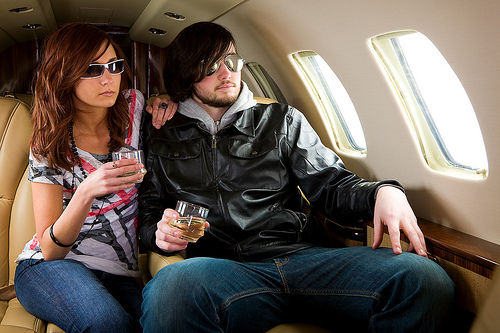
(Rock Star models Andrew and Alyssa)
I spent this past Saturday afternoon doing a stock photo shoot in a private jet. Through a friend, I made contact with a pilot last month and he was able to get me access to one of the corporate jets he flies. I must say, it was pretty cool.
I got word on the Thursday prior that we would have use of the jet on Saturday, so I had to scramble to assemble the models and props for the shoot. Normally I like to schedule shoots a few weeks in advance, but due to the irregular schedule of the plane’s use this was not possible.
When planning the shoot, the three scenes I sought to capture were corporate executives, young rock stars and wealthy jet-setters. Doing the multiple scenes required several different models. Ultimately, six were available (on the short notice) for the shoot.
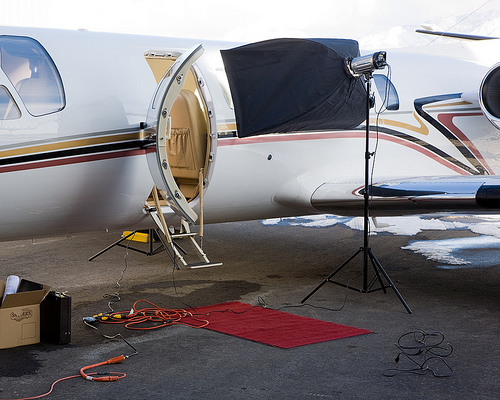
(The lighting setup on the outside of the Cessna Citation)
The lighting for the scene was pretty straightforward. I wanted to create a look that made it appear that the plane was flying. To do so, very bright windows were the key. I placed large softboxes on both sides of the plane to light the windows, then used a small softbox above and behind my camera position for fill light. All of the lights were synced with Pocketwizard radios.
The final result of this lighting setup worked well. The images portray a natural looking directional light similar to what you would see in an airplane at altitude.
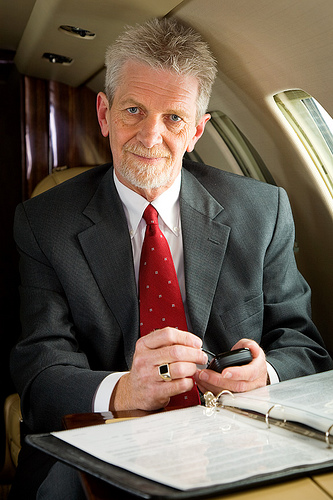
(Corporate executive model Ron)
The biggest hurdle in doing the shoot was the cold weather and wind. The hangar that we used as a staging area was un-heated. Thankfully, Kevin from the airport provided a space heater to keep the models warm between shots. The plane itself was also not heated (it was powered down) and the door had to stay open for the light’s power cables.
All in all, it was a successful and fun shoot which will yield a few dozen images for my stock portfolio. Big time thanks go out to all of the models (Michelle, Dale, Ron, Andrew, Jenna & Alyssa) and especially to my new pilot friend Matt. Thank you all! Without people like you I could not do what I do.
LeggNet’s Digital Capture
© Rich Legg, Inc. All rights reserved.
February 2, 2008
Boys Will Be Boys
Meet Lewis.
In addition to being a second grader, Lewis is an accomplished Easter Egg Crusher. He took time out of his busy academic schedule yesterday to model in some Easter shots for an upcoming stock series.
After we completed shooting, he asked if I would take “just one more shot” – and here it is. I promised him I’d post this image on the blog so the world could see his awesome skill in action.
Here’s to you, Lewis. You did a great job!
Canon 5D, Canon 24-105 f/4L lens – 1/125 second, f/8, ISO 100
LeggNet’s Digital Capture
© Rich Legg, Inc. All rights reserved.
February 1, 2008
Destination: Wildnerness
I have been shooting so much studio stock work lately that I decided to take a trip back through the 2007 archives in search of something different.
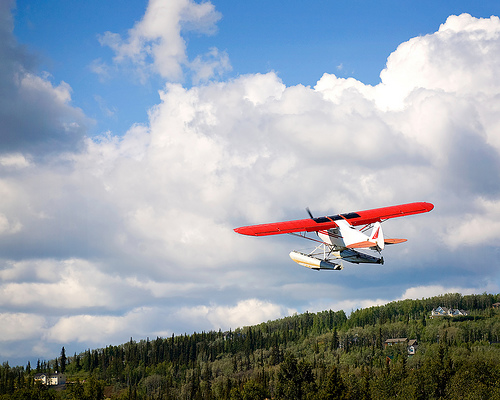
This image of a Piper Super Cub lifting off was captured last summer in Fairbanks, Alaska. The owner of this plane keeps it tied-up at his waterfront home. in less time than it takes me to drive from my house to downtown Salt Lake City this pilot can be trying his luck at a wilderness fishing hole.
But there are two sides to each coin, especially in Alaska. Right now it is -9º Fahrenheit in Fairbanks and they will have less than 7 hours of daylight today. I think I’ll stick with Utah.
Canon 5D, Canon 70-200 f/4L lens – 1/1600 second, f/5.6, ISO 160
January 31, 2008
Reflector Lighting in Mid-Day Sun
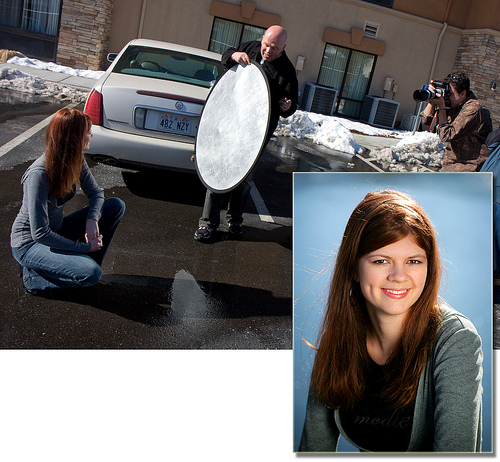
Pro photographer and instructor Kenneth Linge had another of his Photographing People clinics this past Saturday in Salt Lake City. I was privileged enough to be invited again to help out and photograph during the class. Kenneth is a master at using mid-day sunshine with a reflector to create stunning portraits.
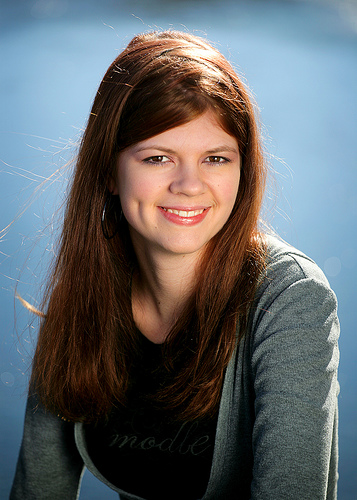
I took the above photo of Lindsey in direct overhead sunshine in the parking lot of the hotel the seminar was held at. The lighting was provided by a single silver reflector positioned by Kenneth. The combination of the warm light on the face with the cool background bokeh created a pleasant portrait.
Here is an overview of the scene as captured by my favorite videographer Jeremy Hall.
It is always rewarding to be able to capture a nice portrait such as this in an environment that many photographers would consider inhospitable to portrait work.
On a somewhat related side note, I processed this image in under 5 minutes using Kenneth’s Photoshop Actions. I will be providing more information on these actions in the near future.
On the web:
Canon 5D, Canon 70-200 f/4L lens – 1/800 second, f/4, ISO 100
Labels: tutorial
January 31, 2008
Reflector Lighting in Mid-Day Sun
Pro photographer and instructor Kenneth Linge had another of his Photographing People clinics this past Saturday in Salt Lake City. I was privileged enough to be invited again to help out and photograph during the class. Kenneth is a master at using mid-day sunshine with a reflector to create stunning portraits.
I took the above photo of Lindsey in direct overhead sunshine in the parking lot of the hotel the seminar was held at. The lighting was provided by a single silver reflector positioned by Kenneth. The combination of the warm light on the face with the cool background bokeh created a pleasant portrait.
Here is an overview of the scene as captured by my favorite videographer Jeremy Hall.
It is always rewarding to be able to capture a nice portrait such as this in an environment that many photographers would consider inhospitable to portrait work.
On a somewhat related side note, I processed this image in under 5 minutes using Kenneth’s Photoshop Actions. I will be providing more information on these actions in the near future.
On the web:
Canon 5D, Canon 70-200 f/4L lens – 1/800 second, f/4, ISO 100
LeggNet’s Digital Capture
© Rich Legg, Inc. All rights reserved.
January 29, 2008
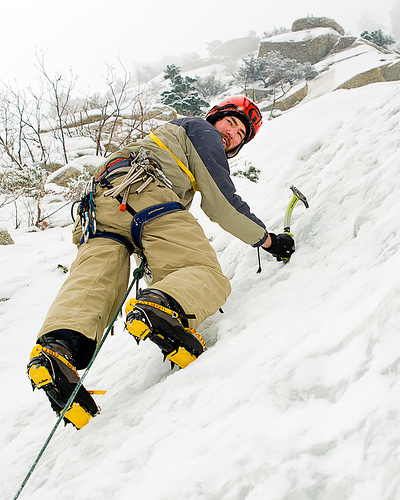
Climbing the Ice
I recently joined some local ice climbers for the opportunity to photograph them ascending a frozen waterfall. Photographing people against the bright snow/ice background can be challenging exposure-wise. To keep the subjects from becoming too dark in the image, I adjusted my camera’s meter to overexpose by one-third f/stop and used a strobe set at minus one-third f/stop for filling in the shadows.
The exciting part of taking this shot was the small icy ledge that I was perched on while wearing ice climbing gear.
Canon 5D, Canon 70-200 f/4L lens – 1/80 second, f/9, ISO 50
January 28, 2008
Working Nine to Five
Today’s image is from last Friday’s stock shoot with one of my favorite models Alyssa. When planning a photo shoot, I map out a list of ideas for shots ahead of time. The overwhelmed office worker concept was one of the main themes for this session and Alyssa did a great job of pulling it off.
A few technical notes: This was shot with at a medium wide-angle focal length (40mm on a full-frame) to give depth between the model and the files in the foreground. I opted to spotlight the white background rather than make it pure white to have a bit of uneven vignette. Lighting was a single softbox left of camera with a silver reflector to the right of the model (plus the background light).
Canon 5D, Canon 24-105 f/4L lens – 1/160 second, f/8, ISO 100
January 26, 2008
Photowalking Utah – Video
Jeremy Hall was kind enough to shoot and edit a video from our last Photowalking Utah event. This was the indoor photowalk featuring studio lighting.
Thanks for the hard work on this Jeremy, it turned out well.
Labels: photowalking
January 25, 2008
When Life Gives You Lemons . . .
January 24, 2008
Holly
January 23, 2008
Colorful Shooting on a Grey Winter Day
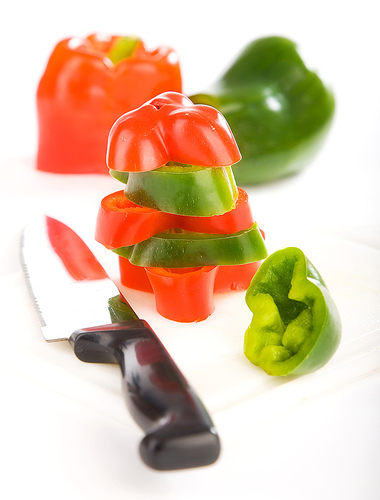
It was another grey day in Northern Utah this past Saturday when I decided to spend some time photographing. I wanted something colorful to shoot, so I stopped by the produce section of the local supermarket in search of cheap color. I found it with these red and green bell peppers.
This arrangement of the freshly cut peppers on a cutting board was shot in studio using four lights. I used a high key arrangement of two softboxes for main light (one on each side of the camera), a small softbox for a rim light and a monolight onto white seamless for the backdrop. My favorite part of the shot is the separation caused by the rimming of light on the top of the red cut pepper.
And when I finished shooting, I had a healthy snack.
Canon 5D, Canon 24-105 f/4L lens – 1/160 second, f/8, ISO 100
January 22, 2008
Photographing People Seminar with Kenneth Linge
I had a conversation yesterday with my friend Kenneth Linge. Kenneth is a world class wedding and portrait photographer as well as a photography instructor. In chatting with him about his upcoming seminar (Photographing People, Part 1) this Saturday in Salt Lake City, he mentioned that there were still some spots available. Being someone who is always on the lookout for something to blog about, I freely offered to pass along the info.
I have attended two of Kenneth’s classes in the past year. I find it amazing that a photographer of his level is so willing to freely share the techniques that he has learned in 30+ years as a working pro. Scott Smith (a photographer I met through this blog) attended Kenneth’s last class in Salt Lake City. Here’s a little bit of what he had to say about it on his blog:
“Kenneth teaches seminars in the US and Europe. He successfully completed five European tours last year. Kenneth and his wife Marylyn taught the class of 15 students. Their class was structured in a way to teach some basic fundamentals with techniques they use and build upon them in upcoming seminars. One of the highlights for me was to participate in a live model shoot in downtown Salt Lake City. It was amazing to watch Kenneth look for the natural available light and apply it to create some amazing photographs.”
If you’re interested in learning more about the seminar (and possibly attending), pop on over to Kenneth’s website for more into: http://kennethlinge.com/seminars.html
And when you decide to attend, you can see yours truly in action. I will be there photographing the photographer 🙂
Labels: education, photography
January 21, 2008
Dream a Little Today
I selected this image for today’s post in hopes of making an ever-so-subtle reference to the holiday in the US today honoring the late Reverend Martin Luther King, Jr.
Early morning, April 4
Shot rings out in the Memphis sky
Free at last, they took your life
They could not take your pride
– U2
Update: When I refreshed the blog after making the post, I was surprised to see the resemblance between today’s image and the post I made on Saturday. I hadn’t noticed that until now.
Canon 5D, Canon 24-105 f/4L lens – 1/100 second, f/10, ISO 100
January 18, 2008
Calling Photoshoppers – My Version
It was great to see the response to the Calling Photoshoppers project we featured this week (original post). I received a few suggestions that I give a shot at editing the image, so I spent a few minutes with it this morning. Here is my version.
I didn’t keep a detailed list of my editing steps (like the others did so well), but I will touch on a few highlights.
– Cropped and leveled
– Removed rock (thanks Brian)
– Blended two versions of the images, one sepia and one color
– Warmed up and softened using an action
– Brightened faces
– Vignette
My goal was to create a sepia image with a subtle color on the couple (especially the jeans and her top). Similar to others, I sought to create an old-fashioned feel to the image.
So, how’d I do?
Canon 5D, Canon 70-200 f/4L lens – 1/250 second, f/5, ISO 100
Labels: photography, photoshop, tutorial
January 17, 2008
Hanging Around in the Studio
January 16, 2008
Calling Photoshoppers – The Results
Last week I put out a call for Photoshop users who would like to put their skills to work on one of my images (original post). I received a very nice response and selected the first five to participate.
I have since received the four edited images (one person was unable to complete the assignment). In addition to doing a great job applying their Photoshop chops to the image, they each wrote a narrative on what they did and why they did it. It is very interesting for me to see the different style and approach each artist took.
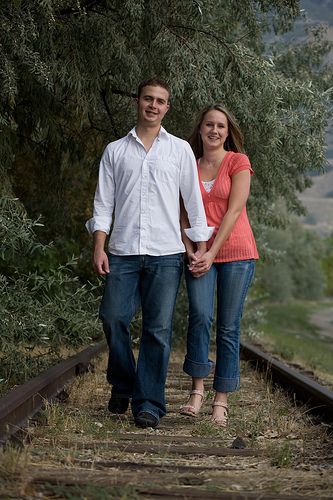
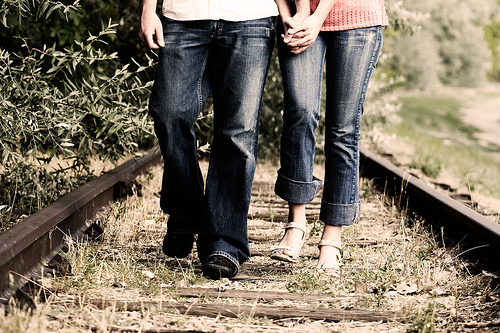
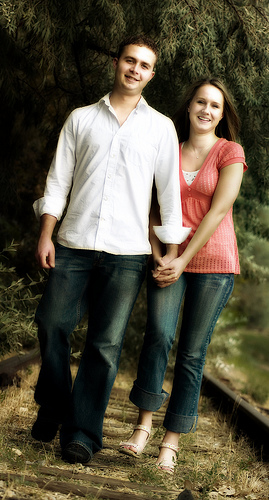
Each person was provided with an unedited JPG and RAW image (shown above) of the couple walking on abandoned railroad tracks. The only guideline given was that they could do whatever they wanted. Here are their results in no particular order.
Technically
In short – two Adobe Camera Raw interpretations of the same image,
over and under exposed. The diffusion is simulated by copying the
over-exposed image, blurring it, and using the Screen mode.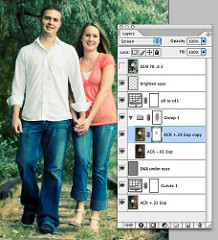
The under-exposed ACR conversion is blended with Multipy at a partial
opacity to bring back the dark zones. A Curves Adjustment Layer
introduces the Cross Processing look; search on-line for many cross
processing curve examples to download. One more thought: edit in 16-
bit mode when making dramatic shifts and expect a spiky histogram.
Down-sampling to 8-bit will smooth much of the spikiness out.
Cropped to 8×10, light sharpening for Rich to resize and sharpen for
printing.
Artistically
I imagined this couple would like one image from their engagement
session styled for fashion. I wanted to give them an image that they
will like now, their kids will laugh at on their 25th wedding
anniversary, and treasure on their 50th.
I liked the pose, motion and expressions, and how the color of her
shirt pops out of the image. But their beautiful skin and hair tones
get lost in the muddy colors of the tree leaves. And the unfocused
weeds at the bottom of the image have to go (Rich was smart to keep
the camera plane parallel to the couple, and allow some room in the
composition for cropping.)
Cross-processing refers to an old-school color film technque of
processing slide film as if it were color negative or vice versa. It
gives a characteristic color shift and contrast transformation to the
film, and has been used a lot in fashion photography. Another tool
fashion photographers might use is a diffusion filter. Since Rich
didn’t use one on his lens, I faked one. I wanted to use both ideas;
retaining a full range of brightness called upon a bit of Photoshop.
Technically
I processed the RAW file using Adobe Camera Raw 4.3.1. I left the white balance as shot, and I started with the “Auto” adjustment for the exposure settings. I tweaked a few minor things, then I got started in Photoshop CS3. Once in Photoshop, I applied a curves adjustment layer to increase contrast. Then I converted to black and white using the Channel Mixer adjustment layer at 34% red, 66% green, and 0% blue. I set the blending mode of this adjustment layer to “Overlay” and dropped the opacity to 80%. Then I desaturated the image using a Hue/Saturation adjustment layer by dropping the Saturation slider to -35. The final adjustment step was a Photo Filter adjustment layer using an LBA Warming Filter at a density of 35%. Then I cropped the image (see why in the next section). And finally, the rock in the foreground was a little off for me, so I cloned it out. No sharpening was applied.
Artistically
I felt the scene had a lot of potential and I knew I wanted the image to have a kind of timeless and carefree look and feel to it. The adjustment layers got the overall mood where I wanted it, but the composition was off for me. I loved the slight tilt in the image, but the upper half of the scene wasn’t working for me – the background was too dark on the left and too light on the right. It added too much tension and took away from the “carefree” feeling I wanted. So I played around with different crops and I finally landed on a 3:2 aspect that cut off just below the cuff of the white shirt on the left arm. To me, this was the most interesting part of the image (no offense to the models… or Rich for that matter). The photo was suddenly more timeless and relatable. It wasn’t about the two specific people in the photo — it was about the carefree feeling of walking down the old tracks on a sunny summer afternoon, hand-in-hand with the person you love.
Technically
My first step was to eliminate some of the empty space around the couple, so I cropped the image to bring the couple forward. I then tilted the image to take away the linear power that the original had, and also in hopes adding a more visual element to the picture. Overall, I felt the image had too much space around it, and was too much on the straight and upright!
Artistically
I bumped the contrast a little! I also played with different levels of contrast and decided that since the couple are wearing jeans containing pattern and texture , to bring out that element and use that as a unifier that this is a “couple”!
I then added a soften glow to the shot, and then layered a sepia toned layer on top. I took a black paint brush at around 2% opacity and painted over the whole image to achieve that black/sepia combo and add a little warmth and hopes of a romantic flair.
ARTISTICALLY
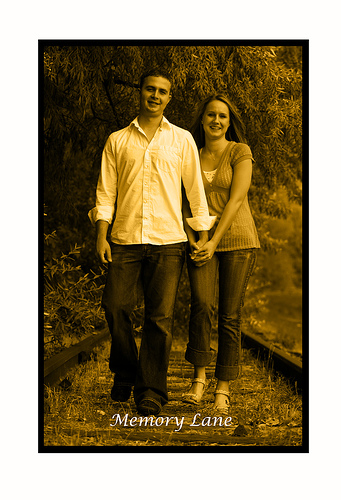
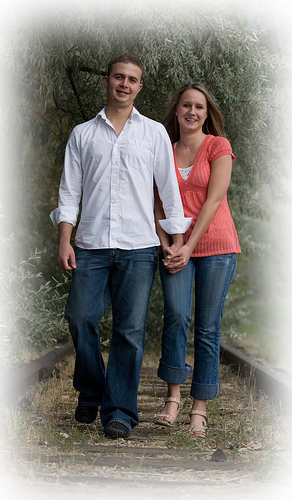
I looked at the photo and it seemed to be a pretty candid shot snapped mid action, but when I thought about it from the perspective of the couple, there was obviously going to be some memories associated with the event. It was obviously a staged candid shot. The railway tracks and the way they were dressed and walking holding hands suggested that a photographer had set this shot up for them – maybe as a anniversary special photo occasion or something. So while wild fantasies of photo shopping an old fashioned steam train in behind them to make them look as if they were in danger crossed my mind (in fact I even found some suitable photos) I didn’t attempt this. Instead I reasoned that the couple would be interested in framing this photo on their wall as a memory of this event or time in their lives. So I created two different looks and borders that would lend themselves to printing on canvas or photo paper and framing with a nice frame.
TECHNICALLY
Shot 1 – the sepia image. First I tightened the shot by cropping substantially. I then copied this onto a larger white canvas to create a large margin. I then changed the image to black and white using a gradient adjustment layer and then added a colour adjustment layer of sepia. I then created a slightly larger selection in the background and filled this with black to give the old time real photo look of the black edges and sepia tone. I then added the text at the bottom. This would look good in an old wooden frame – probably 2-3 inches in width in an old fashioned style.
Shot 2 – the soft edges. Once again I tightened the shot by cropping the extraneous material. I then create a border inside the edge and feathered this by 170 pixels. I then selected the inverse and deleted to create the soft edges. This would look good on a matt photo paper and framed in a thin metal frame, gold or maybe silver.
____________
And there you have it. I would again like to personally thank each participant for taking the time and energy to be involved in this little project. Based on the response, we will be doing this again in the future.
January 15, 2008
iStockphoto Download #10,000
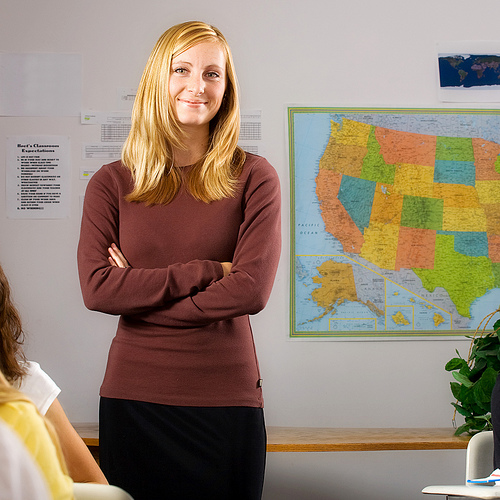
Today marks a milestone in my stock photography. Just a little while ago this image of Jenna as a school teacher sold on iStockphoto.com marking my 10,000th photo sold on the popular stock photography website. This advances me to a Gold Level contributor and not only entitles me to a higher royalty payment percentage, but I am now eligible to also sell my stock photography via Getty Image’s (the parent company of iStockphoto) royalty free collection.
Shooting and selling stock images has grown over the past year from a small part of my photography to becoming the major focus. During that time the income I receive from sales has increased to where it is now the majority of my monthly revenue.
I look forward to the year ahead as I now set my sights on iStock’s Diamond Level of 25,000 downloads.
If you’d like, you can click HERE to view my stock portfolio.
Canon 5D, Canon 70-200 f/4L lens – 1/60 second, f/10, ISO 100
LeggNet’s Digital Capture
© Rich Legg, Inc. All rights reserved.
January 14, 2008
Photowalking Utah: Studio Photography – Recap
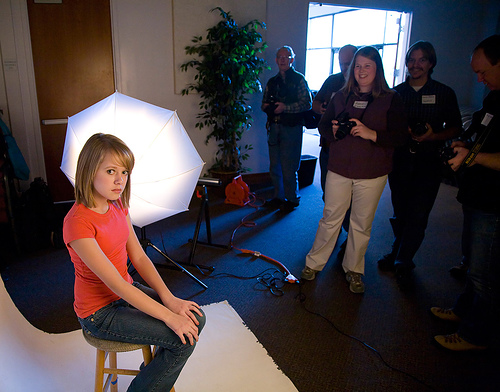
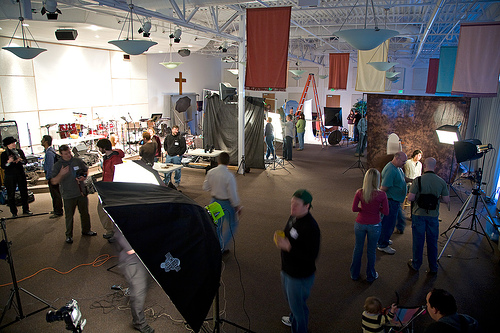
What happens when you put 75 photographers, 8 studio lighting setups, 9 models, a gear tryout table and 25 door prizes in a 6,000 square foot church auditorium? The answer is simple – a great photographic time!
Last Saturday’s indoor photowalk was a rousing success. With the addition of the Utah Photo Safari & Salt City Photo club members joining the Photowalking Utah regulars, the energy in the room was incredible. The participants got a chance to walk among the different lighting setups and to shoot the various models while meeting and talking with fellow shooters.
Our good friend Berkely at Pictureline hooked us up with plenty of Nikon and Canon swag for the prize table. Many a photographer walked away with more Canon and/or Nikon goodies than they arrived with.
To take a look at the 150+ photos (posted so far) in the Photowalking Utah Flickr group, visit flickr.com/groups/photowalkslc.
Special thanks go out to Gateway Community Church for the use of their building, Pictureline for the prizes and to all of the folks who brought gear and muscles to set-up and tear down the room. It was great to hear from the church that they felt we left the room in better condition than we found it.
The triumvirate leadership of Photowalking Utah is busily planning the next two events. Stay tuned here or at PhotoWalkingUtah.com for details.
Update: Here are a few other articles and/or blog posts on the event:
http://www.photowalking.org/2008/01/14/photowalking-utah-indoor-studio-wrap-up/
http://www.anntorrence.com/blog/2008/01/photowalking-studio-workshop-l.html
.
Labels: photowalking, studio
January 12, 2008
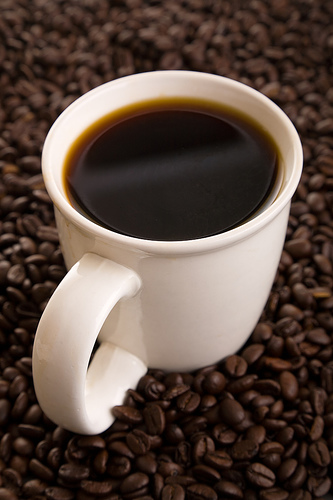
Saturday Morning Joe
Canon 5D, Canon 70-200 f/4L lens – 1/125 second, f/13, ISO 100
LeggNet’s Digital Capture
© Rich Legg, Inc. All rights reserved.
January 11, 2008
One Shopping Day Left
Only one shopping day left before the January edition of Photowalking Utah. Here are some links with details:
/2008/01/studio-photography-photowalking-this.html
http://www.anntorrence.com/blog/2008/01/photowalking-reminder-portrait.html
http://flickr.com/groups/photowalkslc/discuss/72157603442844313/
/2007/12/save-date-photowalk-5-january-12-2008.html
Canon 5D, Canon 24-105 f/4L lens – 1/125 second, f/10, ISO 100
LeggNet’s Digital Capture
© Rich Legg, Inc. All rights reserved.
January 10, 2008
Studio Photography Photowalking This Saturday
We are having our January Photowalking Utah event this Saturday. This will be an indoor event with multiple sets for doing studio photography. Based on the response in the Flickr discussion, it looks like we are going to have a HUGE turnout. This should be fun.
Here are the details:
When: Saturday January 12, 11:00 am – 1:30 pm (ish)
Where: Gateway Community Church – 584 E. 12300 South, Draper UT 84020
As always, these events are open to anyone interested in attending – regardless of skill and/or equipment level. If your camera has a flash, we will be able to sync you to the lights.
I have scheduled six amateur models to be available to pose for the photographers. We are asking each photographer to make a $5 recommended donation to compensate these models for their time.
For more information, visit the group page at www.photowalkingutah.com or read my previous post by clicking here.
Feel free to contact me at rich(at)leggnet.com or (801) 259-3500 with any questions.
I look forward to seeing many of you on Saturday.
UPDATE: I just came from my favorite photography store Pictureline where I picked up the door prize donations. They have generously offered up over 20 items including Nikon thumb drives, Canon memory card holders, Nikon coffee mugs and much more. These will be given out by random drawing at the event. Please keep Pictureline’s generosity in supporting this event in mind the next time you need to make a photography purchase.
Labels: photowalking, studio
January 10, 2008
Studio Photography Photowalking This Saturday
We are having our January Photowalking Utah event this Saturday. This will be an indoor event with multiple sets for doing studio photography. Based on the response in the Flickr discussion, it looks like we are going to have a HUGE turnout. This should be fun.
Here are the details:
When: Saturday January 12, 11:00 am – 1:30 pm (ish)
Where: Gateway Community Church – 584 E. 12300 South, Draper UT 84020
As always, these events are open to anyone interested in attending – regardless of skill and/or equipment level. If your camera has a flash, we will be able to sync you to the lights.
I have scheduled six amateur models to be available to pose for the photographers. We are asking each photographer to make a $5 recommended donation to compensate these models for their time.
For more information, visit the group page at www.photowalkingutah.com or read my previous post by clicking here.
Feel free to contact me at rich(at)leggnet.com or (801) 259-3500 with any questions.
I look forward to seeing many of you on Saturday.
UPDATE: I just came from my favorite photography store Pictureline where I picked up the door prize donations. They have generously offered up over 20 items including Nikon thumb drives, Canon memory card holders, Nikon coffee mugs and much more. These will be given out by random drawing at the event. Please keep Pictureline’s generosity in supporting this event in mind the next time you need to make a photography purchase.
LeggNet’s Digital Capture
© Rich Legg, Inc. All rights reserved.
January 9, 2008
Don
Canon 5D, Canon 24-105 f/4L lens – 1/125 second, f/6.3, ISO 100
LeggNet’s Digital Capture
© Rich Legg, Inc. All rights reserved.
January 8, 2008
Calling Photoshoppers
My college age son spent some time with us over Christmas break and offered up a suggestion for a blog post here on LeggNet’s Digital Capture. He thought that it would be interesting to see different photographers’ final version of the same photograph after editing. I agreed that it would be cool, so we are going to do it.
I am looking for five blog readers that would like to put their Photoshop chops to work on an image that I supply. They will each have one week to do whatever they would like to the image. In the end, I will post all five images along with the photographer’s commentary on what they did and why.
If you are interested in participating, please email me at rich(at)leggnet.com with the subject of “COUNT ME IN!”. I will take the first five respondents.
This will be fun!
UPDATE
We’ve got our participants who will each be receiving the un-edited image in the next day. I can’t wait to see the results.
UPDATE 2
The image file has been delivered to each of the participants. I anticipate posting the results along with their comments by the middle of next week.
UPDATE 3
The results are posted: /2008/01/calling-photoshoppers-results.html
LeggNet’s Digital Capture
© Rich Legg, Inc. All rights reserved.
January 7, 2008
TTV Photography Revisited
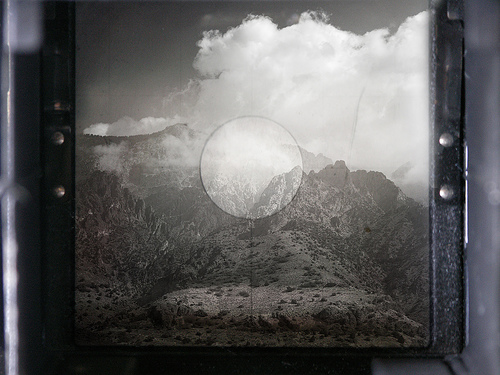
Here is another take on the technique of creating a Through-the-Viewfinder image in Photoshop (previous example here). Sometime soon, I need to take one of my antique cameras out and try this technique for real.
Canon 5D, Canon 50mm f/1.8 lens – 1/200 second, f/5.6, ISO 100
January 5, 2008
Flower Girl
Here’s a little bit of warmth for this cold winter day.
Canon 5D, Canon 24-105 f/4L lens – 1/100 second, f/10, ISO 100
LeggNet’s Digital Capture
© Rich Legg, Inc. All rights reserved.
January 4, 2008
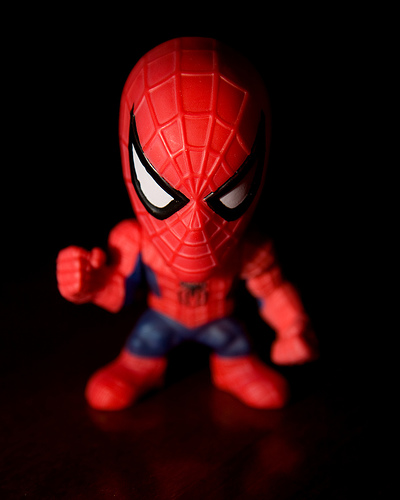
Big Headed Spidey
Here’s a different take on yesterday’s Wide Angle Portrait technique. Instead of using the wide angle lens to create the appearance of the model’s larger than life head, I found a model with an extremely big head 🙂
Canon 5D, Canon 24-105 f/4L lens – 1/200 second, f/4, ISO 100
January 3, 2008
Use Wide Angle Lens Distortion for a Creative Portrait
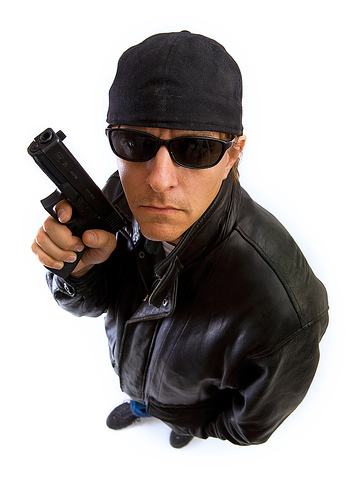
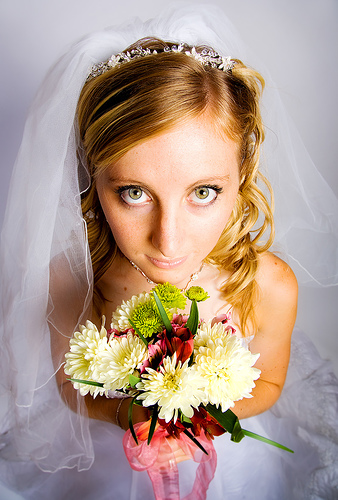
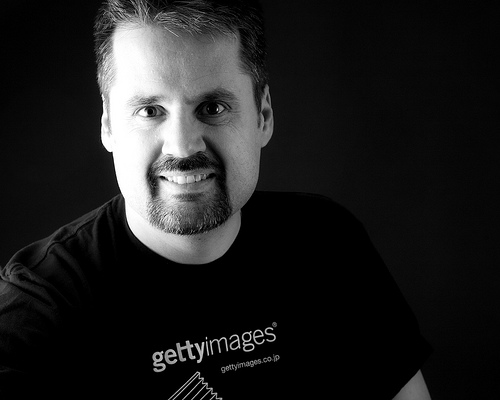
One of the fun poses I like to do when working with a model is a close-in wide angle shot taken from above the subject. The distortion created by a wide angle lens causes the subject’s head to appear oversized with a small body filling the remainder of the frame. For further exaggeration of the face, I get as close to the model as possible while still maintaining focus. To be able to get over top the model, I keep a small ladder in the studio for this purpose.
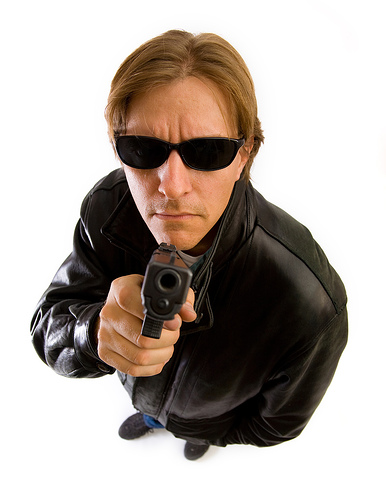
On both the shot of the menacing looking gunman (above) and the little bride (below), I used my all-purpose 24-105 f/4L lens on a Canon 5D. Since the 5D has a full-frame sensor eliminating the crop-factor, I get a true 24mm in the widest focal length causing the large head effect to work nicely.
One of the lenses on my future-purchase list is the Canon 17-40 f/4L. This lens will give me even more versatility in creating this type of portrait.
Canon 5D, Canon 24-105 f/4L lens – 1/125 second, f/7.1, ISO 100
Labels: tutorial
January 3, 2008
Use Wide Angle Lens Distortion for a Creative Portrait

One of the fun poses I like to do when working with a model is a close-in wide angle shot taken from above the subject. The distortion created by a wide angle lens causes the subject’s head to appear oversized with a small body filling the remainder of the frame. For further exaggeration of the face, I get as close to the model as possible while still maintaining focus. To be able to get over top the model, I keep a small ladder in the studio for this purpose.
On both the shot of the menacing looking gunman (above) and the little bride (below), I used my all-purpose 24-105 f/4L lens on a Canon 5D. Since the 5D has a full-frame sensor eliminating the crop-factor, I get a true 24mm in the widest focal length causing the large head effect to work nicely.
One of the lenses on my future-purchase list is the Canon 17-40 f/4L. This lens will give me even more versatility in creating this type of portrait.
Canon 5D, Canon 24-105 f/4L lens – 1/125 second, f/7.1, ISO 100
LeggNet’s Digital Capture
© Rich Legg, Inc. All rights reserved.
December 31, 2007
2007 – This Photographer’s Look Back
324,157 – Unique Visitors to LeggNet’s Digital Capture
126,742 – Most Hits on a Single Day
16,586 – Photos Taken
8,693 – Photos Sold Online
1,748 – Photos added to Flickr
1,514 – Photos added to iStockphoto
732 – Comments left by Readers
334 – Blog Posts Made
2 – Frontpage DIGG Stories
1 – New Camera
Thank you to everyone for your kind words and support throughout the year. I anxiously look forward to what 2008 has in store for all of us photographically.
LeggNet’s Digital Capture
© Rich Legg, Inc. All rights reserved.
December 28, 2007
A Camera, Kids and an Empty Bowling Alley
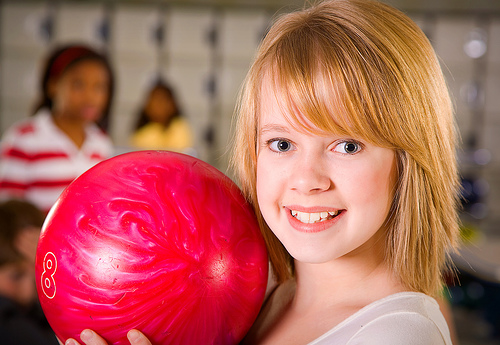
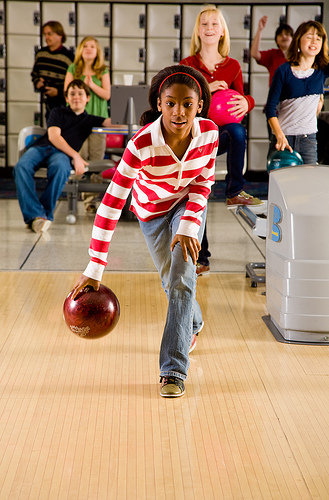
I spent the snowy Friday morning before Christmas at a local bowling center with a few kids doing a photo shoot for my iStockphoto portfolio. The kids had a great time getting to do some bowling while modeling. This shoot had been planned for quite a while since the date was a school holiday. What we didn’t expect was for it to be the snowiest morning of the season. To my surprise, all of our models braved the weather and made it to the shoot on time.
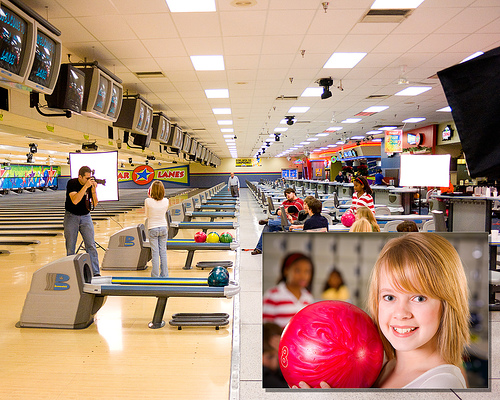
Most of the shots involved the kids hanging out in the bowler’s seating area, although I did do a few shots of kids bowling (above). In this overview image below, you can get an idea of the lighting setup used. Three large softboxes and a 5×7′ monolight lit diffusion screen created a sizable ‘set’ to shoot within.
It was very cool to have a whole bowling alley to ourselves. Of course, the raging blizzard outside did help contribute to the emptiness of the location. Special thanks go to my friend Harley who supplied some equipment, assisted on the shoot, and took the overview shot.
LeggNet’s Digital Capture
© Rich Legg, Inc. All rights reserved.


