Post Number 1,000!

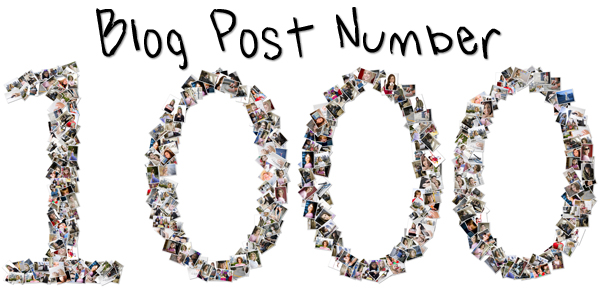
Post 1000

Today’s post marks a milestone as number 1,000 for LeggNet’s Digital Capture. I never would have imagined back in 2005 the journey that my photography would be taking me on over the next 3+ years. During that time I have completely transitioned from a real estate broker to a full-time professional photographer. This little blog has chronicled the experience in it’s own special way. I used to be a bit embarrassed by the older posts on the blog, but I now embrace them as my own sort of wayback machine serving as mileposts along the road.

Thank you to everyone who has followed and supported me from post #1 up until today. I anxiously look forward to what the future holds for me and my photography.

All the best,

Rich


LeggNet’s Digital Capture
© Rich Legg, Inc. All rights reserved.


Wednesday

Wednesday
Canon 5D Mark II, Canon 70-200 f/4L lens – 1/125 second, f/8, ISO 100


LeggNet’s Digital Capture
© Rich Legg, Inc. All rights reserved.


Making Photo Collages – Free Program

Collage

While editing images today I was watching/listening to the live recording of the MacBreak Weekly podcast on TWiT.tv. One of the features of the program is that each of the hosts makes a Pick-of-the-Week. One of this week’s picks was a free program for making Photo Collages called Shape Collage. This pick caught my attention so I downloaded the program to try it out.

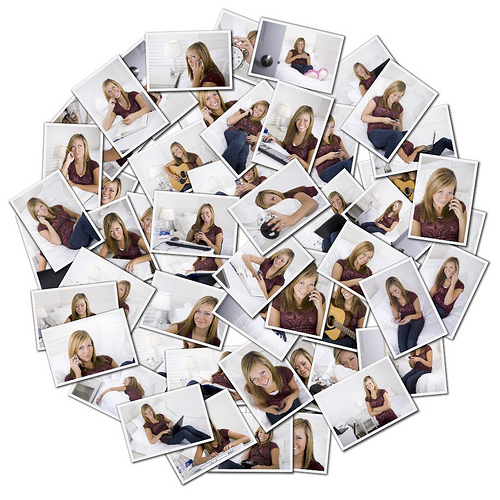
Today’s image was created using the program. Utilizing the extremely simple interface, I was able to drag a group of images from the finder and drop them into Shape Collage. From there I selected the output shape (in this case a circle) and clicked the ‘Create’ button. Simple and easy.

I’m not sure how I will utilize the program, but I plan on experimenting with it in the coming weeks to see what creative uses I can find for it. The variety of shapes available makes for near endless possibilities.

To learn more about Shape Collage and to download a free copy (Mac/Windows/Linux), surf on over to http://www.vincentcheung.ca/shapecollage/.

Photowalking Utah: Recapping the Studio Lighting Event

Photowalking Utah,  Studio Lighting Event
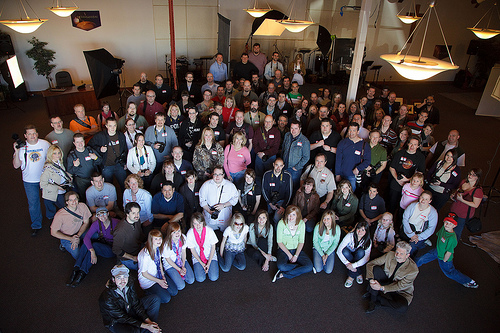
click here for to see a full-resolution version of the group photo

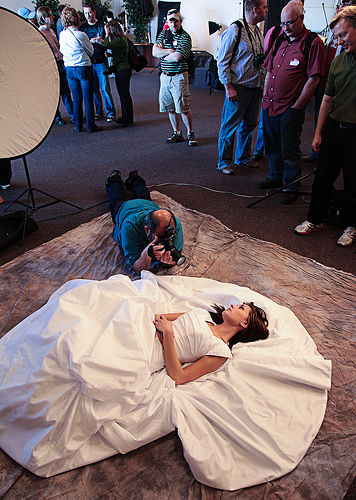
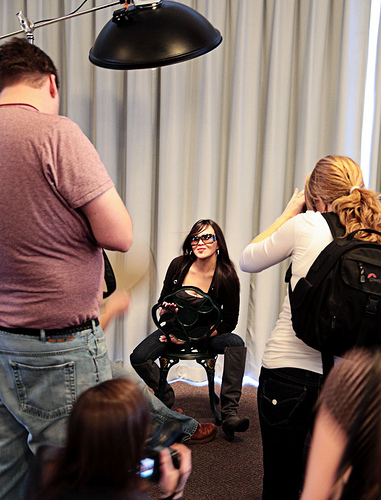
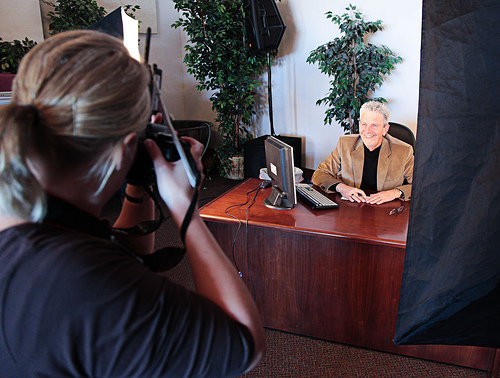
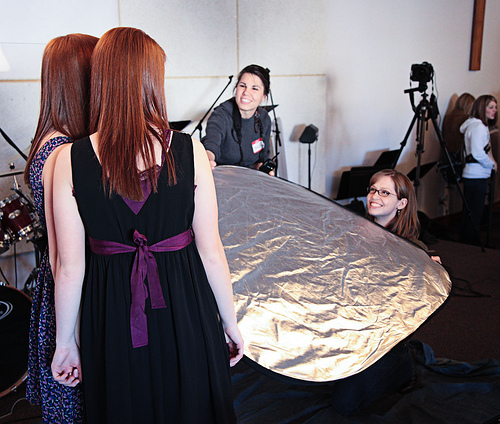
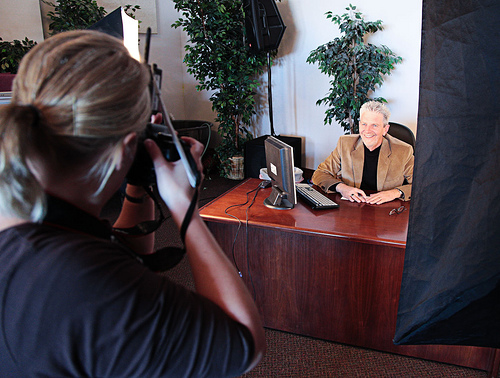
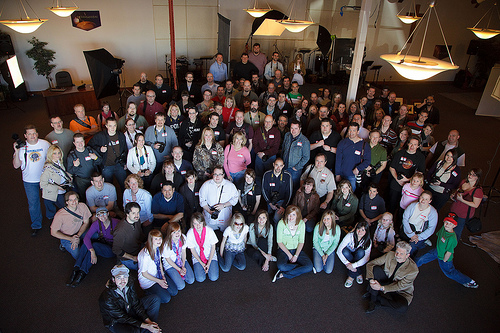
This past Saturday I again had the honor of hosting the Studio Lighting event for Photowalking Utah. Much like the inaugural event last year, this was an indoor photowalk consisting of multiple studio lighting setups for the participating photographers to demo. The idea of an indoor photowalk was hatched last year as a way of doing a winter event without having to brave the unpredictable weather of Northern Utah.

Photowalking Utah - Behind the Scenes 2

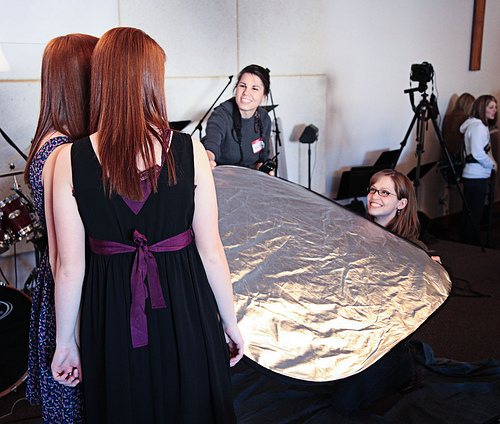
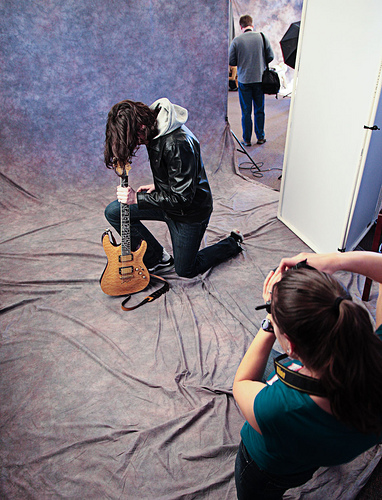
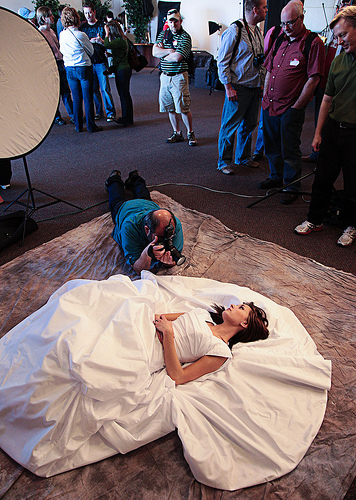
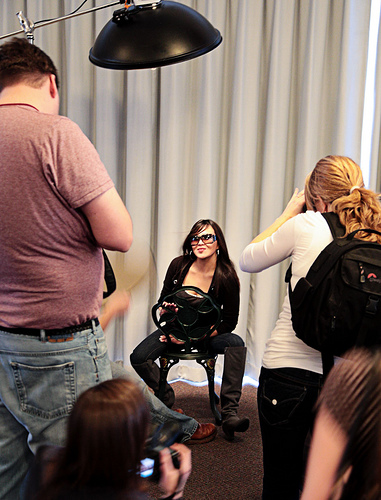
For this year’s outing, we had seven different ‘studios’ for the photographers to shoot in. In planning the setups, I worked with the volunteer ‘studio hosts’ to have a variety of styles for the photographers to shoot. This worked rather well. The setup themes were: Speedlight, Natural Light, Stock, Bridal Portrait, Fashion, Group Posing and Dramatic.

Photowalking Utah - Behind the Scenes 3

Each of the setups featured models for the participants to photograph. I have to say that our models went above-and-beyond for the three hours of the event to make sure that the photographers were able to capture the images they sought.

Photowalking Utah - Behind the Scenes 1

The ‘studio host’ was available at each setup to assist the shooter with exposure, syncing, model direction and anything else they needed assistance with. Not only did these hosts bring all their own lighting equipment, but they had to essentially work the entire time. It is volunteers like this that make Photowalking Utah a success. This year’s hosts were: Dale Welcome, Scott Smith, Ann Torrence, David Terry, Mike Calanan, Mark Abercrombie, Kim Guanzon and Ed Paz (who manned my setup).

Photowalking Utah - Behind the Scenes 4

By the end, over 120 photographers had participated in the event. I’m thoroughly impressed with the samples I’m seeing coming into the Photowalking Utah Flickr Group. It is really interesting to see the variety of results created using the same models/lights.

Photowalking Utah - Behind the Scenes 5

It’s been an exhausting few days for me between teaching last Thursday’s Mini-Clinic and hosting Saturday’s Photowalk. But I’ve got to say it has also been extremely rewarding. Thank you to everyone who came out and supported this month’s events.

Big Thanks to:

Gateway Community Church – Location sponsor
Pictureline – Door Prize sponsor
Pixels – Door Prize sponsor
Kenneth Linge – Grand Prize sponsor

…and the models: Andrew, Alyssa, Kylee, Ron, Elisabeth, Mady, Brittanie, Sarah, Emily and Laarni

Labels:

Photowalking Utah: Recapping the Studio Lighting Event

Photowalking Utah,  Studio Lighting Event
click here for to see a full-resolution version of the group photo

This past Saturday I again had the honor of hosting the Studio Lighting event for Photowalking Utah. Much like the inaugural event last year, this was an indoor photowalk consisting of multiple studio lighting setups for the participating photographers to demo. The idea of an indoor photowalk was hatched last year as a way of doing a winter event without having to brave the unpredictable weather of Northern Utah.

Photowalking Utah - Behind the Scenes 2

For this year’s outing, we had seven different ‘studios’ for the photographers to shoot in. In planning the setups, I worked with the volunteer ‘studio hosts’ to have a variety of styles for the photographers to shoot. This worked rather well. The setup themes were: Speedlight, Natural Light, Stock, Bridal Portrait, Fashion, Group Posing and Dramatic.

Photowalking Utah - Behind the Scenes 3

Each of the setups featured models for the participants to photograph. I have to say that our models went above-and-beyond for the three hours of the event to make sure that the photographers were able to capture the images they sought.

Photowalking Utah - Behind the Scenes 1

The ‘studio host’ was available at each setup to assist the shooter with exposure, syncing, model direction and anything else they needed assistance with. Not only did these hosts bring all their own lighting equipment, but they had to essentially work the entire time. It is volunteers like this that make Photowalking Utah a success. This year’s hosts were: Dale Welcome, Scott Smith, Ann Torrence, David Terry, Mike Calanan, Mark Abercrombie, Kim Guanzon and Ed Paz (who manned my setup).

Photowalking Utah - Behind the Scenes 4

By the end, over 120 photographers had participated in the event. I’m thoroughly impressed with the samples I’m seeing coming into the Photowalking Utah Flickr Group. It is really interesting to see the variety of results created using the same models/lights.

Photowalking Utah - Behind the Scenes 5

It’s been an exhausting few days for me between teaching last Thursday’s Mini-Clinic and hosting Saturday’s Photowalk. But I’ve got to say it has also been extremely rewarding. Thank you to everyone who came out and supported this month’s events.

Big Thanks to:

Gateway Community Church – Location sponsor
Pictureline – Door Prize sponsor
Pixels – Door Prize sponsor
Kenneth Linge – Grand Prize sponsor

…and the models: Andrew, Alyssa, Kylee, Ron, Elisabeth, Mady, Brittanie, Sarah, Emily and Laarni


LeggNet’s Digital Capture
© Rich Legg, Inc. All rights reserved.


Recapping the Budget Studio Lighting Mini-Clinic

Clinic Example Portrait

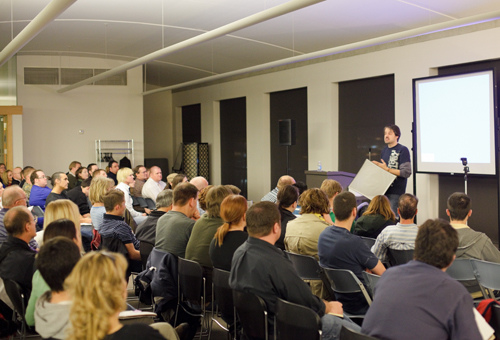
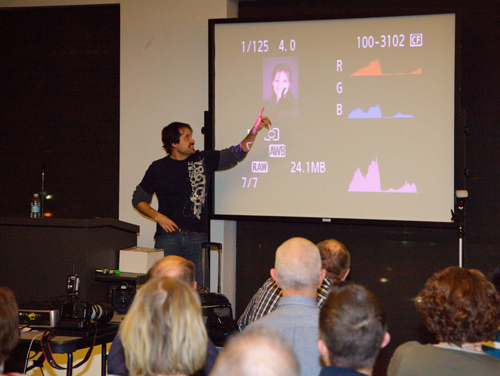
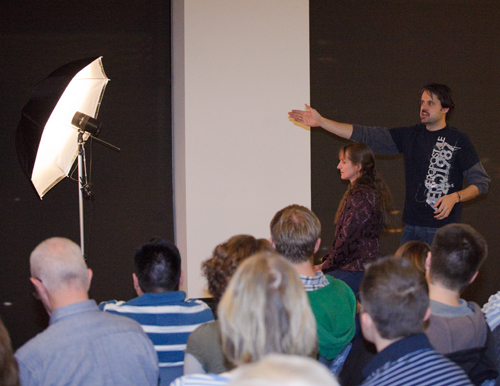
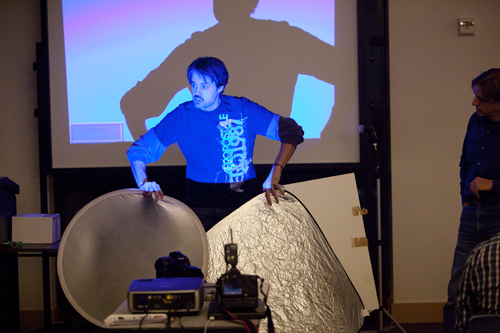
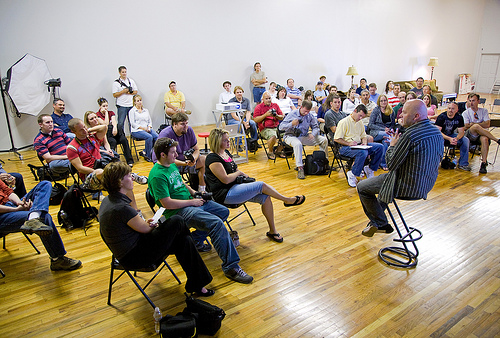
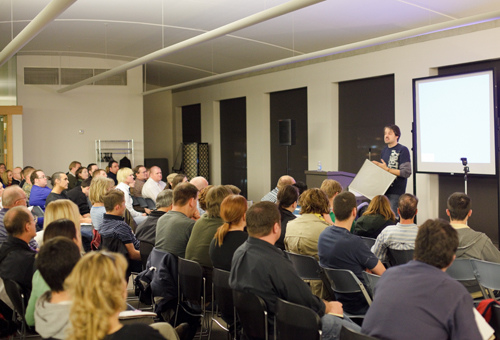
Last night’s Photowalking Utah mini-clinic at the Salt Lake City library was a great success. Even though the event didn’t feature any walking (unless you count the trek up to the 4th floor), it turned out to be our most attended event to date with 86 photographers participating. The theme of the clinic was “How to Get Great Studio Lighting Results for Under $250”. In the session I showed how to create nice studio portraits using some of the absolute lowest price lighting available.
Clinic Behind the Scenes 5

I really enjoy sharing my somewhat limited photography knowledge with others and doing this through the Photowalking Utah group has become a nice venue for teaching and learning. Even though the internet provides an abundance of free information for photographers to learn from, there is just something about getting several dozen like-minded folks together that increases the ability to share and learn.
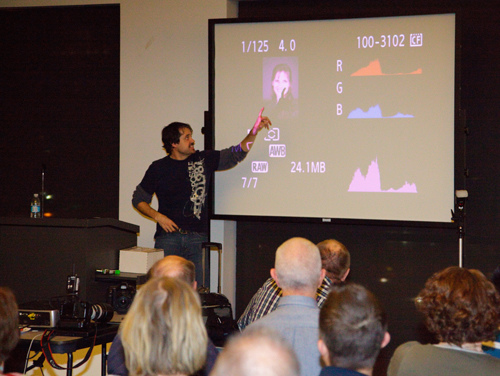
Clinic Behind the Scenes 1

As a follow-up to the session, I want to take a few moments and share some of the simple setups I demoed along with some links to el-cheapo budget lighting equipment.
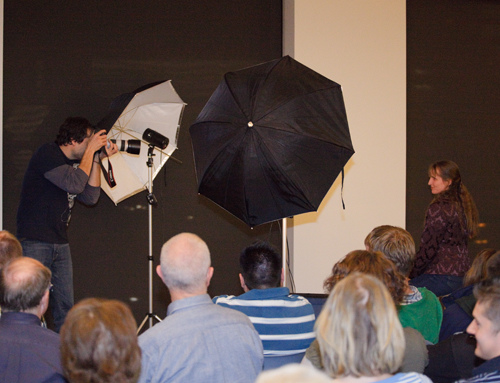
Clinic Behind the Scenes 2

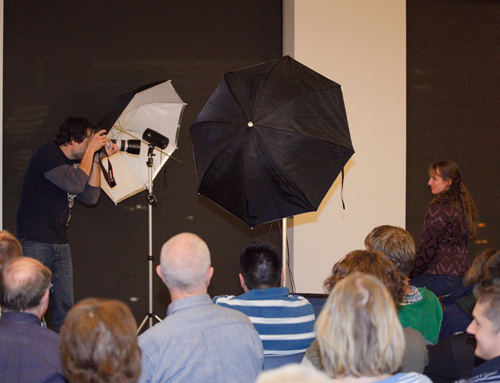
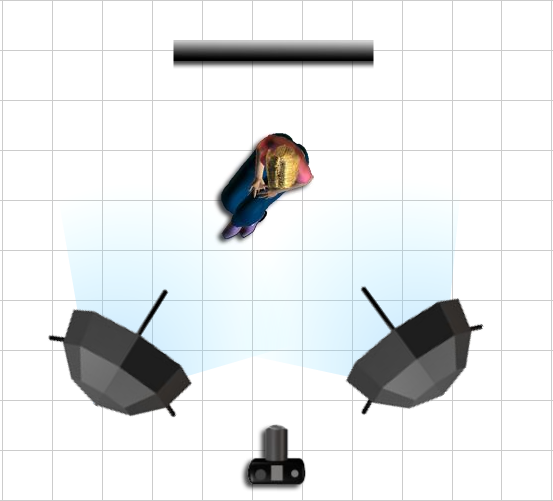
I began with a balanced two-light setup. This is my absolute least favorite setup and one that I rarely (if ever) use. This is the lighting arrangement that I was trained to use back in the eighties during my days as a school picture photographer (eek!).

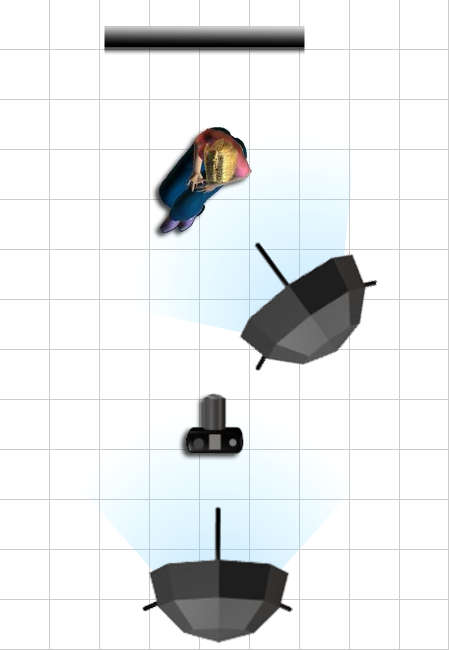
After showing this setup, I made a quick change to the lighting arrangement to give a key-light with on-axis fill. Unlike the previous balanced setup, on this configuration I set the key light at 1.5 f/stops more powerful than the fill light. This is an extremely simple yet useful setup that I was taught by my friend Kenneth Linge. I use a variation of this quite frequently.
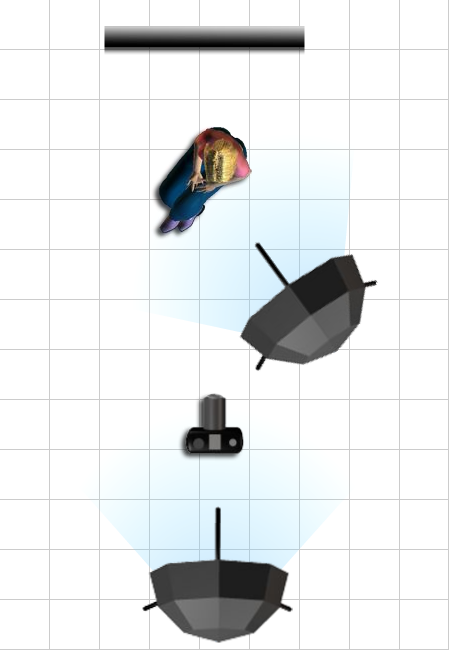
After these two initial setups, I showed several more ways to create different feels by moving the lights around. While all of the arrangements can be classified as rather simple, they can serve as a nice starting point for a photographer new to using off-camera studio lights.
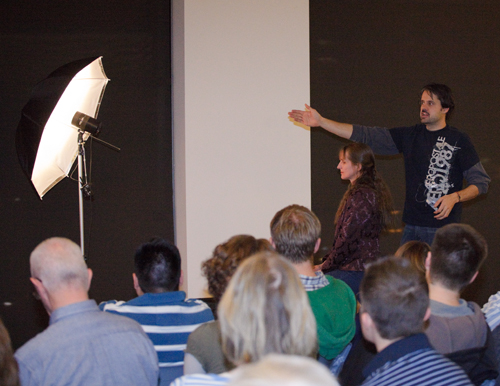
Clinic Behind the Scenes 3

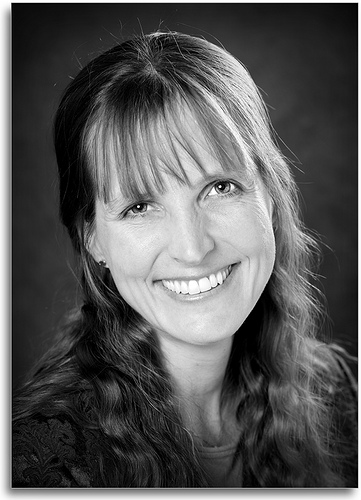
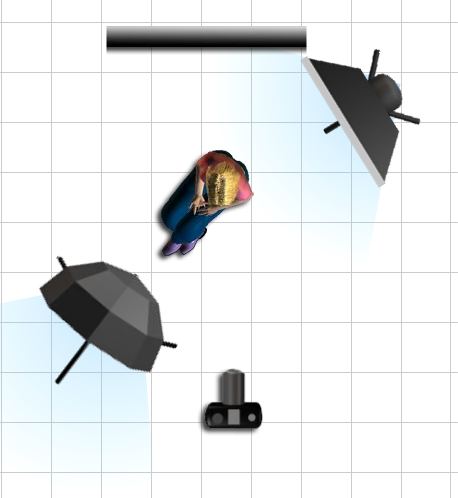
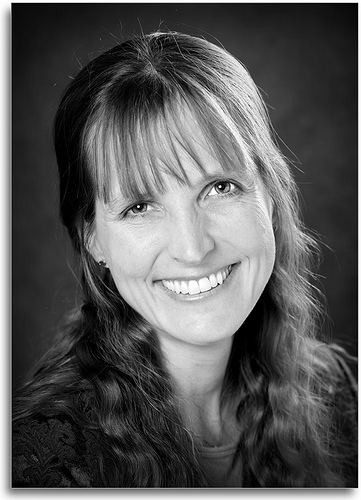
Here is a setup using a shoot-through umbrella for the key (or main) light and a small softbox for the hair light. The top image of Diane in today’s post was shot at the clinic using this arrangement.
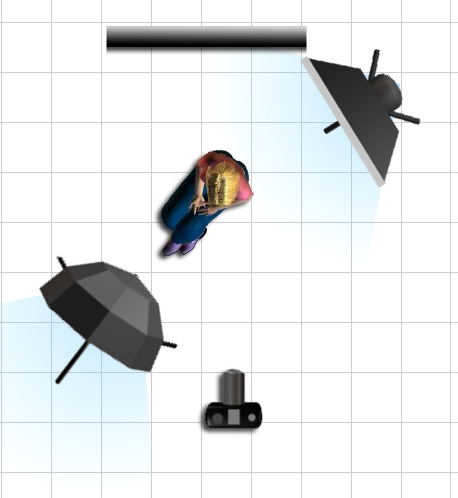
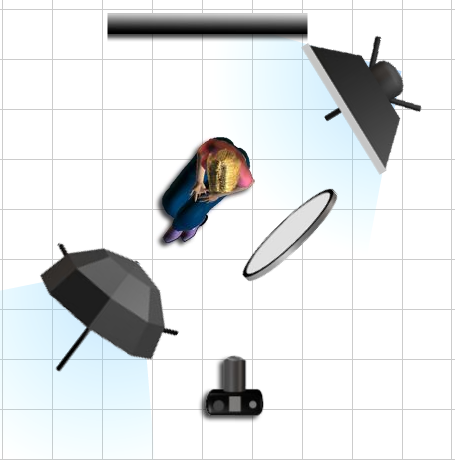
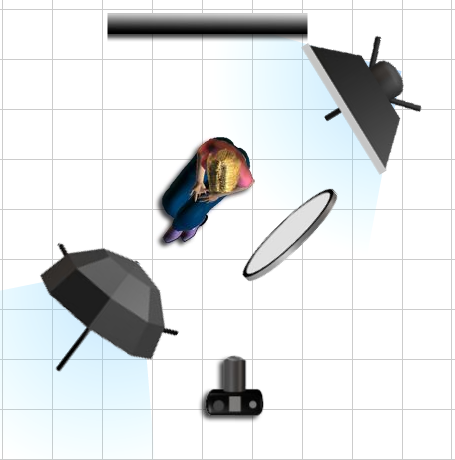
Another variation of the previous setup involved bringing in a reflector to add light to the darker side of the model’s face. Unlike the diagram below which shows a $50 reflector, in keeping with the budget theme of the night I used a $1 piece of white foam board.
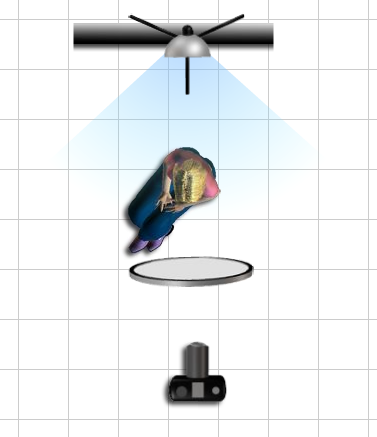
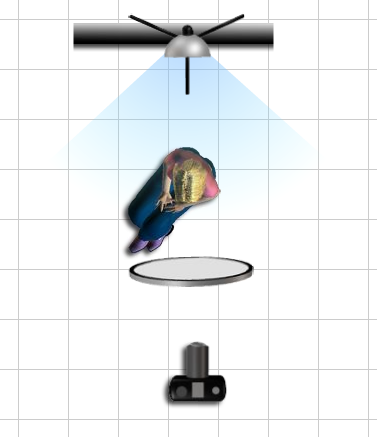
One of the last setups I demonstrated involved using a single light above and behind the model. I then used two of the $1 white boards taped together to create a V-Card held under the model’s face to reflect light back onto her face. This gave a nice rim-light combined with a very soft light on her face.
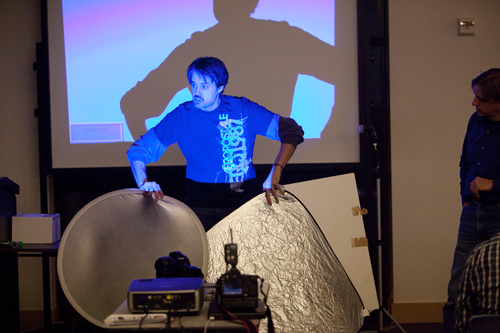
For the demonstration I used a pair of probably the cheapest mono-lights available – Adorama Budget 100 Studio Monolights. They can be picked up for around $50 each. LINK
Clinic Behind the Scenes 4

I’m really thankful for having the opportunity to facilitate classes like this. If the turnout at last night’s event is any indication, I expect we will see a great turnout for tomorrow’s Studio Lighting Photowalk. It promises to be a lot of fun!

p.s. Big props go out to Diane for being such a patient model and not minding that my shots of her were scrutinized in front of everyone on the projector screen 🙂

Labels: ,

Recapping the Budget Studio Lighting Mini-Clinic

Clinic Example Portrait

Last night’s Photowalking Utah mini-clinic at the Salt Lake City library was a great success. Even though the event didn’t feature any walking (unless you count the trek up to the 4th floor), it turned out to be our most attended event to date with 86 photographers participating. The theme of the clinic was “How to Get Great Studio Lighting Results for Under $250”. In the session I showed how to create nice studio portraits using some of the absolute lowest price lighting available.

Clinic Behind the Scenes 5

I really enjoy sharing my somewhat limited photography knowledge with others and doing this through the Photowalking Utah group has become a nice venue for teaching and learning. Even though the internet provides an abundance of free information for photographers to learn from, there is just something about getting several dozen like-minded folks together that increases the ability to share and learn.

Clinic Behind the Scenes 1

As a follow-up to the session, I want to take a few moments and share some of the simple setups I demoed along with some links to el-cheapo budget lighting equipment.

Clinic Behind the Scenes 2

I began with a balanced two-light setup. This is my absolute least favorite setup and one that I rarely (if ever) use. This is the lighting arrangement that I was trained to use back in the eighties during my days as a school picture photographer (eek!).

After showing this setup, I made a quick change to the lighting arrangement to give a key-light with on-axis fill. Unlike the previous balanced setup, on this configuration I set the key light at 1.5 f/stops more powerful than the fill light. This is an extremely simple yet useful setup that I was taught by my friend Kenneth Linge. I use a variation of this quite frequently.

After these two initial setups, I showed several more ways to create different feels by moving the lights around. While all of the arrangements can be classified as rather simple, they can serve as a nice starting point for a photographer new to using off-camera studio lights.

Clinic Behind the Scenes 3

Here is a setup using a shoot-through umbrella for the key (or main) light and a small softbox for the hair light. The top image of Diane in today’s post was shot at the clinic using this arrangement.

Another variation of the previous setup involved bringing in a reflector to add light to the darker side of the model’s face. Unlike the diagram below which shows a $50 reflector, in keeping with the budget theme of the night I used a $1 piece of white foam board.

One of the last setups I demonstrated involved using a single light above and behind the model. I then used two of the $1 white boards taped together to create a V-Card held under the model’s face to reflect light back onto her face. This gave a nice rim-light combined with a very soft light on her face.

For the demonstration I used a pair of probably the cheapest mono-lights available – Adorama Budget 100 Studio Monolights. They can be picked up for around $50 each. LINK

Clinic Behind the Scenes 4

I’m really thankful for having the opportunity to facilitate classes like this. If the turnout at last night’s event is any indication, I expect we will see a great turnout for tomorrow’s Studio Lighting Photowalk. It promises to be a lot of fun!

p.s. Big props go out to Diane for being such a patient model and not minding that my shots of her were scrutinized in front of everyone on the projector screen 🙂


LeggNet’s Digital Capture
© Rich Legg, Inc. All rights reserved.


Re-Shooting Previous Themes

Kylee Receptionist - sample

I’ve lately begin to re-shoot some of my older themes. There are two main reasons that I am doing this. The first reason is since I am now shooting with a Canon 5D Mark II, the images are 21 megapixel as opposed to the 12 my previous camera created. This equates to stock images being available in sizes up to XXXL versus XL. The cost difference between the two on iStockphoto is 28 credits (XXXL) versus 12 (XL) for the largest available size. While a low percentage of buyers purchase the largest image, when they do my royalty increases by over double.

The second reason is one we can all probably relate to. When I revisit a theme, I come at it from a different perspective. I will usually shoot the theme differently – lighting, posing, props, etc. Today’s featured image is an example of this. I did a re-shoot on Monday of one of my most popular images. Here is the previous image featuring Alyssa as a receptionist.

This popular image has sold over 1,000 times in the year that it has been available. While I like the warm tones, I have since painted the inside of the studio walls so the new image with Kylee features a white walled background. It’s also noticeable that I shot a tighter crop from a different angle.

Time will tell if revisiting this theme will pay off. In the coming months I will be continuing to re-shoot my most popular themes.

Canon 5D Mark II, Canon 70-200 f/4L lens – 1/125 second, f/8, ISO 100


LeggNet’s Digital Capture
© Rich Legg, Inc. All rights reserved.

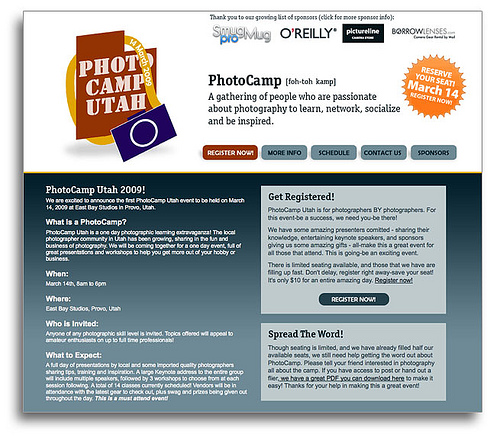
Announcing PhotoCamp Utah

PhotoCamp Utah

A few months back I was invited to be involved in the creation of PhotoCamp Utah. During that time there’s been plenty of planning going on behind the scenes and we recently rolled out the announcement of the inaugural event to be held on March 14, 2009.

Instead of me rambling on about it, let me quote directly from the PhotoCamp website:

We are excited to announce the first PhotoCamp Utah event to be held on March 14, 2009 at East Bay Studios in Provo, Utah.

What is a PhotoCamp?

PhotoCamp Utah is a one day photographic learning extravaganza! The local photographer community in Utah has been growing, sharing in the fun and business of photography. We will be coming together for a one day event, full of great presentations and workshops to help you get more out of your hobby or business.

When:

March 14th, 8am to 6pm

Where:

East Bay Studios, Provo, Utah

Who is Invited:

Anyone of any photographic skill level is invited. Topics offered will appeal to amateur enthusiasts on up to full time professionals!

What to Expect:

A full day of presentations by local and some imported quality photographers sharing tips, training and inspiration. A large Keynote address to the entire group will include multiple speakers, followed by 3 workshops to choose from at each session following. A total of 14 classes currently scheduled! Vendors will be in attendance with the latest gear to check out, plus swag and prizes being given out throughout the day. This is a must attend event!

The initial interest (read: paid reservations) in the event has been great. We’ve got a very diverse and knowledgeable slate of presenters to cover photographic topics for all skill levels. I will be holding a session on stock photography.

For a very reasonable $10 fee, entrants will receive a full day of photographic training. To get the rest of the details and to reserve your spot, drop by the official website at PhotoCampUtah.com.

PocketWizard announces TTL Radio Triggers

Being a prolific user of PocketWizards to fire my lights, I found today’s announcement of their next-generation models featuring true TTL (through-the-lens) functionality rather exciting. Here’s the announcement/demo video.

Since I use my PocketWizards to mainly trigger my mono-lights, the TTL feature isn’t something that I need to upgrade to immediately. But it does swing the door wide open with possibilities for using my Speedlights more prominantly in my work.


LeggNet’s Digital Capture
© Rich Legg, Inc. All rights reserved.


In the Kitchen with a Happy 4 Year Old

Kitchen Girl - Sample

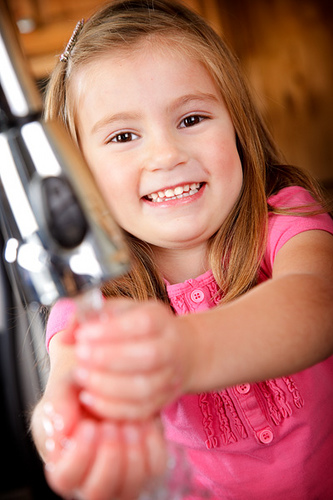
My latest stock photo shoot centered around a four year old girl in a home kitchen. The various themes from the shoot included learning to cook with mom, getting her knee bandaged, washing hands (today’s featured image) and such. She was a great model and really seemed to have a lot of fun being in the shoot.

Canon 5D Mark II, Canon 24-105 f/4L lens – 1/125 second, f/5.6, ISO 100

Another Member Joins the +1,000 Club

My Latest Member of the 1,000 Club

This afternoon I had my third photo join the exclusive ranks of images in my portfolio that have sold over 1,000 times.

Canon 5D, Canon 24-105 f/4L lens – 1/125 second, f/10, ISO 100

Release the Models!

]]>

It’s probably no coincidence that the image in my stock portfolio with the most models (and hence, most signed model releases) is also my top selling image. This particular shot with 12 signed model releases has sold nearly 1,300 times as of today.

Canon 5D, Canon 24-105 f/4L lens – 1/125 second, f/5.0, ISO 100

Photographers – How do you overcome creative block?

Overcoming Creative Block

If you are working in a creative medium, it is inevitable that you will eventually encounter creative block. Since photography definitely qualifies as a creative medium, this is something that will most likely hit every serious photographer at some point.

In the 13 months or so that I have been working full-time with my photography company, I have for the most part been able to avoid a major case of block. What I have realized though is that my current mood plays a large part about my creativeness. If I’m feeling particularly “down”, it definitely has a tendency to show up in my work (or lack of work). On the other hand, when I am feeling “up”, I tend to produce a higher amount of good content.

This morning I read a blog post I found through my friend Dennis’ Photo News Today website. The post is titled 10 Ways To Break Photographers Block. It has some great ideas for dealing with this problem and is definitely worth a read. After reading the 10 suggestions, I began to wonder how others handle this.

What I would like to hear, is how you (as a photographer or other content creator) overcome a creative block. Do you have a routine you do to get out of a funk? Are there resources you would be willing to share with the community? I am anxious to see what you have to offer. And as a purely selfish benefit, the next time I find myself feeling particularly foggy in my creativeness I will have a resource to help me get back on track.

Street Person Studio Shoot

Street Person Sample

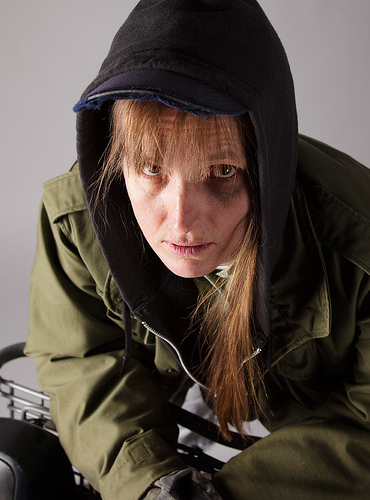
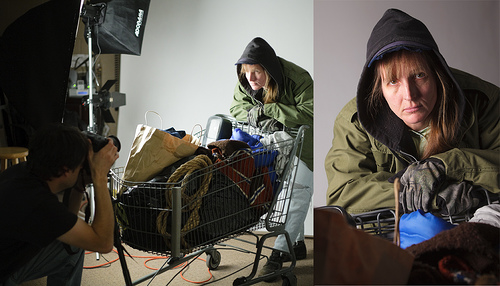
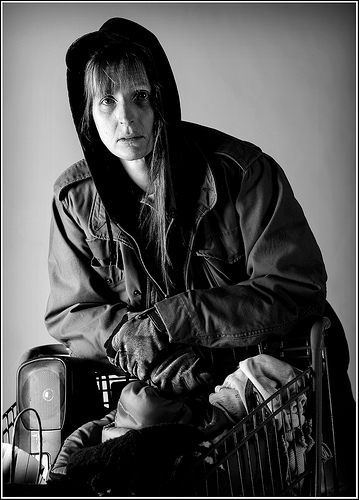
One of my recent stock photo shoots was a new take on an earlier theme, Street People. In the fall I did an outdoor shoot featuring two models dressed as a homeless couple. The series of images are beginning to see regular sales in my stock portfolio.

To follow up on the earlier shoot, I did a studio session featuring Diane again as a homeless looking woman. I positioned her with the shopping cart loaded with possessions and shot against a white background. Some of the images were photographed with the background lit to create an isolated-on-white look while on other images (like those featured here) I turned off the background lights to create a darker look.

Behind the Scenes - Street Person Studio Shoot

Given the bad news recently with the world’s economic health, I’m hoping that these stock images will be found useful for designers looking for a certain look. To see my complete “Street People” series of images on iStockphoto, click here.

Published: Working Nurse Magazine

]]>

…and another random find of my work in print. Not the most glamorous publication, but a cover nonetheless.


LeggNet’s Digital Capture
© Rich Legg, Inc. All rights reserved.

Everyone Needs a Jarvie in Their Life

]]>

One of the greatest things that becoming involved in a local photography group has contributed to my life is the friends I have made. When I sat down with Ann Torrence and Bryan Jones a year-and-a-half ago to organize what is now Photowalking Utah, I never dreamed of all of the truly good friends I would make through the group in the coming months.

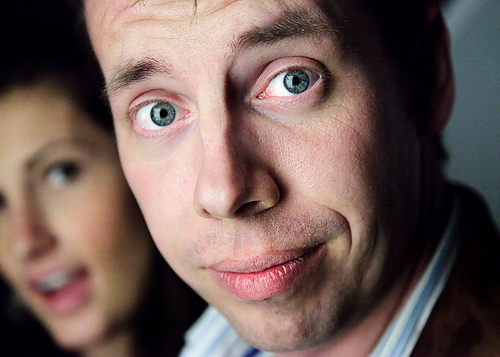
Today’s image is of one of those friends. Photowalking Utah regulars will immediately recognize the face of our pal, Scott Jarvie. He’s a kick-butt wedding photographer and one of the nicest guys you will ever meet. I first met Jarvie (it seems that’s what everyone calls him) last July when he came to the Fourth of July Photowalk. I immediately found out that he’s a live-and-breathe-photography-24-hours-a-day photographer. Calling it his passion would be an understatement.

Beyond the photography, Jarvie is simply a fun guy to hang around with. His unassuming manor and witty sense of humor make you want to have him in your group.

I don’t really have a major point to today’s post other than this – if you’re not involved with others who share your passion (photography or otherwise), you might just be missing out on having a Jarvie in your life. Find a group and get involved!

Oh, and one more note. It seems that when I wrote my blog post last week on Twitter & Photography, I picked up a lot of new followers on Twitter. Jarvie took note of this (we had been neck-and-neck with followers) and now feels a bit left behind. So, if you feel inclined, drop on over to http://twitter.com/jarvie and add him to your follow list. He’ll really appreciate it!

Canon 5D Mark II, Canon 24-105 f/4L lens – 1/100 second, f/4, ISO 6400

Labels:

Everyone Needs a Jarvie in Their Life

]]>

One of the greatest things that becoming involved in a local photography group has contributed to my life is the friends I have made. When I sat down with Ann Torrence and Bryan Jones a year-and-a-half ago to organize what is now Photowalking Utah, I never dreamed of all of the truly good friends I would make through the group in the coming months.

Today’s image is of one of those friends. Photowalking Utah regulars will immediately recognize the face of our pal, Scott Jarvie. He’s a kick-butt wedding photographer and one of the nicest guys you will ever meet. I first met Jarvie (it seems that’s what everyone calls him) last July when he came to the Fourth of July Photowalk. I immediately found out that he’s a live-and-breathe-photography-24-hours-a-day photographer. Calling it his passion would be an understatement.

Beyond the photography, Jarvie is simply a fun guy to hang around with. His unassuming manor and witty sense of humor make you want to have him in your group.

I don’t really have a major point to today’s post other than this – if you’re not involved with others who share your passion (photography or otherwise), you might just be missing out on having a Jarvie in your life. Find a group and get involved!

Oh, and one more note. It seems that when I wrote my blog post last week on Twitter & Photography, I picked up a lot of new followers on Twitter. Jarvie took note of this (we had been neck-and-neck with followers) and now feels a bit left behind. So, if you feel inclined, drop on over to http://twitter.com/jarvie and add him to your follow list. He’ll really appreciate it!

Canon 5D Mark II, Canon 24-105 f/4L lens – 1/100 second, f/4, ISO 6400


LeggNet’s Digital Capture
© Rich Legg, Inc. All rights reserved.

Despair

]]>

Canon 5D Mark II, Canon 24-105 f/4L lens – 1/125 second, f/6.3, ISO 100


LeggNet’s Digital Capture
© Rich Legg, Inc. All rights reserved.

Kenneth Linge, Photog Instructor

]]>

When I was writing last week’s blog post about using a monopod, I used my friend Kenneth Linge as an example. This got me thinking that I hadn’t talked to him in awhile so I dialed him up. It was great to catch up and hear about what’s been going on with his studio and photography school.

After chatting with him, I thought it’d be a good time to give the teaching side of his business a plug. I have taken numerous classes from Kenneth and not a photo shoot goes by that I don’t put to use some of the lighting techniques I learned from him. The biggest thing he taught me is to “see the light”. While I don’t think I will ever perfect this skill, I have noticeably come a long way from where I was just a few short years ago.

With that being said, here are some upcoming classes being offered by Kenneth that I would recommend any photographer looking to expand their skills should look into:

– Photographing People, Part II – February 7, 2009
– Photographing People, Part I – March 28, 2009
– The Wedding School – March 23 – 25, 2009

For details on any of these classes, visit Kenneth’s website at kennethlinge.com and click on the “Seminars” link.