February 22nd, 2008
Photoshop Tip: An Alternative to Brightness/Contrast
When editing my images in Photoshop, I always begin with a couple simple adjustment steps before venturing into the more advanced edits. Since I shoot most of my shots around 1/3 f/stop underexposed (to preserve highlights), the first simple editing step I do is an adjustment to the brightness/contrast of the image. But guess what? I don’t use the brightness/contrast adjustment to do this. I use LEVELS.
By using the LEVELS adjustment, I am able to fine tune the brightness of the image while causing very little damage. This is extremely important in my stock images since they have to go through a rigorous inspection process to be included in my portfolio. Here are the simple steps I use:
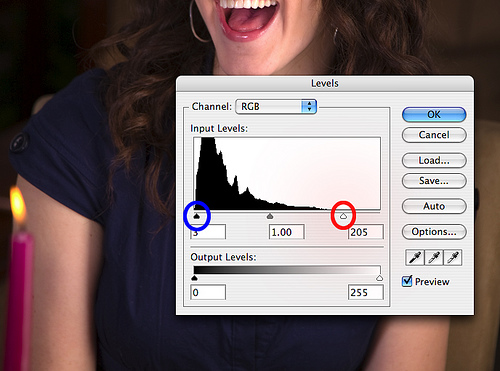
1. Create a new LEVELS adjust layer.
2. Slide the upper clipping adjustment (red circle below) down until it is just above the upper end of the histogram.
3. Slide the lower clipping adjustment (blue circle below) up until it is just below the lower end of the histogram.
4. Inspect image and fine tune the adjustments as needed
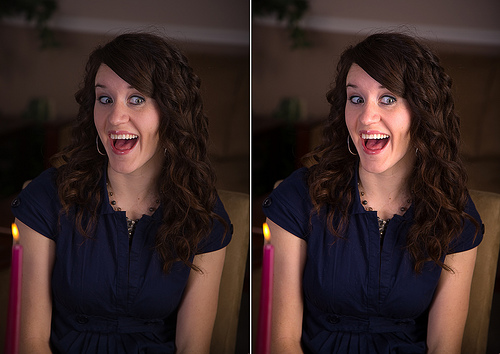
As you can see in today’s featured image, the sample on the right ‘pops’ quite a bit more than the original on the left. This was done strictly using the levels adjustment. Once I complete this step, I then go on and finish my editing of the image.
If you haven’t tried adjusting brightness/contrast this way, give it a shot and see how well it works for you.
Canon 5D, Canon 24-105 f/4L lens – 1/160 second, f/4.5, ISO 50


