An Experiment in Post-Processing

]]>

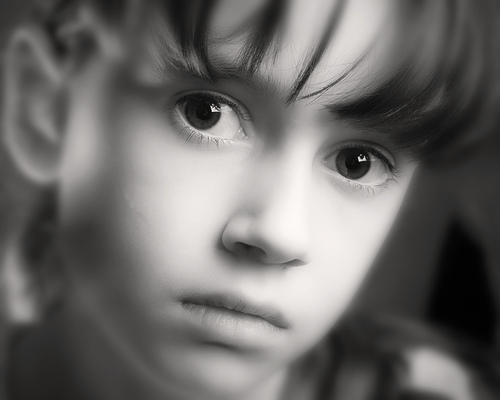
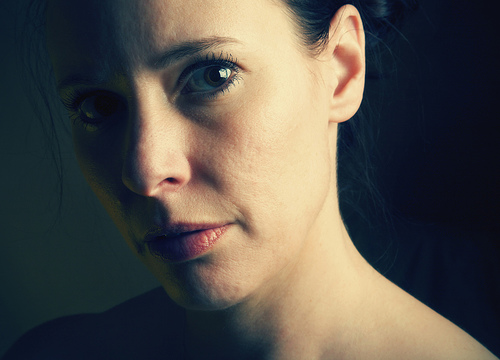
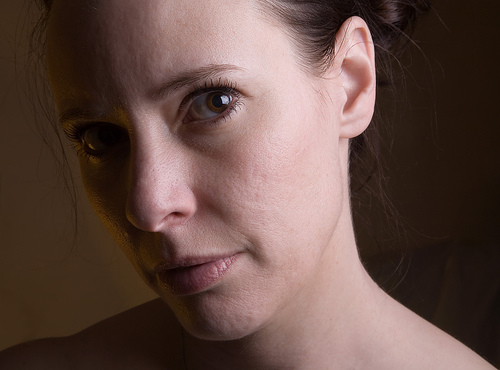
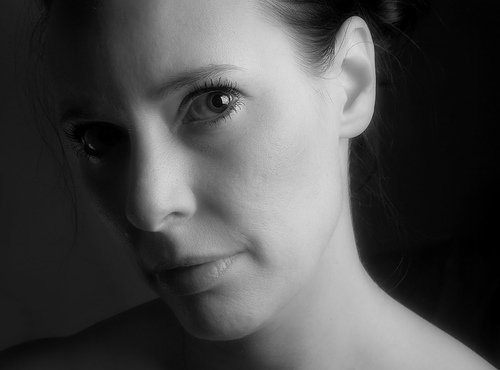
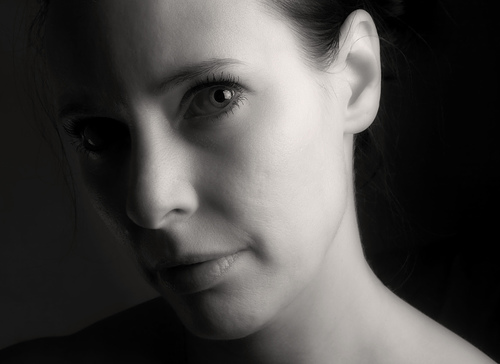
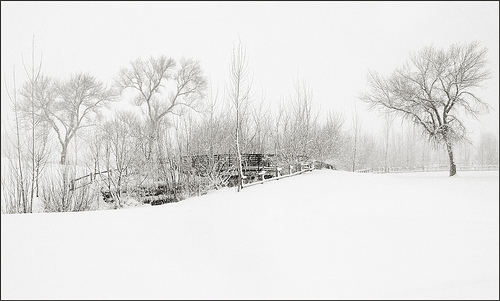
This image is the result of some recent post-processing experimentation. I had seen a similar style applied to portraits and sought to create the effect myself. I wanted the eyes to remain fairly sharp while having much of the remaining image appear almost animated with a blurred glow. My workflow on the shot was mostly trial and error. The resulting photo came very close to what I desired.

Now, if I could only remember the steps I took to create it… 🙂

Canon 5D, Canon 24-105 f/4L IS lens – 1/125 second, f/22, ISO 50

Labels: , ,

The Rule of Thirds – Simplified

]]>

One of the first things to get emphasized to novice photographers by those who claim to be more knowledgeable is to “Follow the rule of thirds”. While this is sound advice, the phrase can be confusing. Let’s take a few moments and simplify this “Rule” so that we all can use it when making captures regardless of our experience.

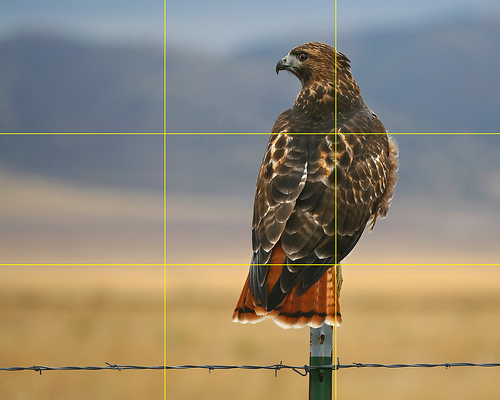
Simply put, the Rule of Thirds is a tool to use when composing a photograph. The way I like to instruct it is this: Place four evenly spaced imaginary lines on your image, 2 horizontal and 2 vertical. I have even further simplified it to some (mainly children) by suggesting that they imagine a “tic-tac-toe” board over the photo. Once you can picture the lines, place your subject very near a line and, if possible, arrange the main focal point of the subject where two of the lines intersect. In doing so, you increase the odds that you will create a photo that is visually appealing to how the human mind interprets the image.

For today’s image (above) I took one of my favorite hawk photos and added yellow lines to help illustrate the process. When composing the photo I placed the bird on the right most vertical line. The main focal point of the bird is the eyes and beak, but I found that if I placed them on an intersection the photo was a bit bottom heavy. Instead, I placed the bird’s body where the two nearest lines meet. Doing so creates a pleasing composition since the birds head is close enough to an intersection to take advantage of the rule. Had I taken the same photo and composed it differently by placing the bird in the center of the image, the result would not be as pleasing.

Since I’m on the subject of image composition, the image above demonstrates another “Rule” that can be followed to make a shot more pleasing. In most situations it is desired to have the subject looking toward the center of the image. If the bird were looking to the right rather than the left, the photo would not be as pleasing to the viewer’s eye. In fact, to many people it would just “feel uncomfortable”. The same can be said for motion. If the photo is of a subject in motion, compose it so it is moving toward the image’s center.

Lastly, remember the old phrase “Rules are made to be broken”. There are plenty of times when a more pleasing image can be created by breaking the Rule of Thirds rather than following it. Try using this rule as a guideline and see if your work improves.

Canon 30D, Canon 70-200 f/4L lens – 1/500 second, f/4, ISO 100


LeggNet’s Digital Capture
© Rich Legg, Inc. All rights reserved.


Deer Creek Sunset

]]>

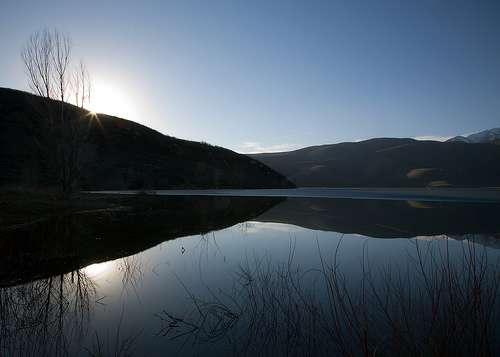
A beautiful sunset over Deer Creek Reservoir in Northern Utah. If you look closely, you can see that the far side of the reservoir is still covered with ice.

Canon 5D, Canon 24-105 f/4L IS lens – 1/20 second, f/22, ISO 50

Missionary Shoes

]]>

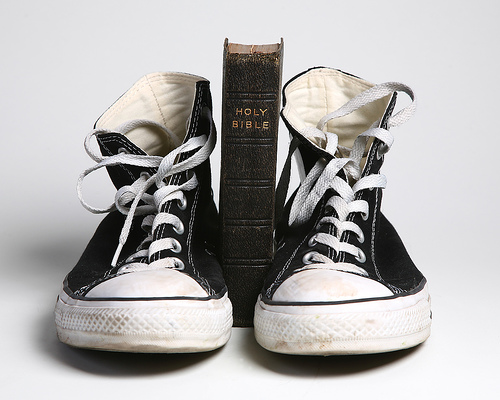
I’ve been shooting quite a bit of stock work in my spare time lately for iStockphoto. When creating stock photos, I try and ask myself “in what possible applications can this shot be used?”. If I can’t think of a use for a photo, chances are that not many other people will either and it won’t sell. For today’s featured capture, I received an answer.

My friend Bryan from the This Scribbler’s Preoccupation blog emailed me last night to inquire about using the shot (or one similar) for a new church that he is involved with. He saw the photo on iStock and felt that it fits nicely with the message the new church is wishing to convey. This is very close to what I imagined as a use when I set up the photo.

That’s cool…!

To see (and possibly purchase) this image on iStockphoto, click here.

Canon 5D, Canon 24-105 f/4L IS lens – 1/60 second, f/11, ISO 50

Labels:

Lowlight Photography Tips

]]>

Many people believe that when the lights go low the best way to capture a shot is by utilizing the camera’s flash. While I’m a frequent user of strobes in my photography (mainly in studio environments), my first instinct in a low-light scene is to go flashless. I find that by using available light the scene can be captured in a more dramatic fashion. Here are some tips I use in photographing in low light:

Bump That ISO Increasing the camera’s ISO setting will allow you to handhold shots in lower light situations. The caveat to this is the increase of digital noise into the image. I would rather deal with noise in a sharp image than deal with a blurred shot due to camera shake. I use Neat Image noise reduction software on my high ISO shots and find that it greatly improves the images.

How Low Can You Go (with the aperture) Find your fastest lens and use it. The lower the f-stop the faster the lens. Canon sells a relatively inexpensive lens that works great in low light, the 50mm f/1.8. This lens can be picked up around $75 and will give you the freedom to shoot in much darker settings than a stock 18-55 kit lens.

Burst It Put your camera in continuous mode and shoot three to five frame bursts. By doing so you will greatly increase the chances that one of the shots has less camera shake and thus less motion blur. You will be amazed at how effective this trick can be in low light settings.

IS is What it Is….Great! Image stabilization has come on strong over the past few years. Lenses with this technology are coming down in price and can offer you much more freedom when it comes to dim shooting scenarios. In shooting with an IS lens compared to a non-IS lens, I find that I can routinely shoot 3-4 stops slower and still have good results. This equates to shooting with a shutter speed of 1/125 a second on a non-IS lens versus 1/15 or even 1/8 of a second on an IS lens, a very big improvement. Many point-and-shoot cameras are also adding this feature. My pocket sized Canon G7 has it and it is extremely helpful.

Three Legs are Better Than Two Find something to stabilize your camera on to eliminate hand shake. The old standby of a tripod is a great choice, but when one is not available look around for something else. Many photographers carry a beanbag in their kit for this very purpose. There have been numerous wonderful sunset photos taken with professional quality results by a camera resting on a beanbag atop a car hood. Another tip I have heard is to carry a few feet of cord with a loop on one end and a threaded mounting screw on the other. Use this to stabilize your camera by standing on the loop, attaching the other end of the cord to the camera’s tripod mount, and then pulling it taught.

Go Wide and Get In Close By shooting with a wide angle lens you minimize the effect of camera movement on the image, thus reducing motion blur. Put away that telephoto glass when it gets dark and shoot with your widest angle lens. For many folks, the kit lens that came with their SLR will be the choice. If this is the case, don’t be tempted to zoom in – keep it at 18mm.

If You Must Flash, Bounce It If you find that you absolutely must resort to using a flash, bounce that light. By bouncing your light off of a light colored ceiling or wall you will eliminate that blown out two dimensional look that straight on flash causes. Bouncing can be difficult (if not nearly impossible) with a cameras on-board flash, but it can be done with a little ingenuity. I have seen many photographers tape or rubberband a piece of white paper in front of their on-board strobe unit to diffuse and bounce the light. Give it a shot.

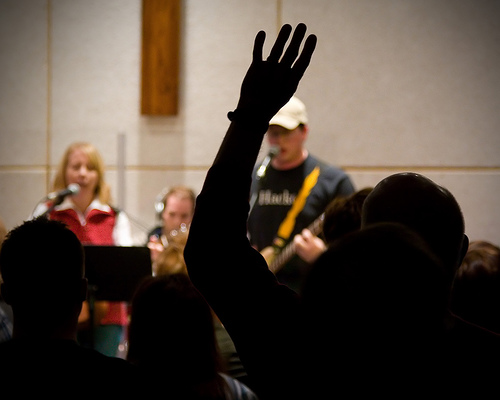
The image I have featured on this post was taken in a very dark church during a worship service. I used my Image Stabilized lens combined with a high ISO and slow shutter speed to capture the scene. Had I made this same shot with a flash, the band in the background would be completely dark and all I would have had was a blown out shot of a bald guy raising his hand. By choosing to go strobe-less, it made for a much more interesting capture.

Please share any low-light photography tips you use in shooting when the lights go down.

Canon 30D, Canon 24-105 f/4L IS lens – 1/25 second, f/4, ISO 1600

Labels:

Consequence

]]>

con – se – quence [kon-si-kwens, -kwuh ns]
noun

1. the effect, result, or outcome of something occurring earlier: the police action was a consequence of the teen’s vandalism.
2. an act or instance of following something as an effect, result, or outcome.
3. the conclusion reached by a line of reasoning; inference.
4. importance or significance: a matter of no consequence.
5. importance in rank or position; distinction: a man of great consequence in art.

[Origin: 1350–1400; ME ( AF) L consequentia.]

Cowboy Poet

]]>

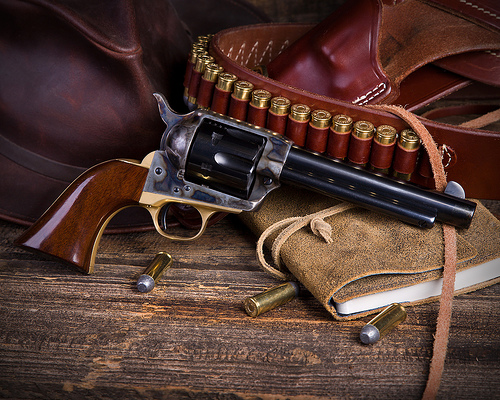
I was shooting some captures today for my stock photo portfolio and I invited a friend over to watch. He’s a recent convert from film to digital SLR’s (albeit Nikon!) and wanted to try my studio lights with his D80. We were planning on shooting some photos involving smoke and guns so he brought along his 45 Colt single action revolver.

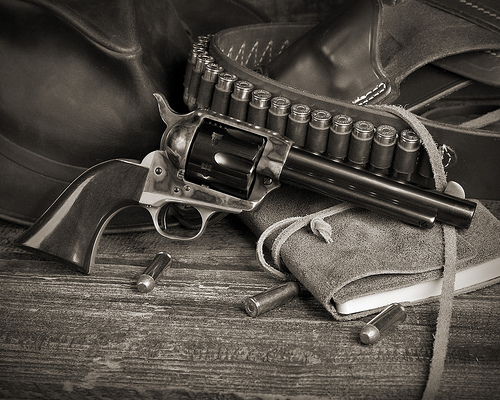
While we were shooting he told me about a western style photo he saw on a website and suggested that we attempt to make a similar capture sometime in the future. That’s all the motivation I needed. We rounded up the props and put together the shot. While the color version works well, I also like this version in black & white sepia with a bit of film grain added.

Cowboy Poet (grainy b&w)

Canon 5D, Canon 24-105 f/4L lens – 1/60 second, f/11, ISO 50

Labels:

Capital Building

]]>

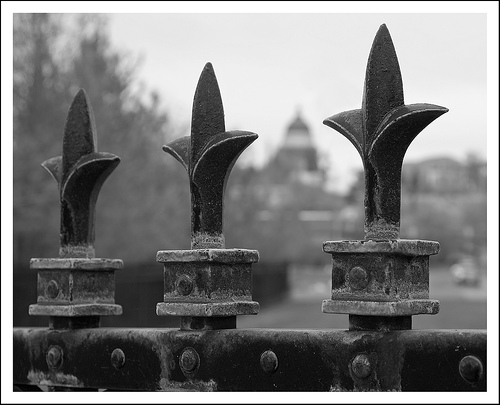
Canon 30D, Canon 24-105 f/4L IS lens – 1/125 second, f/6.3, ISO 100

Old House on a Hill

]]>

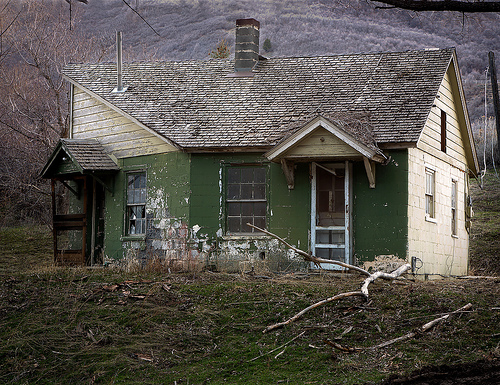
A quaint little fixer-upper. Great view. Just needs a little TNT TLC.

Canon 5D, Canon 24-105 f/4L IS lens – 1.3 seconds, f/11, ISO 50

Rainy Approach

]]>

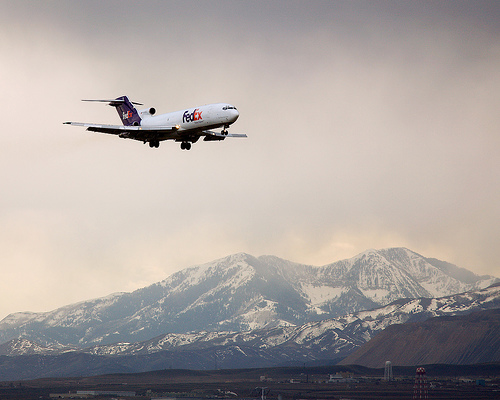
This photograph of a FedEx owned Boeing 727 on approach was taken at Salt Lake City International Airport. A storm was just beginning its descent upon Northern Utah as I made this capture. The afternoon light along with the darkening storm clouds made for what I believe to be an interesting airplane shot.

Canon 5D, Canon 70-200 f/4L lens with 1.4x extender – 1/320 second, f/5.6, ISO 50

Reservoir in Black & White

]]>

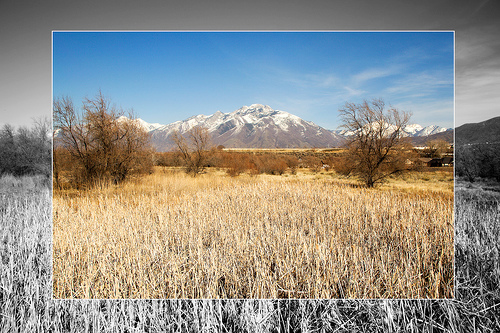
Northern Utah enjoyed some springlike weather this past weekend with daytime highs in the seventies. I took advantage of this unseasonably warm weather on Sunday and headed up into the mountains to capture some scenery shots.

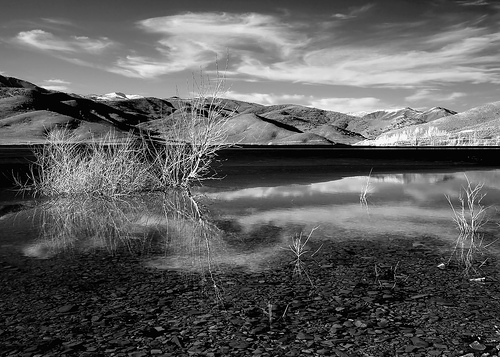
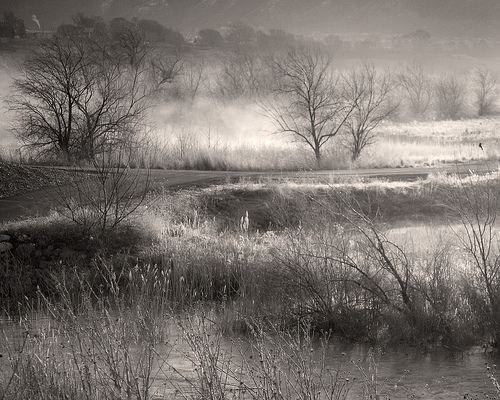
This aggressively filtered black & white image was taken at Deer Creek Reservoir shortly before sunset. The reservoir was partially frozen and the ice created an interesting near-black layer within the photo.

For the process of converting this shot to black & white, I used the Channel Mixer tool in Photoshop CS2. To enhance the dramatic dark tones of the scene, I bumped the red filter to its maximum setting of +200% and then adjusted the green and blue filters to a combined amount equal to -100%. One caveat of this technique is the ‘digital noise’ that the maxed out red channel introduces. I took care of this with a Photoshop plug-in called Neat Image.

This is just one method I use in converting an image to black & white. How do you do your b&w conversions? Please feel free to share your tricks.

Canon 5D, Canon 24-105 f/4L IS lens – 1/40 second, f/11, ISO 50

Feels Like Spring

]]>

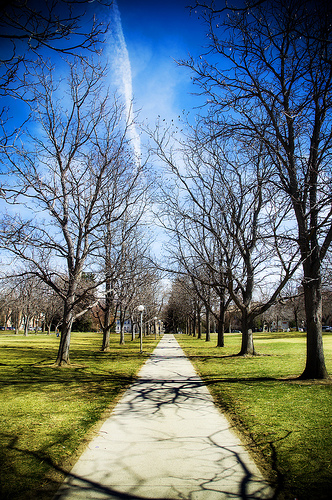
Feels Like Spring, photographed at the University of Utah in Salt Lake City.

Canon 5D, Canon 24-105 f/4L IS lens – 1/200 second, f/6.3, ISO 50

Creating a Cross-Processed look in Photoshop

]]>

Sometimes an “Oops!” can give you an unexpected good result. This is the case with Cross Processing.

“What is this Cross Processing you speak of?” you ask. Simply put, it is the processing of film in chemicals that are not intended for the type of film being processed. An example is developing slide film (E-6) in chemicals intended for negative film (C-41), or vice versa. I can imagine the first photographer’s reaction upon discovering that he (or she) mistakenly created this process when looking at their developed film. The resulting effect that this gives an image can vary quite a bit but one common result is blown-out highlights and colors that just “aren’t right”.

In seeking to create a cross-processed effect in Photoshop, it took a short trip to Google. The search resulted in a couple of tutorials on the subject. The easiest instruction set I found was located at PhotshopSupport.com. The tutorial there was easy to follow and included screen shots of the Photoshop steps. I created the image of Michelle in this post using their formula. Notice the yellow-green tint to the skin tone and the bright color of the lips. The effect can be a bit surreal.
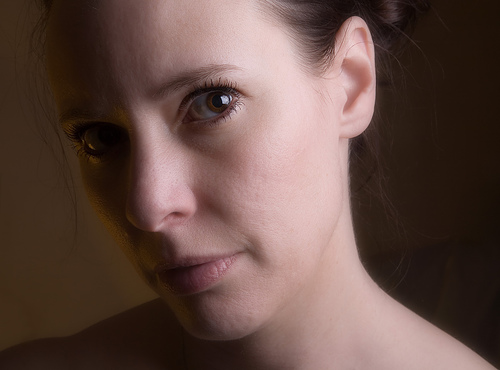
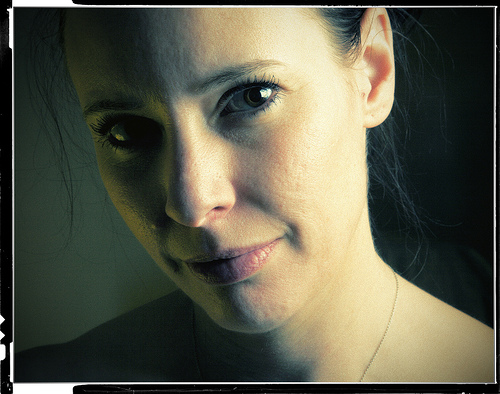
Here is another example of the process on a similar shot. On this photo, I added a film border as recommended in the tutorial to add to the effect.
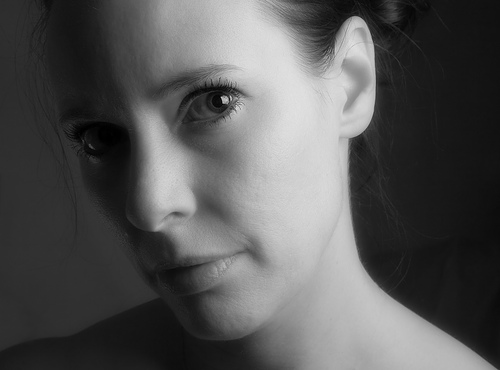
Cross Processed Portrait

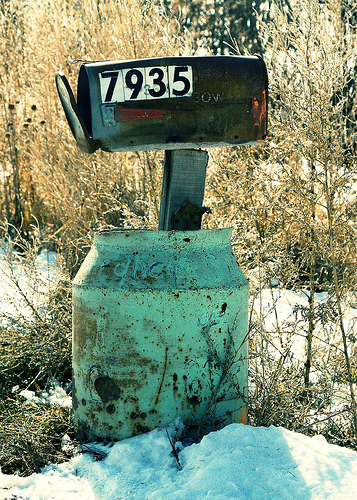
And finally, here is one more example applied to an image of an old mailbox.

Cross Processed Mailbox

If you have given Cross-Processing a try (either with film or digital), please share you results – I’d love to see them.

Cross Processing Info on the Web

On Wikipedia
PhotoshopSupport.com
The Wonders of Cross-Processing

Images 1 & 2: Canon 5D, Canon 24-105 f/4L IS lens – 1/125 second, f/22, ISO 50
Image 3: Canon 30D, Canon 24-105 f/4L IS lens – 1/320 second, f/9, ISO 100

Labels: ,

Misty Valley

]]>

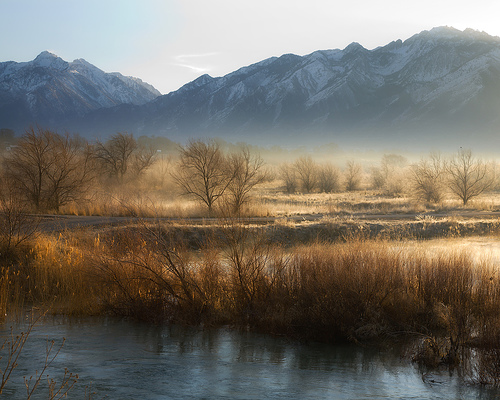
Misty Valley, photographed in Draper, Utah.

Canon 5D, Canon 24-105 f/4L IS lens – 1/200 second, f/4, ISO 50

Why not a Digital Camera?

]]>

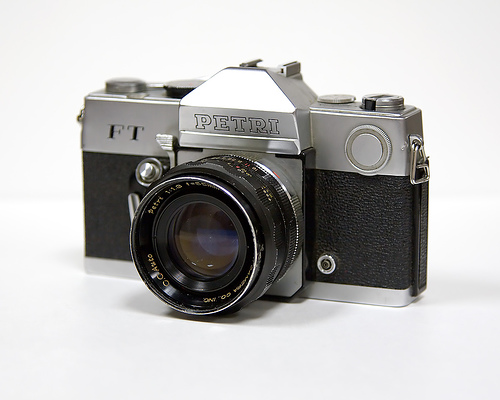
I’ve been asked why I put a film camera (and an old clunky one at that) on the newly redesigned masthead of LeggNet’s Digital Capture .

The first reason is very simple. I had this photo in my inventory and didn’t have a similar shot of a digital SLR. It was an easy capture to use until I could shoot a picture of a digital camera.

The second reason follows along the lines of yesterday’s nostalgic post. This particular camera is a PETRI FT. This is the same model as my very first SLR. I received it secondhand when I was in the eighth grade. I shot many rolls of film through it in the year I used it, before upgrading to a Pentax MX. This is not the actual camera, but one I picked up off of eBay for $10. It serves quite well in its roll of an office decoration.

I’ll be replacing the camera image up top with a shot of a digital SLR very soon, but for now – film it is.

Canon 30D, Canon 24-105 f/4L IS lens – 1/25 second, f/4, ISO 100

TRI-X Remembered

]]>

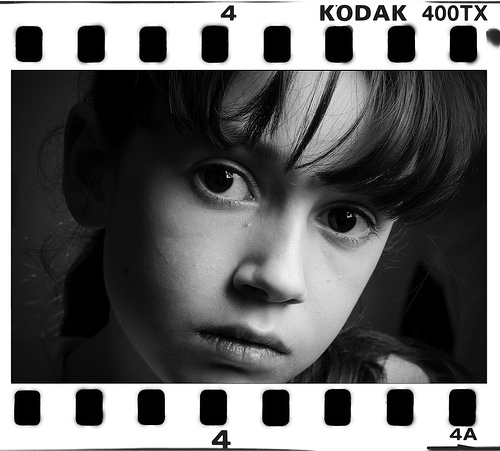
Kodak’s TRI-X black & white film holds a special place in my memory. At 14 years old, this was the first black & white film that I shot and the first that I developed myself. When I took PHOTOGRAPHY I at Chugiak High School we had two choices of film to choose from, PLUS-X and TRI-X. I opted for TRI-X since it was rated at ASA 400 (pre-ISO in those days) and Plus-X was only rated at ASA 125. I wanted the extra low-light ability gained by the faster speed.
As my high school photographic career advanced onto the yearbook and newspaper staff, TRI-X went along for the ride. I routinely bumped the speed to ASA 1600 for the low-light ability it provided. The extra grain was tolerated as a way of getting the shot.

I left TRI-X behind after high school and graduated into shooting roll upon roll of Kodachrome 120 while working as a studio photographer. I didn’t shoot black & white again until a few years later in college, but by then I was more interested in quality and “tighter grain” so I opted for PLUS-X in my Mamiya 645.

Today’s capture was created in Photoshop to give the illusion of TRI-X film. The black & white image of Sarah was shot digitally. I then blended a scan of actual film grain onto the image and then placed it on the scanned TRI-X film negative.

This sure reminds me of my time spent in the darkroom 20+ years ago, but it’s just not quite the same.

Canon 5D, Canon 24-105 f/4L IS lens – 1/125 second, f/22, ISO 100

Labels: ,

Salt Palace

]]>

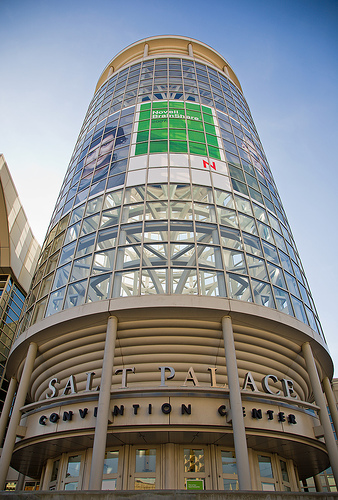
The Salt Palace. Taken in Salt Lake City, Utah.

Canon 5D, Canon 24-105 f/4L lens – 1/80 second, f/6.3, ISO 50


LeggNet’s Digital Capture
© Rich Legg, Inc. All rights reserved.


Free Online Mosaic Generator

]]>

Today’s image is a mosaic created from an image of colored pencils I took last summer. I made it with a free tool I came across recently on the web. The tool creates a mosaic of your uploaded image from photos it retrieves from Flickr. While I’m not sure if this violates the API rules for Flickr since the photos used in the creation aren’t attributed to their original photographer, it sure is cool.

Try it out for yourself at imagemosaicgenerator.click42.com.

Labels:

Digital Camera Sensor Sizes Explained

]]>

I recently began shooting with a Canon 5D, moving up from the 30D body that I had been using. The major difference between the 5D and the 30D is that the 5D uses a full-frame sensor as opposed to the 30D’s APS-C sensor. Terms like “full-frame” and “APS-C” can be a bit confusing, so hopefully I can shed a little light on the subject with today’s post.

In digital cameras there is a sensor in place where the film used to be in film cameras. The light passing through the camera’s lens projects the image onto this sensor which then captures it digitally and records the image to memory. These sensors vary in size in both the number of pixels they contain (megapixels) and their physical dimension. Most digital SLR (single lens reflex) cameras bear a strong physical resemblance to the 35mm SLR’s we shot in decades past. But a difference between many of these cameras is the size of their sensor.

Taking Canon’s DSLR line for example, several of their cameras have an APS-C sensor which is smaller than a frame of 35mm film. The 30D model (a camera I use) has this size of sensor. Since the sensor is smaller it only records a portion of the image the lens is projecting. This results in a “zoomed in” effect on the captured image. On cameras with this size sensor, a photographer has to take the focal length of their lens and multiply it by 1.6 to see what the equivalent focal length is. My new 5D body, on the other hand, has a sensor that is the same size as a 35mm frame of film and therefore the equivalent focal length of the lens remains the same.

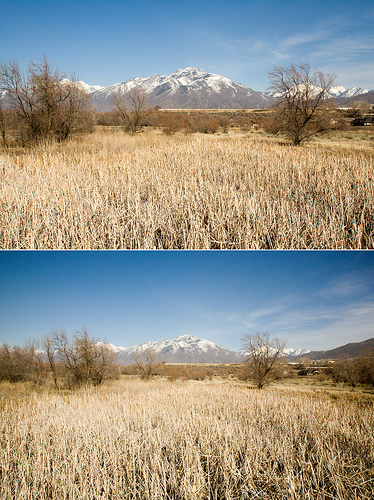
In the image above I took two pictures from the exact same location with a 30D and a 5D. I used the same lens (Canon 24-105 f/4L IS) on both photos at a focal length of 24mm. By overlaying 100% size images on top of each other you can see how much more of the scene is captured by the 5D’s full-frame sensor (the color 30D image is on top of the black & white 5D image).

Here is another example of the two images next to each other:

30D vs 5D comparison
Top image taken with Canon 30D – Bottom image taken with Canon 5D

Notice how much more of the scene is captured with the 5D in the bottom image? The lens has a significantly greater wide-angle field of view. This is particularly helpful in landscape photography and architectural captures (not to mention my industry of real estate). The 1.6 crop factor sensor on the other hand can be a benefit when a photographer seeks added ‘reach’ for a lens. I recently used a 300mm lens with my 30D to photograph eagles and hawks in Farmington Utah. By putting this lens on the 1.6 crop camera, it became an equivalent of 480mm – a nice improvement.

In addition to the larger physical size of the sensor, the total amount of pixels is obviously different between the two. The 30D records an image of 3504 x 2336 pixels (8.2 megapixel) while the 5D records a 4368 x 2912 pixel (12.8 megapixel) image. This difference gives a noticeable quality boost to the 5D.

Both of these sensor types have their advantages and their applications. For the type of photography I shoot, I prefer the wide view and image quality of the 5D. The exception to this is when I need the added reach of the APS-C equipped 30D.

Which do you prefer?

Canon 5D, Canon 24-105 f/4L IS lens – 1/125 second, f/16, ISO 100 &
Canon 30D, Canon 24-105 f/4L IS lens – 1/125 second, f/16, ISO 100


LeggNet’s Digital Capture
© Rich Legg, Inc. All rights reserved.


River Bottom

]]>

River Bottom, captured in Draper Utah.

Canon 5D, Canon 24-105 f/4L lens – 1/50 second, f/8, ISO 50

Free Online Mosaic Generator

]]>

Today’s image is a mosaic created from an image of colored pencils I took last summer. I made it with a free tool I came across recently on the web. The tool creates a mosaic of your uploaded image from photos it retrieves from Flickr. While I’m not sure if this violates the API rules for Flickr since the photos used in the creation aren’t attributed to their original photographer, it sure is cool.

Try it out for yourself at imagemosaicgenerator.click42.com.


LeggNet’s Digital Capture
© Rich Legg, Inc. All rights reserved.


My Post Processing Technique

]]>

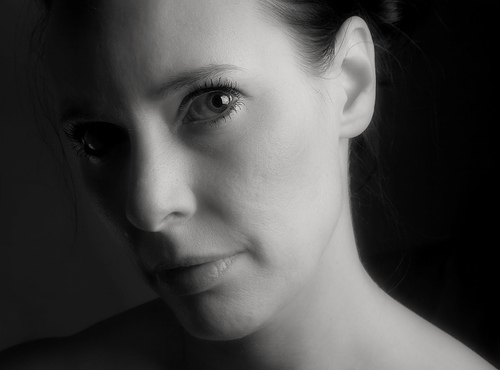
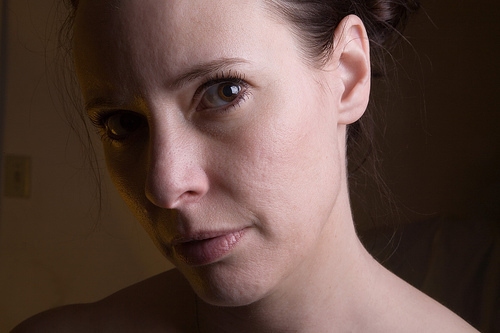
I have received a couple of questions about my technique in processing images. To assist in showing how I do it, I thought I’d detail the steps I took in processing a photo such as the one posted yesterday. This photo was taken on the spur-of-the-moment when Michelle walked by. I was playing with a soft-box and asked her to stop and pose for the shot. I am self taught in all of my post-processing so I am sure that the ‘pros’ have better techniques, but this is what works for me.

ORIGINAL IMAGE

Here is the original image after doing the RAW conversion from the camera file:

Original

STEP ONE

I use the CLONE tool to remove her necklace, earring holes, skin blemishes and background distractions.

Step 1

STEP TWO

I apply noise reduction, slight sharpening (via Unsharp Mask) and crop the image.

Step 2

STEP THREE

I create a new layer from the background layer. I apply 48 pixels of GAUSSIAN BLUR to the newly created layer. I blend the new layer at 35% and mask the eyes to keep them sharp.

Step 3

STEP FOUR

I create a CHANNEL MIXER layer and set to monochrome (70% red, 30% blue). Adjust brightness -5

Step 4

STEP FIVE

I merge my background layers, then create a duplicate of the background. I adjust brightness to -25 then mask out face (this darkens the background).

Step 5

STEP SIX – COMPLETE

I merge the background layers then create a new copy of background. I apply 1.5 pixels of GAUSSIAN BLUR (smooth the skin more). I then mask out eyes to keep them sharp. Add photo filter (Sepia, 10%), Burn/dodge eye to make it more dramatic

Step 6 - Complete

As I said earlier, this is the process that works for me. I find as I continue to advance in post-processing that I am constantly finding new and improved techniques. If you’ve got some pointers, please don’t hesitate to share.

Canon 5D, Canon 24-105 f/4L – 1/125 second, f/22, ISO 100


LeggNet’s Digital Capture
© Rich Legg, Inc. All rights reserved.


Michelle

]]>

Friend (and frequent blog commenter) Mary pointed out recently that I rarely feature my wife on the blog. In reviewing the past several month’s entries I realized that she is correct. Let’s begin remedying that today.

Here is the beautiful Mrs. Legg.

Canon 5D, Canon 24-105 f/4L – 1/125 second, f/22, ISO 100

p.s. Don’t forget that Daylight Savings Time starts three weeks earlier this year – that means we Spring Forward tonight. Don’t worry, you’ll get that lost hour back in November :)


LeggNet’s Digital Capture
© Rich Legg, Inc. All rights reserved.


Bridge in Winter

]]>

Bridge in Winter taken in Draper, Utah.

Canon 30D, Canon 24-105 f/4L – 1/100 second, f/14, ISO 100

Tastes Like Chicken?

]]>

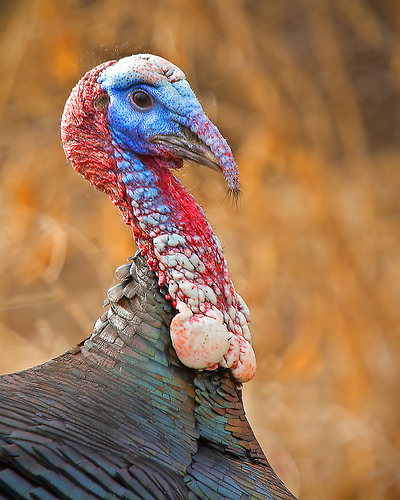
Did you ever stop and truly examine how odd a turkey looks? I came across this guy standing in the middle of a rural road. It wasn’t until I viewed the image full size that I truly appreciated the uniqueness of the bird. From the hair on his head and beak to the bluish color to the texture and bulges of his throat – this is one strange looking creature.

Canon 30D, Canon 70-200 f/4L with 1.4 extender – 1/200 second, f/5.6, ISO 100

Buddy Dog

]]>

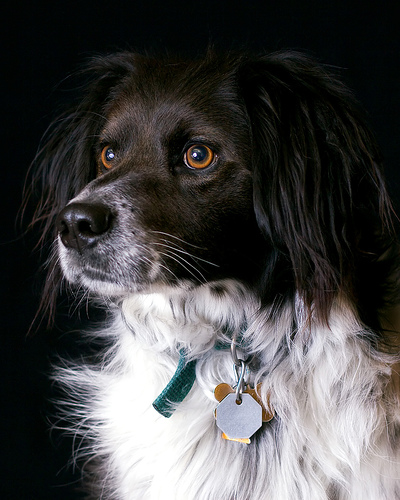
Canon 30D, Canon 50mm f/1.8 – 1/60 second, f/3.2, ISO 100

Pink Shoes and Photoshop

]]>

I have had this idea for a photo bouncing around (pun intended) in my head for awhile. My oldest daughter was very willing to model for the shot, especially since it involved a new pair of pink shoes.

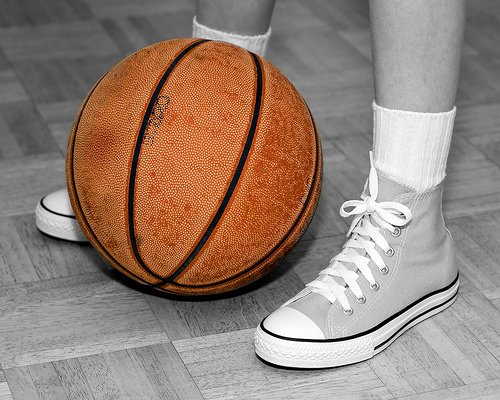
I am generally not a huge fan of selective colorization, but in this case I like the result. There are several methods of doing this effect. The one I use most often is to convert the capture to monochrome using a [CHANNEL MIXER] layer in Photoshop. I then add a [VECTOR MASK] and paint out the area of the photograph that I want to remain in color. This is a quick and easy method that provides good results.

Here’s another example of this process applied to a different shot taken at the same time:

Game Ball

If you’ve done some colorized shots, please share them with me. I’d love to see them.

Canon 30D, Canon 50mm f/1.8 lens – 1/125 second, f/2.5, ISO 100
Canon 430EX strobe with Lightsphere attached

Labels: ,

Burning Out at 5 frames per second

]]>

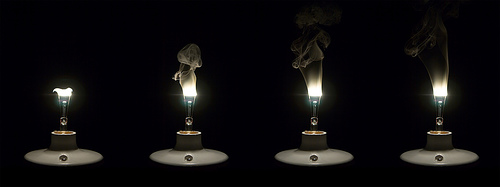
Here’s a sequence of captures of that popular lightbulb in the process of flaming out. Shot #2 is the one that hit it big on Digg.

Canon 30D, Canon 24-105 f/4L lens – 1/640 second, f/4, ISO 100

Relief from yesterday’s Clash

]]>

Wow, did the color in yesterday’s post clash with the rest of the page or what? If you missed it, click here and see for yourself. Yeesh, what was I thinking with that post? Well as a relief from that blogging faux pas I have posted an image that will hopefully be better suited for its webpage surroundings.

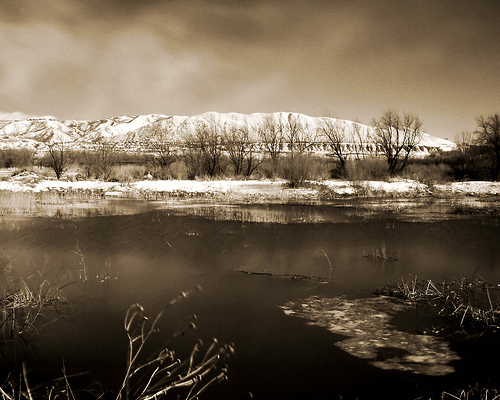
As I mentioned yesterday, I picked up an R72 infrared filter to experiment with. This filter is so dark red that it is nearly black. I’m not an expert in infrared technology, but from what I have read this filter cuts out much of the visible light we see with our naked eye and just lets in the infrared. This can result in very dramatic black & white photographs.

So far I haven’t been overly impressed with my results, but I really need to do some more trials. This particular shot was made with the filter on my lens. Even though it was a bright sunny day, due to the density of the filter this capture required a 30 second shutter speed.

Canon 30D, Canon 24-105 f/4L lens – 30 Seconds, f/22, ISO 100

Hot and Cold

]]>

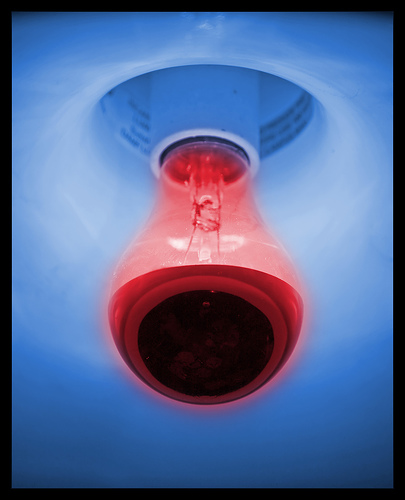
The weather’s been crummy lately so I haven’t done much photography. With a lack of ‘new shots’ to select from, I was browsing through my February archives last night looking for a photo that I might have overlooked (I usually only process a low percentage of the shots I take).

I came across this fairly plain image of a lightbulb taken on Valentines Day at the Texas Roadhouse restaurant. While the family watched American Idol, I tried different types of processing on the photo. The reflective globe of the bulb is what attracted me to make the shot, but ultimately I opted to downplay that part of the object. Instead, three hue/saturation layers later (along with vector masks) and this is the result.

Now, if the weather would only clear up so I can experiment on some black & white scenery captures with the IR filter I recently purchased.

Canon 30D, Canon 24-105 f/4L lens – 1/50 second, f/4, ISO 100

Labels:

Snowy Tracks

]]>

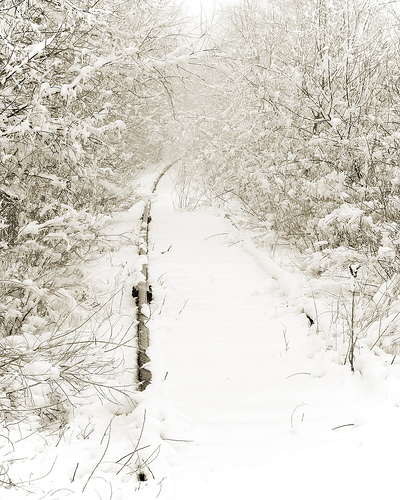
Snowy Tracks photographed on a winter day in Draper, Utah.

Canon 30D, Canon 24-105 f/4L lens – 1/80 second, f/14, ISO 100