February 22nd, 2007
How to: High Speed Splash Photography
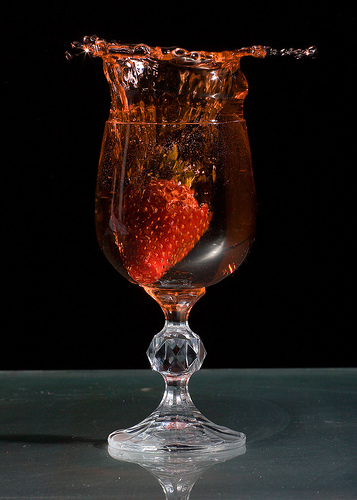
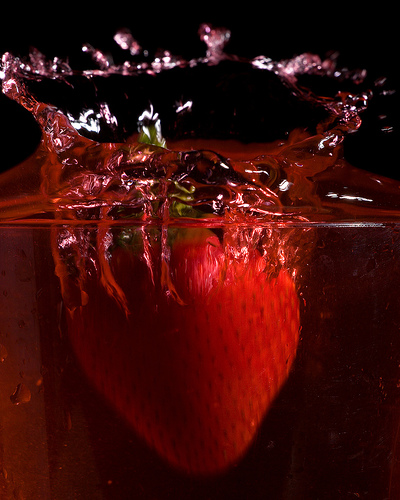
Yesterday I posted some shots of a strawberry splashing into a drink with a brief explanation of how I did the shot (see the post here). I was really surprised at the amount of email I received asking for more information on how I created the shots. To answer these questions, here is a more detailed explanation of how I created the shots.
Lighting
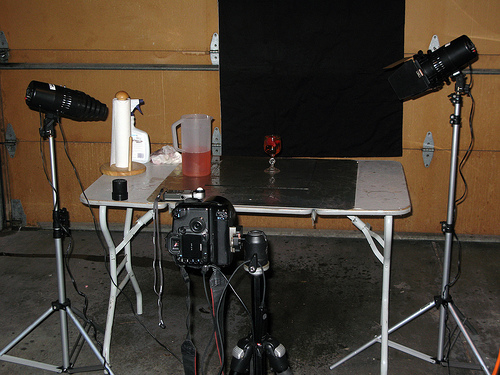
I use relatively inexpensive studio lights (I purchased a two light set from Adorama for under $300). These lights are fairly low power (guide # 100) but work well on close in shots. Each of the shots was made with one light placed at approximately 85 degrees from the camera. I fire the lights with a sync cable connected to my Canon 30D. If you are using a camera that doesn’t have a sync cable port (Canon Rebel for example), you can fire the lights using a hotshoe sync adapter. This relatively inexpensive piece fits on the camera hotshoe and has a place to plug your lighting into. You can also fire the lights via slave from your camera’s onboard flash, but this has a tendency to adversely affect your lighting.
On the lights I use either a barndoor or a snoot attachment. This eliminates the light from splashing on the background and the camera lens.
Metering
I use a handheld meter to get a true reading of the lighting output. This step can save quite a bit of time in post processing. If you don’t have a handheld meter, bracket a number of shots and then view them on your computer to determine the best exposure.
Camera
My primary camera is a Canon 30D SLR. The great part about using an SLR is the near-immediate shutter release when the button is pushed. Timing is critical in catching the splashes and having a fast acting camera is very nice. I have tried these shots with a point-n-shoot camera. It is a bit trickier to time the shots, but it can be done.
I have the camera on a tripod and use a remote cable release. I drop the strawberry with one hand and fire the camera with the other. When I have a helper (usually a daughter), I have her drop the object while I fire the camera.
I prefer to shoot these shots with a telephoto lens for two reasons. The first being that it creates a narrow depth-of-field and throws the background completely out of focus. Secondly, it keeps the camera clear of the “splash zone”.
Background
For a background in these shots, I am just using a black sheet. Like a said earlier, by using the barndoor attachment on the light, I am able to keep the flash off of the background thus making it underexposed and “true black”.
Props
I have used several different items in my splash shots. I have dropped cookies into milk, cream into coffee, and as we see here strawberries into strawberry lemonade. In this instance my strawberry lemonade is simply water with food coloring. I try to avoid sugary liquids due to the stickiness it causes on everything it hits (occasional camera/lens included).
Studio
My studio is rather low-tech. This shot shows a typical splash-shot setup in my garage. I have long since lost the privilege of taking these shots in the house due to the mess it creates.
Post Processing
I use Photoshop CS2 (on a Mac) for my processing. These shots required very little work. I converted the image from RAW format using Adobe Camera Raw, then cropped and applied a small amount of sharpening.
Conclusion
As you can see, this is a relatively easy type of photography to do. The fun part is to just be creative. I had one comment questioning the usefulness of these shots. I really don’t have a use for them. I sell an occasional splash photo on iStockPhoto, but other then that I just consider it art.
Give it a try and see what you can create.
LeggNet’s Digital Capture
© Rich Legg, Inc. All rights reserved.


