
January 31, 2009
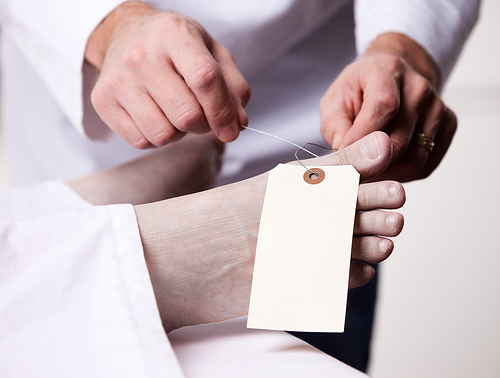
One of Those Days
]]>
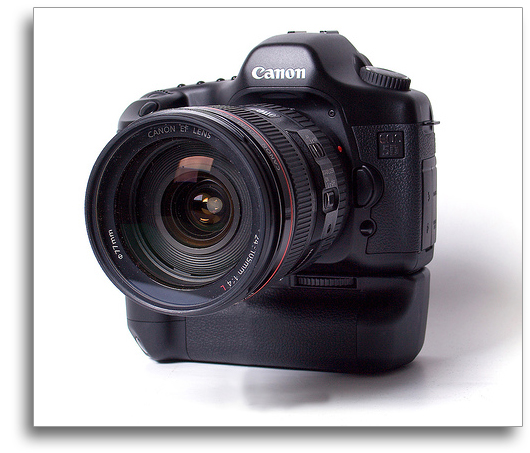
Canon 5D Mark II, Canon 24-105 f/4L lens – 1/60 second, f/5, ISO 100
LeggNet’s Digital Capture
© Rich Legg, Inc. All rights reserved.
]]>
Canon 5D Mark II, Canon 24-105 f/4L lens – 1/60 second, f/5, ISO 100
LeggNet’s Digital Capture
© Rich Legg, Inc. All rights reserved.
]]> 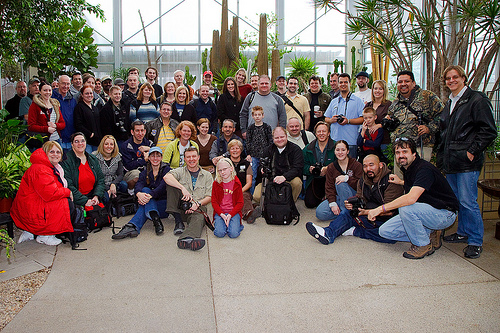
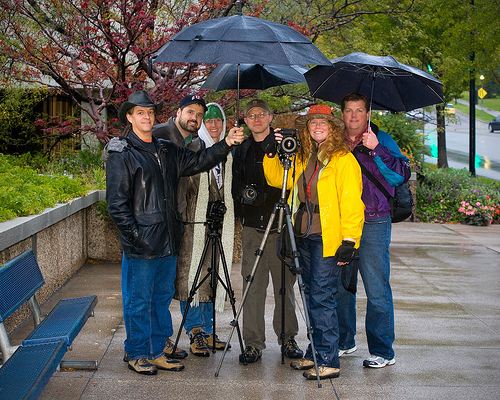
Cactus and Tropicals, January 2009
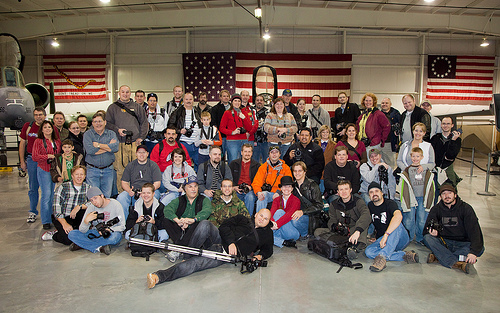
The Photowalking Utah group has been around now for about 15 months. In that time it has grown a great deal and many of my best photographer friends are ones that I made through the group.
One thing we do (or at least attempt to) at each event is to get a group shot before we head out. It seems that this task falls on me quite often. For today’s post, I thought I’d share the group shots that I have captured as a sort of “Time Capsule” backward in Photowalking Utah’s history. Enjoy.

Hill Air Force Base Museum, December 2008
Thanksgiving Night “Turkey Shoot”, November 2008

Downtown Provo, September 2008

Fourth of July Freedom Festival, July 2008

Great Salt Lake, June 2008

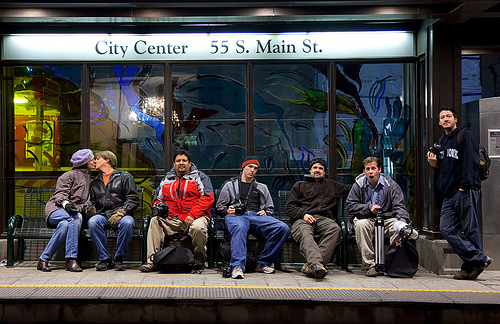
Salt Lake City TRAX, March 2008
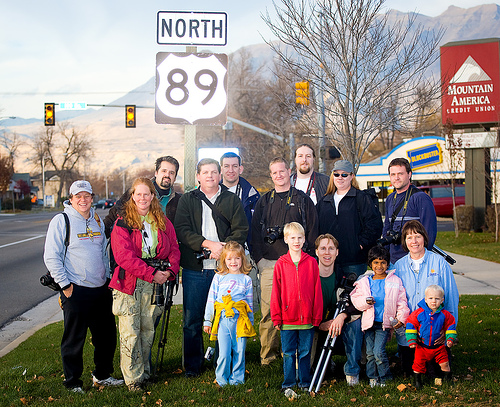
Downtown Provo, November 2007

The Very First ‘Walk – Salt Lake City, October 2007
Labels: photowalking
]]> 
Cactus and Tropicals, January 2009
The Photowalking Utah group has been around now for about 15 months. In that time it has grown a great deal and many of my best photographer friends are ones that I made through the group.
One thing we do (or at least attempt to) at each event is to get a group shot before we head out. It seems that this task falls on me quite often. For today’s post, I thought I’d share the group shots that I have captured as a sort of “Time Capsule” backward in Photowalking Utah’s history. Enjoy.
Hill Air Force Base Museum, December 2008

Thanksgiving Night “Turkey Shoot”, November 2008
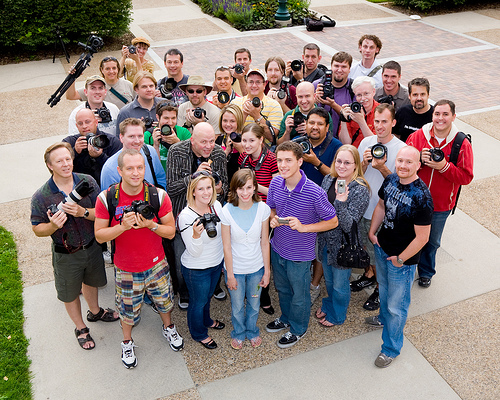
Downtown Provo, September 2008
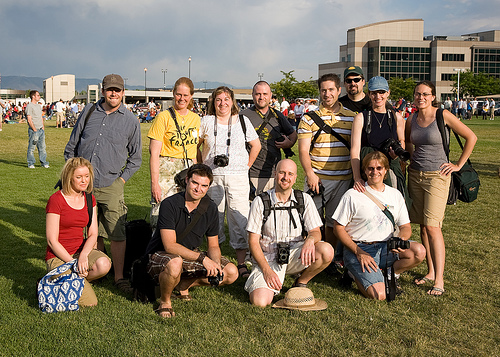
Fourth of July Freedom Festival, July 2008
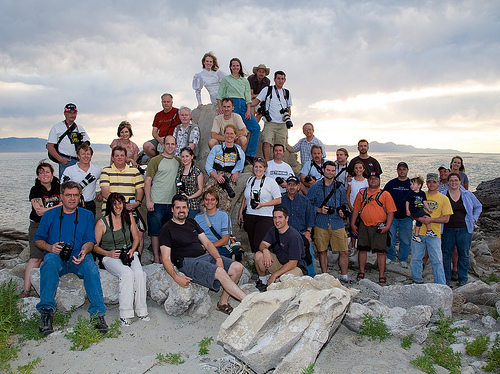
Great Salt Lake, June 2008

Salt Lake City TRAX, March 2008

Downtown Provo, November 2007
The Very First ‘Walk – Salt Lake City, October 2007
LeggNet’s Digital Capture
© Rich Legg, Inc. All rights reserved.

image by Scott Jarvie
One of my photography resolutions for the new year was to use a monopod for the majority of my shooting. The reason is quite simple: to create sharper images.
Two photographers whose work I greatly admire, Kenneth Linge and Yuri Arcurs, use a monopod the majority of the time. Kenneth (international award winning wedding/portrait photographer) uses his mostly while shooting outdoor portraits with a 70-200 lens using available light, and Yuri (one of the top selling stock photographers in the world) uses his for all his commercial work. The final thing that pushed me over the edge to begin using this piece of equipment was this video that Yuri posted on his blog:
The statement that Yuri makes in the video that you don’t want to be throwing out your #1 pick when selecting images because of blur hit home with me. Having absolute perfect focus on stock photography is critical, and I have had to often discard an image because of slight camera shake.
Kenneth Linge using his monopod
One thing that has happened since I have begun with the monopod is that I have received numerous requests about the equipment I am using. My setup is very similar to the one Yuri describes in the video. The great part is that I already had most of the pieces and only had to add the relatively inexpensive monopod to complete my kit. And guess what? My mother knew what I wanted thanks to Michelle and I found it under the tree on Christmas morning (Thanks mom!).
Here are the pieces I have assembled for my setup:
Monopod: Manfrotto 334B Automatic Monopod
Head: Manfrotto 488RC2 Ball Head
Bracket: Custom Brackets QRS-H2 rotating bracket
For the bracket, I use the QRS-H2 which normally has a flash mount. I have removed the mount (simple to do using an allen wrench) for everyday use. The reason I use this bracket versus the more compact Digital PRO-SV is twofold. The first reason is that I already had this bracket (hey, I saved +$200), and the second reason is that I can attach the flash mounting arm if I am shooting in a scenario where I need the strobe.
I have now used this setup for a half-dozen shoots and must say that it is becoming a very natural part of my work. I find that after a rather brief adjustment period, I don’t feel as though it is an inconvenience at all to use. In fact, I think it has made it easier for me to shoot. And the final result, I have absolutely noticed that I have discarded fewer images, both in-studio and outdoors, for camera shake.
Labels: tutorial

image by Scott Jarvie
One of my photography resolutions for the new year was to use a monopod for the majority of my shooting. The reason is quite simple: to create sharper images.
Two photographers whose work I greatly admire, Kenneth Linge and Yuri Arcurs, use a monopod the majority of the time. Kenneth (international award winning wedding/portrait photographer) uses his mostly while shooting outdoor portraits with a 70-200 lens using available light, and Yuri (one of the top selling stock photographers in the world) uses his for all his commercial work. The final thing that pushed me over the edge to begin using this piece of equipment was this video that Yuri posted on his blog:
The statement that Yuri makes in the video that you don’t want to be throwing out your #1 pick when selecting images because of blur hit home with me. Having absolute perfect focus on stock photography is critical, and I have had to often discard an image because of slight camera shake.

Kenneth Linge using his monopod
One thing that has happened since I have begun with the monopod is that I have received numerous requests about the equipment I am using. My setup is very similar to the one Yuri describes in the video. The great part is that I already had most of the pieces and only had to add the relatively inexpensive monopod to complete my kit. And guess what? My mother knew what I wanted and I found it under the tree on Christmas morning (Thanks mom!).
Here are the pieces I have assembled for my setup:
Monopod: Manfrotto 334B Automatic Monopod
Head: Manfrotto 488RC2 Ball Head
Bracket: Custom Brackets QRS-H2 rotating bracket
For the bracket, I use the QRS-H2 which normally has a flash mount. I have removed the mount (simple to do using an allen wrench) for everyday use. The reason I use this bracket versus the more compact Digital PRO-SV is twofold. The first reason is that I already had this bracket (hey, I saved +$200), and the second reason is that I can attach the flash mounting arm if I am shooting in a scenario where I need the strobe.
I have now used this setup for a half-dozen shoots and must say that it is becoming a very natural part of my work. I find that after a rather brief adjustment period, I don’t feel as though it is an inconvenience at all to use. In fact, I think it has made it easier for me to shoot. And the final result, I have absolutely noticed that I have discarded fewer images, both in-studio and outdoors, for camera shake.
LeggNet’s Digital Capture
© Rich Legg, Inc. All rights reserved.
]]> 
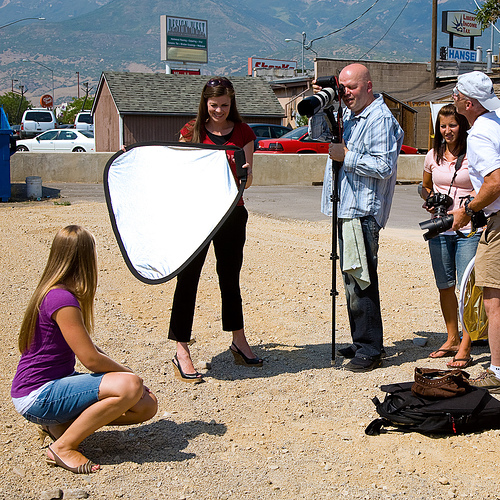
The plans have been finalized for the February Photowalking Utah events and they are going to be great. We will be having two separate but related events. The theme is “Studio Lighting” and since it tends to be a bit cold this time of year in Northern Utah, both will be indoors.
FEBRUARY 19th – Mini Clinic
On the evening of Thursday February 19th, I will be facilitating a mini-clinic at the City Library in Salt Lake City. The theme of the clinic is “How to Get Great Studio Lighting Results for Under $250”. In the session, I will be demonstrating how to shoot portraits with extremely inexpensive (cheap?) lights and get professional results. I will be using a model and shooting with a tethered camera so everyone can immediately see the results.

Handouts of all the lighting setups will be provided. If time permits, I will also demonstrate with the help of Harley Pebley a “Strobist” style setup using a couple of Speedlights on stands with umbrellas.
Date: Thursday February 19th
Time: 6:30 – 8:30 pm
Location: Salt Lake City Main Library – 210 E 400 South, Conf. room #4, 4th floor
Cost: Free
FEBRUARY 21st – Studio Lighting Photowalk
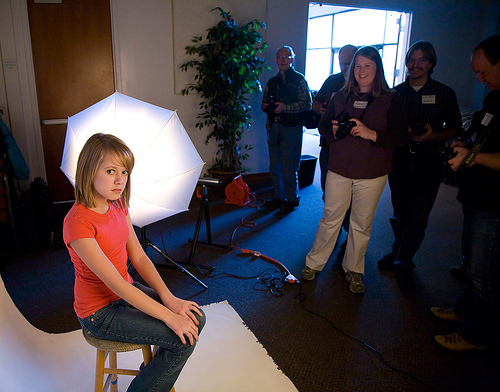
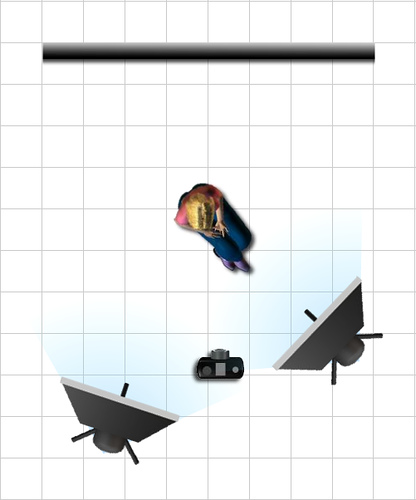
In a repeat of last year’s most popular Photowalking Utah event, we will again be doing an indoor “Studio Lighting” photowalk. The event will feature six different studios set up within a large conference room. Participants will be able to walk to each setup photography station and try their hand at shooting. Models will be provided along with assistance from the host photographer at each station.
This year we will be working to create a variation in the type of lighting setups provided. This will give the participants a way to work with a large variation of portrait lighting arrangements.

I have arranged with several of my stock models to help us out. Just like the previous event, we are suggesting a $3-5 “tip” given that will be put in a pool and divided up among the models after the event. This is purely optional but it really helps to have dedicated models available for the photographers to shoot and this is a great way to compensate them for their time. I’ve got a pretty diverse group confirmed so far including different ages / genders / looks.
For those photographers that aren’t carrying around digital SLR’s, don’t worry. We will have a way to sync point-and-shoot cameras via slave to at least a couple of the setups. Everyone is welcome at these events regardless of skill or equipment. There will even be some higher end gear available to borrow.
Our friends at Pictureline have again donated a bunch of photography ‘swag’ to be used for door prizes at the “Pictureline Prize Table”.
Here are the details:
Date: Saturday February 21st
Time: 10:00 am – 1:00 pm
Location: Gateway Community Church, 584 E 12300 South – Draper
Cost: Free (though a suggested model tip of $3-5 is appreciated)
If you’re planning on attending, please drop an RSVP into the ongoing discussion thread on the Photowalking Utah Flickr Group. Here’s the link.
For any questions, please feel free to contact me at rich@leggnet.com or 801.259.3500.

Labels: photowalking
]]> 
The plans have been finalized for the February Photowalking Utah events and they are going to be great. We will be having two separate but related events. The theme is “Studio Lighting” and since it tends to be a bit cold this time of year in Northern Utah, both will be indoors.
FEBRUARY 19th – Mini Clinic
On the evening of Thursday February 19th, I will be facilitating a mini-clinic at the City Library in Salt Lake City. The theme of the clinic is “How to Get Great Studio Lighting Results for Under $250”. In the session, I will be demonstrating how to shoot portraits with extremely inexpensive (cheap?) lights and get professional results. I will be using a model and shooting with a tethered camera so everyone can immediately see the results.

Handouts of all the lighting setups will be provided. If time permits, I will also demonstrate with the help of Harley Pebley a “Strobist” style setup using a couple of Speedlights on stands with umbrellas.
Date: Thursday February 19th
Time: 6:30 – 8:30 pm
Location: Salt Lake City Main Library – 210 E 400 South, Conf. room #4, 4th floor
Cost: Free
FEBRUARY 21st – Studio Lighting Photowalk
In a repeat of last year’s most popular Photowalking Utah event, we will again be doing an indoor “Studio Lighting” photowalk. The event will feature six different studios set up within a large conference room. Participants will be able to walk to each setup photography station and try their hand at shooting. Models will be provided along with assistance from the host photographer at each station.
This year we will be working to create a variation in the type of lighting setups provided. This will give the participants a way to work with a large variation of portrait lighting arrangements.
I have arranged with several of my stock models to help us out. Just like the previous event, we are suggesting a $3-5 “tip” given that will be put in a pool and divided up among the models after the event. This is purely optional but it really helps to have dedicated models available for the photographers to shoot and this is a great way to compensate them for their time. I’ve got a pretty diverse group confirmed so far including different ages / genders / looks.
For those photographers that aren’t carrying around digital SLR’s, don’t worry. We will have a way to sync point-and-shoot cameras via slave to at least a couple of the setups. Everyone is welcome at these events regardless of skill or equipment. There will even be some higher end gear available to borrow.
Our friends at Pictureline have again donated a bunch of photography ‘swag’ to be used for door prizes at the “Pictureline Prize Table”.
Here are the details:
Date: Saturday February 21st
Time: 10:00 am – 1:00 pm
Location: Gateway Community Church, 584 E 12300 South – Draper
Cost: Free (though a suggested model tip of $3-5 is appreciated)
If you’re planning on attending, please drop an RSVP into the ongoing discussion thread on the Photowalking Utah Flickr Group. Here’s the link.
For any questions, please feel free to contact me at rich@leggnet.com or 801.259.3500.

LeggNet’s Digital Capture
© Rich Legg, Inc. All rights reserved.
]]> 
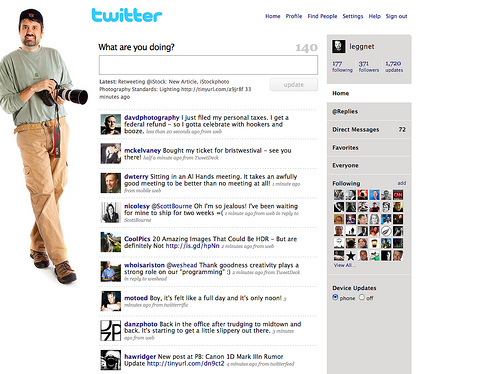
I’ve been an active user of Twitter for over nine months. In that time I have come to depend on this great social-networking tool for keeping in touch with a lot of fellow photographers.
If you don’t know what Twitter is, it is kind of hard to explain. It is a micro-blogging service that allows users to post 140 character updates. These updates are then sent to other Twitter members who are “following” the user. Users can decide they follow and can block people from following them (if they desire).
The majority of the people I follow are related to photography. They are photographers, designers, industry people and the like. In keeping with this theme, the most of my updates (Tweets) are photography and tech related.
When I am working on my production iMac (usually editing images), I keep Twitter running on the second computer. I find this is a great way to keep in touch without having to be “actively” chatting with people. If I see something come across that I want to reply to, I can. Otherwise I just watch occasionally read the updates as they scroll by.
One of the best uses I have found for Twitter is using it as a source of quick information. If I have a question (again, usually photography related), I can ask it to my Twitter followers and I will usually get a pretty quick answer. As an example of this, I just asked this rather generic question on my Twitter feed:
“How many photogs carry a backup camera with them when you shoot? Is it a DSLR or Point and Shoot? Same model as primary or an older one?”
And within a minute, I’ve received a couple of replies. The first one came from local photographer Mike Calanan and the second one from St. Louis photographer Dan Zimmerman:
calanan: @leggnet Always, D700 primary, D200 backup”
danzphoto: @leggnet I ALWAYS carry a backup – shooting wedding and sports. Not responsible if you don’t. Shoot with D300, carry a D200 as backup, 2nd
(Edit: After 15 minutes, I received an additional 6 replies to the question)
One thing about Twitter that I have learned in both the updates of users I follow and my own is to provide a bit of substance. As I mentioned, I like to keep my tweets photography related and link to outside sources when relevant. There are users that blast meaningless junk into their feed, and these are the ones I avoid.
Bad Tweets (fictitious)
twittgrls123 OMG, I just at teh most AWFUL sanwich. PB with tomatos on rye. YUKKK!
mlm_guru_123 Make $10,000 this month!!! You’re an idiot if you don’t do MLM. Click this link ——> jkfdsjkldfs.com
Good Tweets (real examples)
ramseeker New blog post: How to Upgrade Memory in Apple Mac Mini 2GHz Intel Core 2 Duo http://tinyurl.com/cdjh2p
hawridger New post at PB: Canon 1D Mark IIIn Rumor Update http://tinyurl.com/dn9ct2
When someone follows me on Twitter, I take a look at their last 20 or so updates and make a quick judgment on whether I want to follow them back. If I see any marketing or “Get Rich Quick” posts I don’t follow them. If I see photography or tech information, I usually will. I follow about 1/2 the amount of people who follow me.
So, how do you get started. It is simple. Go to http://twitter.com/signup and do just that, sign up. It is free and easy. Once you have your account, find a Twitter user with similar interests and click “Follow”. You can also look at who they are following and see if any of those members are ones you’d like to add to your network.
Once you’ve done that, begin posting updates and replying to others. You will be amazed at how quickly it will become a useful tool in your online life.
To follow my Twitter updates, go to http://twitter.com/leggnet
]]> 
I’ve been an active user of Twitter for over nine months. In that time I have come to depend on this great social-networking tool for keeping in touch with a lot of fellow photographers.
If you don’t know what Twitter is, it is kind of hard to explain. It is a micro-blogging service that allows users to post 140 character updates. These updates are then sent to other Twitter members who are “following” the user. Users can decide they follow and can block people from following them (if they desire).
The majority of the people I follow are related to photography. They are photographers, designers, industry people and the like. In keeping with this theme, the most of my updates (Tweets) are photography and tech related.
When I am working on my production iMac (usually editing images), I keep Twitter running on the second computer. I find this is a great way to keep in touch without having to be “actively” chatting with people. If I see something come across that I want to reply to, I can. Otherwise I just watch occasionally read the updates as they scroll by.
One of the best uses I have found for Twitter is using it as a source of quick information. If I have a question (again, usually photography related), I can ask it to my Twitter followers and I will usually get a pretty quick answer. As an example of this, I just asked this rather generic question on my Twitter feed:
“How many photogs carry a backup camera with them when you shoot? Is it a DSLR or Point and Shoot? Same model as primary or an older one?”
And within a minute, I’ve received a couple of replies. The first one came from local photographer Mike Calanan and the second one from St. Louis photographer Dan Zimmerman:
calanan: @leggnet Always, D700 primary, D200 backup”
danzphoto: @leggnet I ALWAYS carry a backup – shooting wedding and sports. Not responsible if you don’t. Shoot with D300, carry a D200 as backup, 2nd
(Edit: After 15 minutes, I received an additional 6 replies to the question)
One thing about Twitter that I have learned in both the updates of users I follow and my own is to provide a bit of substance. As I mentioned, I like to keep my tweets photography related and link to outside sources when relevant. There are users that blast meaningless junk into their feed, and these are the ones I avoid.
Bad Tweets (fictitious)
twittgrls123 OMG, I just at teh most AWFUL sanwich. PB with tomatos on rye. YUKKK!
mlm_guru_123 Make $10,000 this month!!! You’re an idiot if you don’t do MLM. Click this link ——> jkfdsjkldfs.com
Good Tweets (real examples)
ramseeker New blog post: How to Upgrade Memory in Apple Mac Mini 2GHz Intel Core 2 Duo http://tinyurl.com/cdjh2p
hawridger New post at PB: Canon 1D Mark IIIn Rumor Update http://tinyurl.com/dn9ct2
When someone follows me on Twitter, I take a look at their last 20 or so updates and make a quick judgment on whether I want to follow them back. If I see any marketing or “Get Rich Quick” posts I don’t follow them. If I see photography or tech information, I usually will. I follow about 1/2 the amount of people who follow me.
So, how do you get started. It is simple. Go to http://twitter.com/signup and do just that, sign up. It is free and easy. Once you have your account, find a Twitter user with similar interests and click “Follow”. You can also look at who they are following and see if any of those members are ones you’d like to add to your network.
Once you’ve done that, begin posting updates and replying to others. You will be amazed at how quickly it will become a useful tool in your online life.
To follow my Twitter updates, go to http://twitter.com/leggnet
LeggNet’s Digital Capture
© Rich Legg, Inc. All rights reserved.
]]>
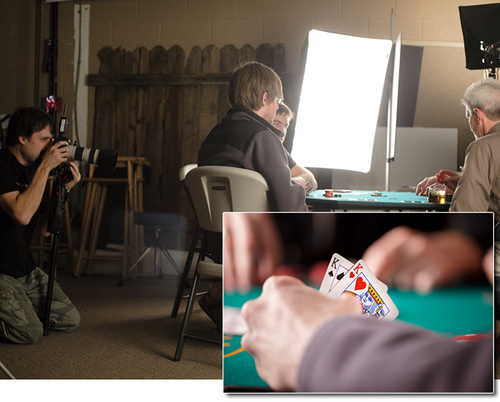
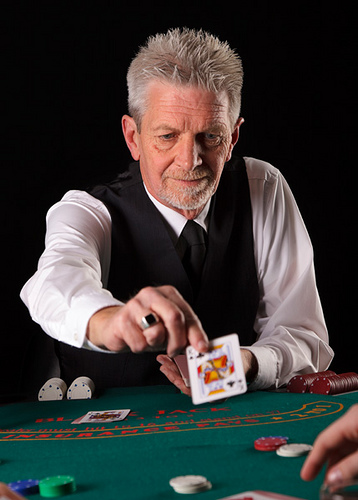
My most recent stock photo shoot was a poker themed session. I had a few particular shots in mind when designing the shoot, and I was able to get pretty close to my ideas with the final products.
For the shoot, I borrowed a small poker table along with some generic cards and chips from a card playing friend. The table wasn’t as authentic looking as a real casino table would be in wide shots, but it worked nicely for the close-up style of images I had in mind when planning the shoot.

I brought five guys in to model for the shoot, and they had a great time playing the part of “players”. Some of the shots are particularly authentic since the models were actually playing hands of poker as I shot. We did several various setups including a home poker party, a blackjack dealer and a tournament player.

I am not sure of the demand by buyers for poker themed stock images, but I will soon be finding out.
]]>
My most recent stock photo shoot was a poker themed session. I had a few particular shots in mind when designing the shoot, and I was able to get pretty close to my ideas with the final products.
For the shoot, I borrowed a small poker table along with some generic cards and chips from a card playing friend. The table wasn’t as authentic looking as a real casino table would be in wide shots, but it worked nicely for the close-up style of images I had in mind when planning the shoot.
I brought five guys in to model for the shoot, and they had a great time playing the part of “players”. Some of the shots are particularly authentic since the models were actually playing hands of poker as I shot. We did several various setups including a home poker party, a blackjack dealer and a tournament player.
I am not sure of the demand by buyers for poker themed stock images, but I will soon be finding out.
LeggNet’s Digital Capture
© Rich Legg, Inc. All rights reserved.
]]>
Canon 5D Mark II, Canon 24-105 f/4L lens – 1/125 second, f/8, ISO 100
LeggNet’s Digital Capture
© Rich Legg, Inc. All rights reserved.
Canon 5D Mark II, Canon 24-105 f/4L lens – 1/125 second, f/8, ISO 200
LeggNet’s Digital Capture
© Rich Legg, Inc. All rights reserved.
]]>
Canon 5D, Canon 24-105 f/4L lens – 1/250 second, f/4, ISO 100
LeggNet’s Digital Capture
© Rich Legg, Inc. All rights reserved.
About a week and a half ago I did a blog post called Share-a-Link Saturday. In the post I asked for readers to submit their favorite photography websites. The response was fantastic. Since so many good links were provided I felt that they needed to be shared. Here, in the order they were submitted, are the reader-submitted links to their favorite photography related websites.
Photowalking Utah – photowalkingutah.com
Epic Edits – epicedits.com
Photography Bay – photographybay.com
Harwood Photography – harwoodphotos.blogspot.com
The Big Picture – boston.com/bigpicture
David’s Photography Blog – www.davidfenwick.co.uk/blog/
Pierre Winther – www.pierrewinther.com
Muenchen – www.muenchenmenschen.de
Magnum in Motion – www.inmotion.magnumphotos.com
2 x 365 Photos – 2x365photos.blogspot.com/
LG Photo – www.lgphotoblog.blogspot.com
DentonImages.comhttp://www.dentonimages.com/
The Strobist – strobist.blogspot.com/
Bryan Niven – www.bryanniven.com/blog/
The Photographic World of Drew Gardner – photography-thedarkart.blogspot.com/
Yuri Arcurs – www.arcurs.com/
Sharon Yanai – www.sharonyanai.com
This Week in Photography – twipphoto.com/
Alex Moore’s Blog – moorealx.com/
orangeblob Photography Blog – www.orangeblob.com/blog/
Foto-Biz.com – foto-biz.com
Jen Murray Photography – www.jenmurrayphotography.com
Myerson Photo – www.myersonphoto.com/
Myerson Photo Blog – www.myersonphoto.com/blog
StudioLighting.net – www.studiolighting.net
Nuno Silva Photography – www.nunosilva.ca
Lens Baby – www.lensbaby.com
Shadow Mountain Photography – shadowmountainphotography.com/
Digital Grin Photography – digitalgrin.com
DIYPhotography.net – diyphotography.net
Pro Photo Life – prophotolife.com
Digital Photography School – digital-photography-school.com/blog/
RomePhotoBlog – romephotoblog.blogspot.com/
Twin City Photos – photoblog.twincityphotos.com/
Beeps and Chirps – beepsandchirps.com/
Bandung Daily Photo – bandungdailyphoto.com/
Oeiras and Environs Daily Photo – oeirasdailyphoto.blogspot.com/
David Terry Photography – www.dterryphotography.com
San Francisco Ed Pingol – edpingol.blogspot.com
Greg Bumatay – bumataystudio.blogspot.com
Dustin Izatt Photography Blog – dustinizattphoto.blogspot.com
Joe McNally’s Blog – www.joemcnally.com/blog/
RobNunnPhoto.com – www.robnunnphoto.com/
ApoChromatic – apochromatic.eu
BURNBLUEDOTCOM – www.burnblue.com/
Zoriah – zoriah.net/
FILE Magazine – www.filemagazine.com/
Flak Photo – www.flakphoto.com/
Joseph’s Life and Photos – www.josephburford.com
Digital Photography Life – personallifemedia.com/podcasts/405-digital-photography-li…
PhotoNetCast – www.photonetcast.com/
hyperfocal – apeture.my-expressions.com/index.html
H-town streets – apeture.my-expressions.com/Htown.html
Photine – www.photine.net/
The Learning Photographer – learningphotog.blogspot.com
Mark Velasquez Photogrpahy – www.flickr.com/photos/markvelasqueztoo/
mikesphotography – mikesphotography.my-expressions.com/
Bert Staphani – www.bertstephani.com/Site/bert_stephani_home.html
Is Steve Still Alive? – www.isstevestillalive.com/the-substance/2008/12/30/random…
Brian Lima Photography – brianlima.com
Peter Lik Fine Art Photography – peterlik.com
Voyages en Images – www.voyimage.com/
Craig Holmes Photographer – www.craigholmes.com
Argos – www.olddogphoto.com
Amy Coffey Photography – www.amycoffeyphotography.com
Aaron Moller Photographer – www.aaronmoller.com/blog
The Online Photographer – theonlinephotographer.typepad.com/the_online_photographer…
Little People – little-people.blogspot.com/
Rob Galbraith DPI – www.robgalbraith.com/bins/index.asp
This Urban Life – thisurbanlife.blogspot.com/
The Caretaker’s Concern – thecaretakersconcern.blogspot.com/
The Circle of Confusion – thecofc.wordpress.com/
Magical Places Fine Art Online Photography Magazine – www.magicalplacesfineart.com/blog
Andes – www.magicalplacesfineart.com/andes/
LeggNet’s Digital Capture
© Rich Legg, Inc. All rights reserved.
]]> 
UPDATE: I’ve added some images of the pinhole camera on a new blog post here.
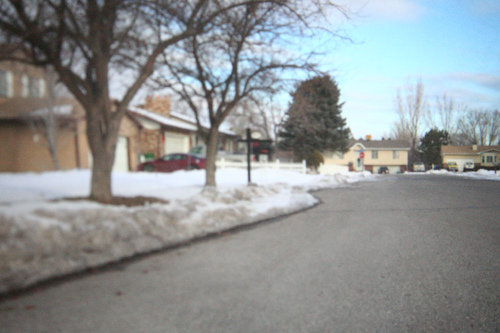
My eighth grade daughter chose to make a pinhole camera for the science fair and asked me to help out. With this being the 21st Century and all, we opted to make a digital version.
It was actually fairly simple to create. She, along with a schoolmate, took a cardboard box and covered it in foil tape to guarantee that it was lightproof. For the lens, a piece of aluminum soda can was used with a needle hole punched in the center. In place of film on the inside of the box, she put a sheet of white paper.
To add the digital part, a hole was cut in the front of the box beside the pinhole lens. It was through this hole that the digital SLR was used to record the pinhole image being displayed on the rear of the box’s inside. To eliminate any light leaks around the SLR lens, a combination of a rubber gasket made from a bicycle tube and foil tape was used. The lens was set on manual focus at its closest setting.
For exposure, she did a bunch of trial-and-error test shots (pretty much just bracketed her times). She was eventually able to produce some fairly good images. In hindsight, I would have suggested that she used a smaller aperture on the SLR to increase the depth-of-field to overcome the blurred left side of the frame.
All in all, I like what she came up with. It was pretty cool to see the image the was captured through a pinhole in a soda can.
Canon 5D, Canon 24-105 f4/L lens – 40 seconds, f/4, ISO 3200
]]> 
UPDATE: I’ve added some images of the pinhole camera on a new blog post here.
My eighth grade daughter chose to make a pinhole camera for the science fair and asked me to help out. With this being the 21st Century and all, we opted to make a digital version.
It was actually fairly simple to create. She, along with a schoolmate, took a cardboard box and covered it in foil tape to guarantee that it was lightproof. For the lens, a piece of aluminum soda can was used with a needle hole punched in the center. In place of film on the inside of the box, she put a sheet of white paper.
To add the digital part, a hole was cut in the front of the box beside the pinhole lens. It was through this hole that the digital SLR was used to record the pinhole image being displayed on the rear of the box’s inside. To eliminate any light leaks around the SLR lens, a combination of a rubber gasket made from a bicycle tube and foil tape was used. The lens was set on manual focus at its closest setting.
For exposure, she did a bunch of trial-and-error test shots (pretty much just bracketed her times). She was eventually able to produce some fairly good images. In hindsight, I would have suggested that she used a smaller aperture on the SLR to increase the depth-of-field to overcome the blurred left side of the frame.
All in all, I like what she came up with. It was pretty cool to see the image the was captured through a pinhole in a soda can.
Canon 5D, Canon 24-105 f4/L lens – 40 seconds, f/4, ISO 3200
LeggNet’s Digital Capture
© Rich Legg, Inc. All rights reserved.

When it comes to making a quality photograph, focus is near the top of the list for requirements. Like any rule, there are always exceptions but the general reaction for the human mind when looking at an out of focus image is that something is not right and it feels uncomfortable.
In stock photography, sharp focus is even more important and is an absolute necessity. While a portrait can get by being a bit “soft”, in the ultra-competitive world of stock images this just won’t fliy.
With this being said, I have to say that I have been blown away at the sharpness results I am receiving with my current camera/lens combo. The 5D Mark II paired with the 24-105 f/4L IS lens have proved to be a great duo. I was pleased with the focus I was able to achieve with the lens on the original 5D, but the results I get now are even better.
I have read on the Internet and heard from some photographers that the 24-105 is not a great lens as far as sharpness is concerned. No less than the self-proclaimed “World’s Top Selling Microstock Photographer” Yuri Arcurs stated recently on his blog that this lens is not sharp enough below f/9 for stock photography. This has not been my experience.
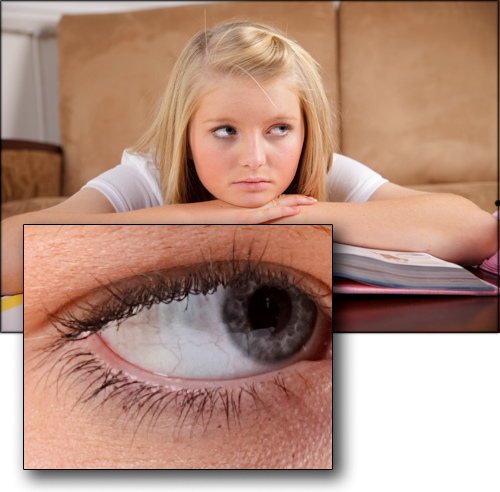
Today’s sample image is from a recent stock shoot I did in my studio. The enlarged portion of the shot is a 100% crop of Emily’s right eye. Since I needed a narrow depth-of-field to sufficiently blur the text on the book, I used a near wide-open aperture of 4.5. Note the detail in the eyelashes and the skin below the eye. Also notice that this was not an extreme close-up image, but a fairly wide head/shoulders capture. This eye is definitely sharp enough for my needs.
One more thing to add is the technique I use to achieve focus. Since the majority of my photography involves pre-set models and not rapid-fire shooting, I don’t need an ultra-fast focus system. I have my 5D bodies set for a “center only” focus point. When shooting, I put this point on the line between color and white on the model’s near eye and lock in focus. Once I have this focus, I recompose and release the shutter. I have also taken to using a monopod in nearly all my shooting to further minimize the effect of camera-shake on the image.
The combination of this technique, a 5D Mark II and the 24-105 f/4L serve me well. What about you? What techniques/equipment do you find works best?
Labels: tutorial
When it comes to making a quality photograph, focus is near the top of the list for requirements. Like any rule, there are always exceptions but the general reaction for the human mind when looking at an out of focus image is that something is not right and it feels uncomfortable.
In stock photography, sharp focus is even more important and is an absolute necessity. While a portrait can get by being a bit “soft”, in the ultra-competitive world of stock images this just won’t fliy.
With this being said, I have to say that I have been blown away at the sharpness results I am receiving with my current camera/lens combo. The 5D Mark II paired with the 24-105 f/4L IS lens have proved to be a great duo. I was pleased with the focus I was able to achieve with the lens on the original 5D, but the results I get now are even better.
I have read on the Internet and heard from some photographers that the 24-105 is not a great lens as far as sharpness is concerned. No less than the self-proclaimed “World’s Top Selling Microstock Photographer” Yuri Arcurs stated recently on his blog that this lens is not sharp enough below f/9 for stock photography. This has not been my experience.
Today’s sample image is from a recent stock shoot I did in my studio. The enlarged portion of the shot is a 100% crop of Emily’s right eye. Since I needed a narrow depth-of-field to sufficiently blur the text on the book, I used a near wide-open aperture of 4.5. Note the detail in the eyelashes and the skin below the eye. Also notice that this was not an extreme close-up image, but a fairly wide head/shoulders capture. This eye is definitely sharp enough for my needs.
One more thing to add is the technique I use to achieve focus. Since the majority of my photography involves pre-set models and not rapid-fire shooting, I don’t need an ultra-fast focus system. I have my 5D bodies set for a “center only” focus point. When shooting, I put this point on the line between color and white on the model’s near eye and lock in focus. Once I have this focus, I recompose and release the shutter. I have also taken to using a monopod in nearly all my shooting to further minimize the effect of camera-shake on the image.
The combination of this technique, a 5D Mark II and the 24-105 f/4L serve me well. What about you? What techniques/equipment do you find works best?
LeggNet’s Digital Capture
© Rich Legg, Inc. All rights reserved.
]]> 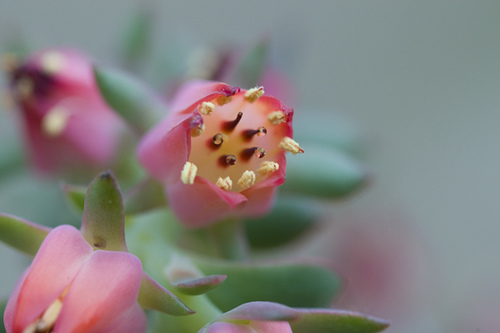
Today’s image by Photowalking Utah co-founder Bryan Jones
Are you a photographer in Northern Utah? Then grab your calendar and circle the date of Saturday January 24th. The Photowalking Utah group will be doing an indoor photowalk at Cactus and Tropicals in Draper. This will give the participants a chance to do some up-close-and-personal macro photography of the various plant life featured in the location. Here’s the info from the announcement at PhotowalkingUtah.com:
Reserve the date: The afternoon of Saturday, January 24th will be the next photowalk, this time up at Cactus and Tropicals, the Draper location. We are planning on starting at 1:00pm and going up to 3:00pm.
Cactus and Tropicals is a garden center with plenty of indoor space that we can meet in to avoid the cold while having the opportunity to photograph plants, exotic and common. We are planning on having at least one macro studio setup for people to explore the wonders of macro photography as well as having studio lights set up to photograph flowers and plants from the everyday ficus to your more exotic Venus fly traps and orchids.
Location: 12252 S Draper Gate Dr (1325 E) Draper, UT 84020
Meet up at 1:00pm. We’ll have a brief introduction followed by wandering the greenhouse to photograph with at least a table or two set up for studio work.
As always, these events are free of charge and open to photographers of any skill level. This is a great way to get to meet like-minded people in your area.
For more information, visit the official website at photowalkingutah.com and the Flickr group at flickr.com/groups/photowalkslc.
Canon 1D Mark III, Canon 100 f/2.8 macro lens – 1/160 second, f/4, ISO 400
LeggNet’s Digital Capture
© Rich Legg, Inc. All rights reserved.
]]> 
Here’s an idea: Drop a comment below with a link or two (or three or four…) to some of your favorite photography related websites. This is a great chance to advertise your own site or other photo sites you frequent.
Like many of us, I’m always on the lookout for a new site to add to my RSS Reader.
LeggNet’s Digital Capture
© Rich Legg, Inc. All rights reserved.
]]>
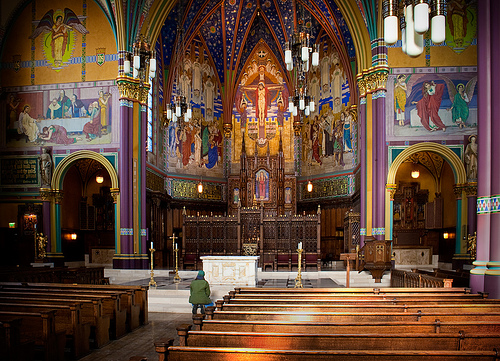
Since I’ve been busy editing images this week and have only done one photo shoot, I thought I’d step “back-in-time” for today’s blog post with a previously unedited image. This photograph was captured in Salt Lake City’s Cathedral of the Madeleine two years ago on a non-commercial Saturday afternoon outing with my friends Harley and Diane. The majesty of the Cathedral’s interior is almost beyond words.
Canon 30D, Canon 18-55 f/3.5-5.6 – 13 seconds, f/22, ISO 100
]]>
Since I’ve been busy editing images this week and have only done one photo shoot, I thought I’d step “back-in-time” for today’s blog post with a previously unedited image. This photograph was captured in Salt Lake City’s Cathedral of the Madeleine two years ago on a non-commercial Saturday afternoon outing with my friends Harley and Diane. The majesty of the Cathedral’s interior is almost beyond words.
Canon 30D, Canon 18-55 f/3.5-5.6 – 13 seconds, f/22, ISO 100
LeggNet’s Digital Capture
© Rich Legg, Inc. All rights reserved.
]]>
Canon 5D Mark II, Canon 24-105 f/4L lens – 1/125 second, f/7.1, ISO 100
]]>
Canon 5D Mark II, Canon 24-105 f/4L lens – 1/125 second, f/7.1, ISO 100
LeggNet’s Digital Capture
© Rich Legg, Inc. All rights reserved.
]]> 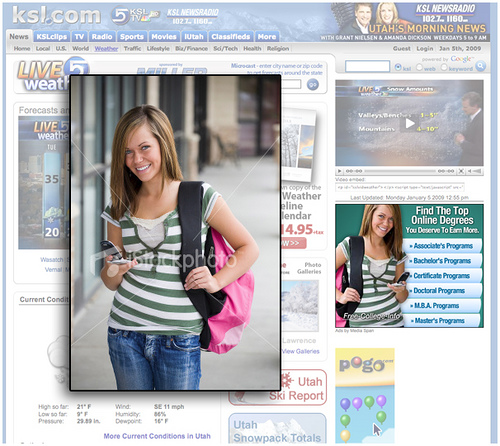
My neighbor Lee tipped me off yesterday afternoon to one of my stock images being used in an ad on KSL.com, the website of Utah’s NBC television affiliate. I’m sharing this today as another example of how designers will change or modify a stock image to fit their specific design needs.
In this instance, the design called for an ad with the text links on the right side. To make this work with my image, they did a horizontal flip of the shot. This change is virtually unnoticeable to everyone except me and Kylee (the model). I frequently see images flipped to fit design needs. Another example of this happened last year when USPS.com used my image of a graduate (link).
Additionally, for this ad the background was removed and the model isolated. This works very well in my opinion. I particularly like how they matched the ad’s color scheme with the green tone in Kylee’s shirt.
I’ve frequently said that I find roughly 1 in 1,000 of my sold images in “The Wild” (spotted in print, web or television). For me, the most interesting part of these finds is to see the context how the image is used. This is valuable information that I can put to use when shooting future stock imagery.
Labels: stock
]]> 
My neighbor Lee tipped me off yesterday afternoon to one of my stock images being used in an ad on KSL.com, the website of Utah’s NBC television affiliate. I’m sharing this today as another example of how designers will change or modify a stock image to fit their specific design needs.
In this instance, the design called for an ad with the text links on the right side. To make this work with my image, they did a horizontal flip of the shot. This change is virtually unnoticeable to everyone except me and Kylee (the model). I frequently see images flipped to fit design needs. Another example of this happened last year when USPS.com used my image of a graduate (link).
Additionally, for this ad the background was removed and the model isolated. This works very well in my opinion. I particularly like how they matched the ad’s color scheme with the green tone in Kylee’s shirt.
I’ve frequently said that I find roughly 1 in 1,000 of my sold images in “The Wild” (spotted in print, web or television). For me, the most interesting part of these finds is to see the context how the image is used. This is valuable information that I can put to use when shooting future stock imagery.
LeggNet’s Digital Capture
© Rich Legg, Inc. All rights reserved.
]]>
Canon 5D, Canon 24-105 f/4L lens – 1/125 second, f/10, ISO 100
LeggNet’s Digital Capture
© Rich Legg, Inc. All rights reserved.
]]> 
Here’s a sample image from the last shoot I did of 2008 which also happened to be the last time I was able to work with Emily since her family is moving back to Australia. I was able to refer her to an outstanding iStock photographer in her home country though, so while I won’t be working with her anymore she will get to continue modeling.
Canon 5D Mark II, Canon 24-105 f/4L lens – 1/80 second, f/5.6, ISO 100
 Rich Legg is a commercial photographer based in Riverton Utah specializing in Microstock Photography.
After beginning his photography career in school and working as a studio portrait photographer during the 1980’s, he stepped away from serious photography for nearly 15 years.
After a successful decade working in corporate America, the advances in internet technology and digital photography lured Rich back into the photographic world in the early 2000’s. Working full-time creating images for his stock portfolios with iStockphoto and Getty Images, he has returned to his roots as a professional photographer.
In addition to the commercial photography work, Rich is a prolific blogger, a founding member of Photowalking Utah and a member of the Professional Photographers of America.
Rich Legg, OwnerLegacy One Photography(801) 568-1000 | rich@leggnet.comwww.legacyonephotography.comwww.richlegg.com
I’ve spent some time over the last few days reminiscing about the photos I took in 2008. I wanted to pick my favorite image for 2008. Instead of picking a single image, I decided to put together a few of my favorites from different categories.
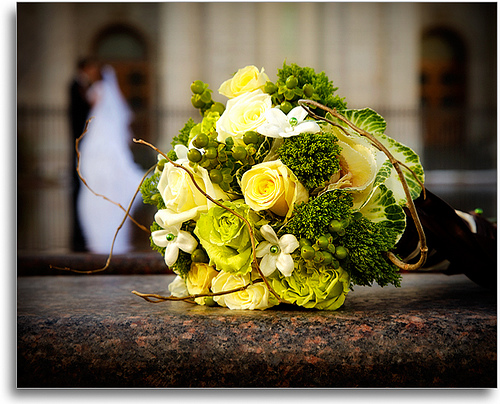
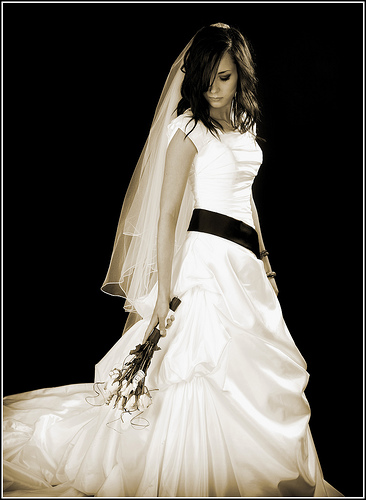
OVERALL FAVORITE IMAGE
When I think of the thousands of images I took in 2008, one image stands alone in my mind as my favorite. It was taken on a rainy/snowy day in May when everything came together perfectly for me to capture what I envisioned in my mind. The shot was made at the Salt Lake LDS Temple at the wedding of a young woman who grew up in my neighborhood.
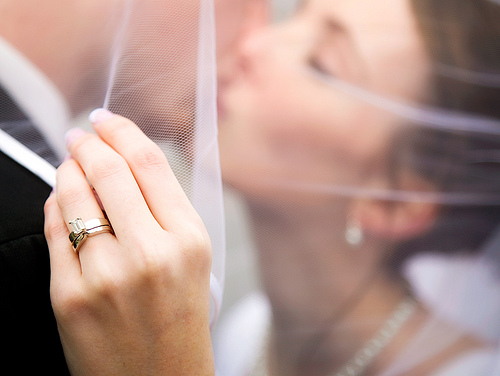
Canon 5D, Canon 24-105 f/4L lens – 1/640 second, f/4, ISO 100
FAVORITE PHOTOWALKING IMAGE
My next favorite is an image that was taken on a Photowalking Utah event in March. The group was riding the light rail system through downtown Salt Lake City and getting off at each stop to photograph. At one of the stops we met this gentleman who kindly let us photograph him. I opted to get in very close and to position him in the light so there wouldn’t be catch-lights in his eyes. I wanted to portray the harshness that is reality when living on the streets.
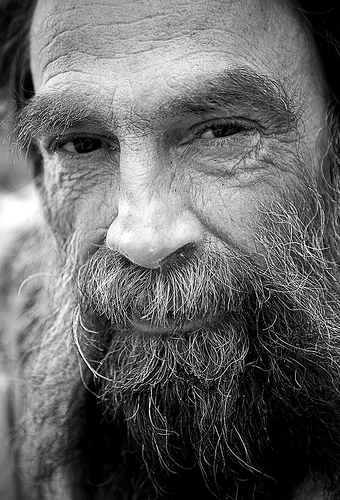
Canon 5D, Canon 24-105 f/4L lens – 1/80 second, f/4, ISO 250
FAVORITE STOCK IMAGE
It was difficult to pick a favorite in this category. I added over 2,800 images to my stock portfolios in 2008 so there were plenty to choose from. My pick is one I shot back in the spring titled Scary Movie. I love how the girls were each able to portray spontaneous fear as if they were actually watching a scary movie. The fact that the image features my two daughters doesn’t hurt either.

Canon 5D, Canon 70-200 f/4L lens – 1/160 second, f/7.1, ISO 100
FAVORITE PORTRAIT
My favorite portrait is of a member of my church named Leon. What makes this image special is that Leon passed away on January 23rd, a relatively short time after this image was made. Even though the image was actually taken a few days after Christmas ’07, I consider it a 2008 image because that’s when I did the editing. I remember talking to Michelle on the way home after photographing Leon and telling her that I had a strange feeling while shooting that this would be Leon’s last portrait. I’m grateful to have been able to capture his warm smile one last time.
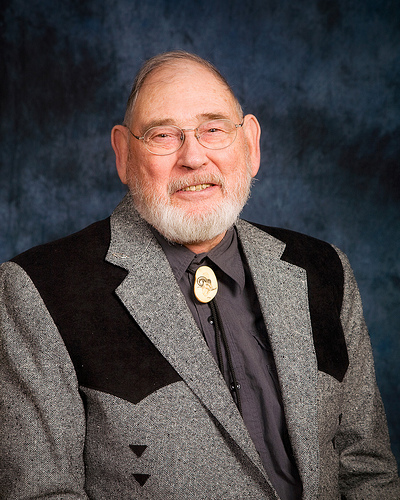
Canon 5D, Canon 24-105 f/4L lens – 1/125 second, f/10, ISO 100
FAVORITE PHOTO SHOOT
My favorite photo shoot of the year took place nearly a year ago in January. Through a pilot friend, I was granted access to a private jet for an afternoon to do a stock photo session. My goal was to create a series of images that portrayed passengers inside an airplane in flight.
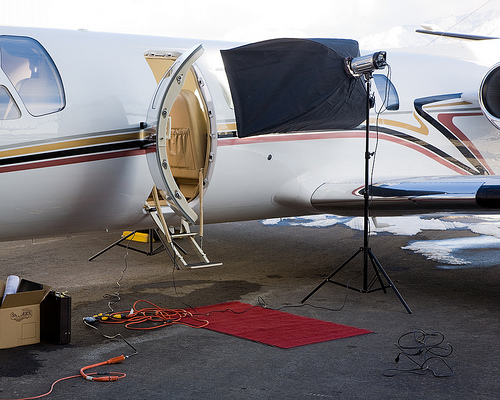
Canon 5D, Canon 24-105 f/4L lens – 1/60 second, f/8, ISO 100
Even though the temperature was in the teens (inside of the airplane and out), the models all braved it to help me create a nice set of stock images that have sold relatively well all year. Of the dozens of shoots I did this one is probably my favorite because of just how cool it was to play around photographically in a multi-million dollar jet.

Canon 5D, Canon 24-105 f/4L lens – 1/160 second, f/6.3, ISO 100
2008 will go down in my memory as the year that my photography business took a front seat to my other endeavors and became my nearly-sole source of income. This would have never happened without the support of my family, the willingness of people to open up locations for me to photograph in and the dozens of great models that worked with me throughout the year.
To each an every one of you I issue a heartfelt Thank You!
Now it’s time to quit looking back and to focus on the future. 2009 here I come!


Unless otherwise noted, all photographs and text copyright 2005-2024 © Rich Legg, Inc. All rights reserved.
Reproduction or redistribution in any form without prior written permission is strictly prohibited.


