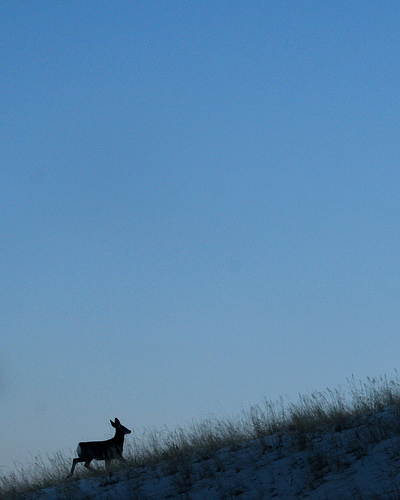
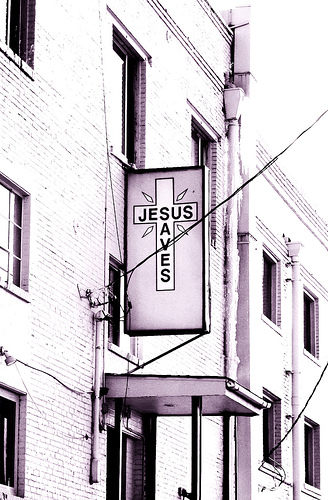
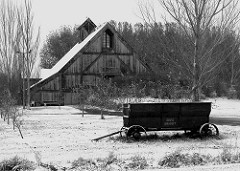
Juxtaposition

No Comments


Juxtaposition, originally uploaded by LeggNet.

jux·ta·po·si·tion n – the act or an instance of placing two or more things side by side; also : the state of being so placed.

I love the contrast displayed in this photo between the signpost ‘sun’ and the daytime moon. I captured this shot up in the Suncrest community on Traverse Ridge above Draper, Utah.

December 16, 2005 at 12:00 pm by | Categories: Post

Daphlen?

1 Comment


Daphlen, originally uploaded by LeggNet.

I’m not sure if this is a common practice in other parts of the country, but in Utah it is not unusual to see a message displayed on an overpass by placing disposable drinking cups in the chain link fencing.

Shown here is one such message communicating amorous feelings toward Daphlen. If you know of, or are familiar with, Daphlen – please pass along the message.

December 14, 2005 at 10:24 pm by | Categories: Post

Depth of Field

No Comments


Depth of Field Example
Originally uploaded by LeggNet.

With the popularity of fully automatic cameras, many people have missed out on the experience of using different settings on their camera to create the feel they desire in the photograph. They can visualize what they want to achieve in their mind’s eye, but are unable to transfer it into the captured image.

Depth of field is an example of something you can control with a simple camera setting that can dramatically change the final photo. Put simply, the less amount of light that is allowed to enter the camera lens, the greater the area of the photograph which will be in focus. This is controlled by adjusting the aperture setting (the ‘f’ numbers). In the example photographs included in this post, you can see that though they are both of the same subject the amount of background area in focus (the right side, down the fence line) changes substantially.

The top photograph (click on it to enlarge) has the camera lens set ‘stopped down’ to f29, or set to allow the least amount of light in. This setting ensures that the foreground and background area will be in focus.

The bottom photograph has the camera lens set ‘wide open’ at f5, or set to allow the most amount of light in. This setting causes the foreground, and more notably the background area to go out of focus.

Many automatic digital cameras have setting which allows the user to manually control the aperture and depth of field. Play around with yours and see what results you can achieve.

For more information on depth of field, do a google search. Here’s a good example.

December 13, 2005 at 11:39 am by | Categories: Post

Unique Perspective

4 Comments


Soundboard Adjustment, originally uploaded by LeggNet.

You never know where a unique and interesting photograph may come from.

Today at church I was standing in the soundbooth with my camera sitting next to the mixing board. It occurred to me that the lens was aimed at the sound board and that this might make a cool shot. I waited for the right moment when Jonathon (the sound tech) was mixing the sound and then discretely reached down and pressed the shutter release.

It wasn’t until I got home later in the day that I could actually see what was captured. Here’s the result.

December 11, 2005 at 11:10 pm by | Categories: Post

Chronicles of Narnia

1 Comment


Narnia
Originally uploaded by LeggNet.

The family and I had the opportunity to see the new Disney movie The Chronicles of Narnia: The Lion, The Witch and The Wardrobe tonight. I must say that I feel that Disney did a good job in maintaining the vision C.S. Lewis had when he wrote the book. Though lacking in the detail the book is able to deliver, it does follow the original storyline closely.

The tale of Aslan the lion, an allegory of the story of Jesus Christ, comes across well on the big screen. I think this movie will attract both Christians and non-Christians alike.

To learn more about C.S. Lewis and his Christian faith, check out the book Mere Christianity.

December 10, 2005 at 10:30 pm by | Categories: Post

‘Tis His Season

No Comments


Jesus Saves, originally uploaded by LeggNet.

at 2:05 pm by | Categories: Post

Wheeeeee….It’s Friday!

No Comments


Wheeeeee…., originally uploaded by LeggNet.

December 9, 2005 at 12:26 pm by | Categories: Post

Winter Has Arrived!

1 Comment


Winter Has Arrived!, originally uploaded by LeggNet.

December 8, 2005 at 6:40 pm by | Categories: Post

Beautifully Cold

No Comments


Gallivan Skating
Originally uploaded by LeggNet.

Even with yesterday being the coldest day so far this winter, many folks got out to enjoy the crisp winter sunshine. The high in Salt Lake City was in the teens, and the overnight low near zero.

I had the opportunity to be in downtown Salt Lake City Wednesday afternoon. Captured here are some Utahns braving the cold while ice skating at Gallivan Center.

at 12:06 am by | Categories: Post

Where’d the color go?

1 Comment


Wheeler Farm
Originally uploaded by LeggNet.

Ever since my high school yearbook staff days, I have had an attraction to black and white photography. Today, with the proliferation of digital cameras, this style lives on – just with a different technique.

In the old days, we loaded our camera with Plus-X or Tri-X black and white film and went about our business. Now we have several options.

Set Camera to B&W
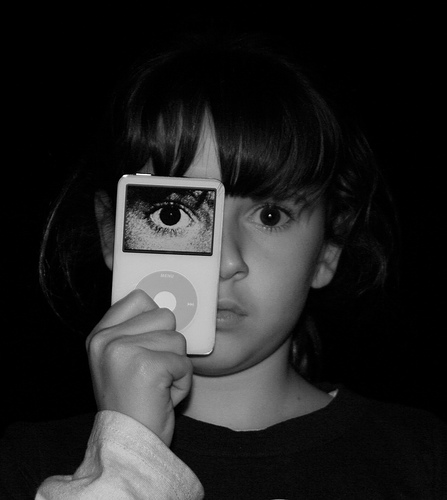
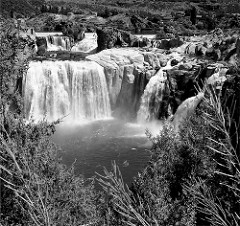
The photo in this post was shot with my camera set on ‘black and white’ mode. I don’t even have a color capture of this scene. This works well, but limits your ability to have a color version of the same photo. If I was shooting this photo today, I would set the camera to the standard color setting and use software to convert to black and white.

Photoshop
My preferred method is to convert the photo to black and white with an editing program. I use Photoshop, so I will demonstrate how to use this program for converting.

The simplest way is to ‘desaturate’ the photo by using the hotkeys [CTRL][SHIFT][U]. Simple, yet allows no control.

Another way is to select [Image] [Mode] [Grayscale]. While this works, as with the first method you do not have much control.

The way I achieve my desired result is a bit more complicated, but allows the photographer the greatest amount of creative control over the result. In Photoshop, select [Layer] [New Adjustment Layer] [Channel Mixer] then click okay. Now click [Monochrom] in the lower left and change your RGB settings to Red-0%, Green-0%, Blue-100%. You can tweak these three percentages, but always ensure they add to a total of 100%.

Take some time and play around with black and white. You just might find you enjoy having a little less ‘color’ in your life.

December 7, 2005 at 10:50 am by | Categories: Post